
TallyCapital Business Loans
Access to capital is imperative for any business to maximize its growth and head toward its full potential.
The TallyCapital Plug-In is a convenient solution that caters to all your business financial needs. To get started, deploy the plug-in using your TallyPrime license. Once deployed, you can create and submit loan applications digitally. TallyCapital Plug-In is supported in TallyPrime Release 1.0 and later. All you need to do is enter your company details and specify your loan requirements. It simplifies the process by extracting the necessary company details and reports from the loaded company, along with other annual reports required by the lender to approve your application. You can digitally handle all the Know Your Customer (KYC) documentation within TallyPrime by uploading the necessary documents. After submitting the loan application, you can track its status and alter and resubmit it based on the reviewer’s comments, if required.
Apart from the end-to-end loan application process, you can check your credit score and business loan eligibility amount in the TallyCapital Plug-In. You can also calculate your EMI using the loan EMI calculator. Once the loan amount is disbursed, the loan disbursement summary will assist you in getting a perspective on the EMIs, upcoming payments, and the overall repayment schedule of a loan.
Business Loans
You can apply for business loans using TallyPrime from the Gateway of Tally.
- Gateway of Tally > TallyCapital.
You can press Alt+9 (TallyCapital) from any screen on TallyPrime.
-
Click Loan Application.

Click Get a Call Back if you need any assistance. Our representative will contact you shortly to help you with the loan application.
-
Enter the Mobile number followed by the OTP.

You can start with the Loan Application Creation screen on successful OTP authentication.
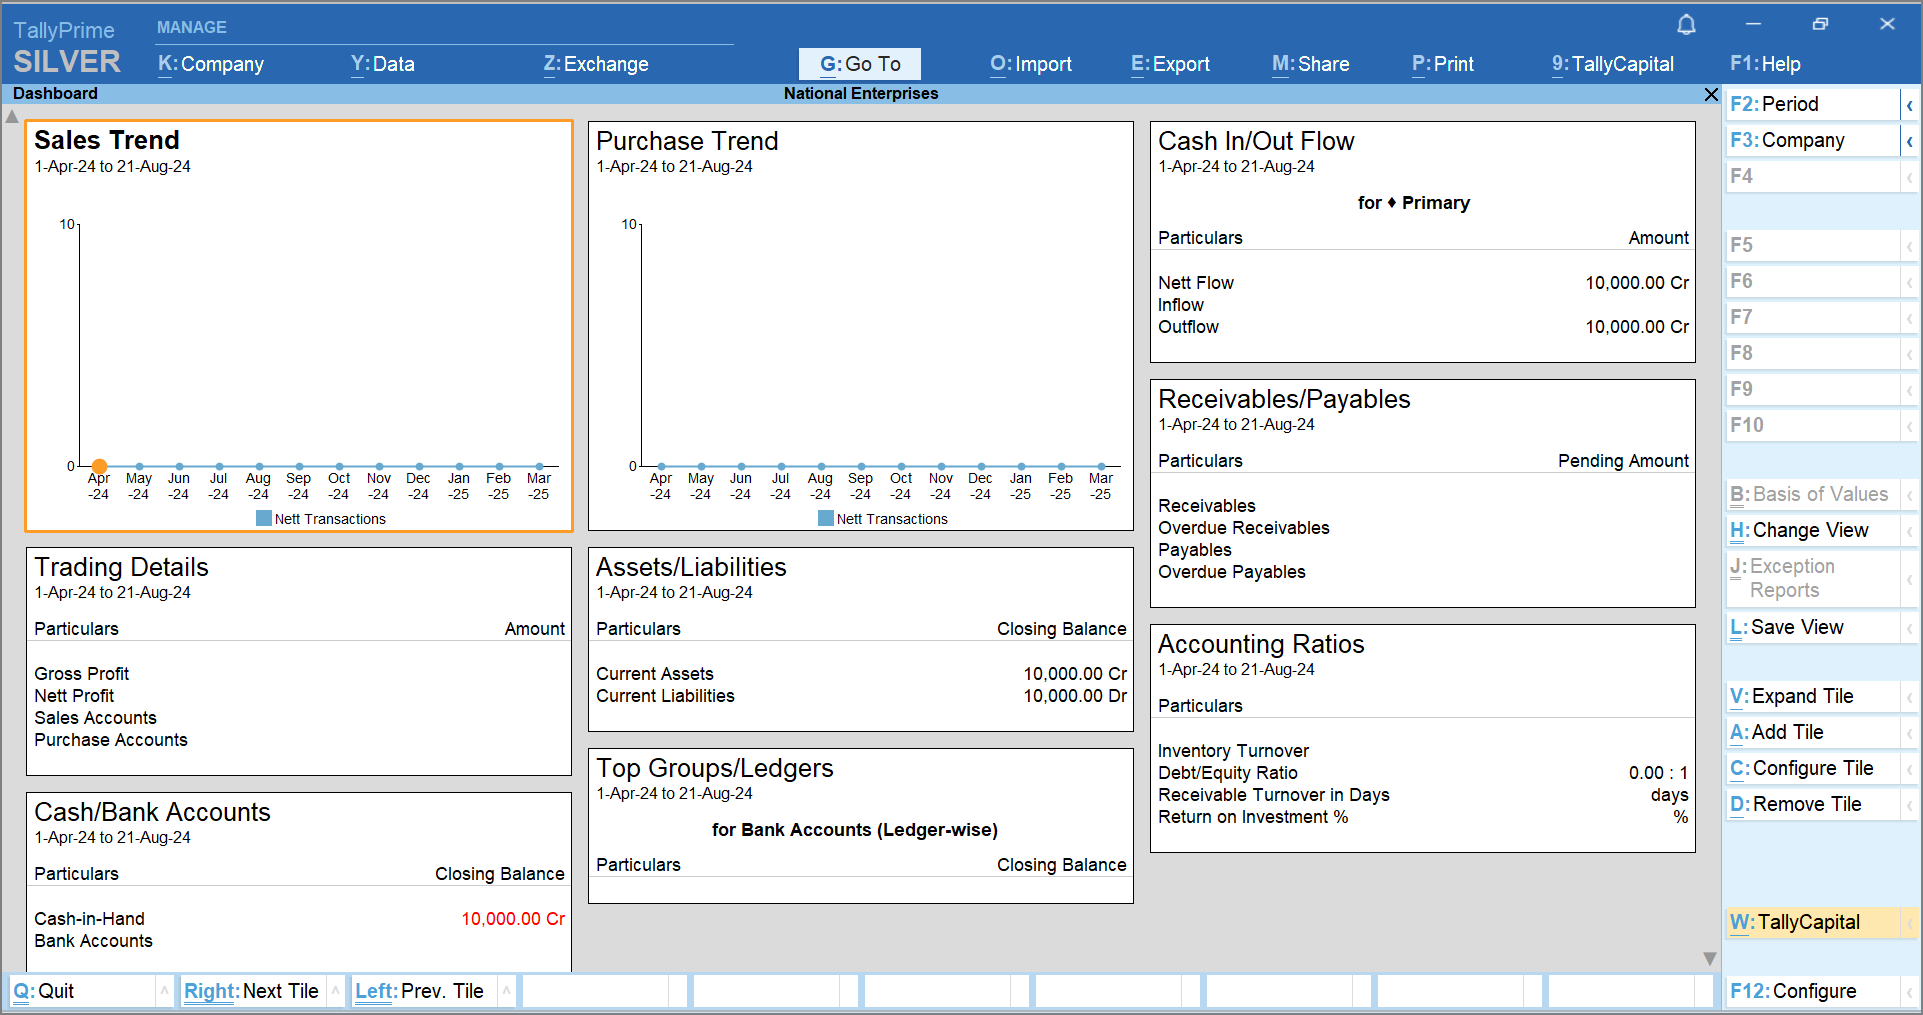
You can also apply for business loans directly from the Dashboard report. Press Alt+W (TallyCapital) on the Dashboard report to get started with your business loan application.
Create Loan Application
You can create a loan application in the TallyCapital Plug-In to apply for a business loan. While creating the loan application, provide details like the required loan amount and the tenure. The plug-in takes care of all the KYC requirements digitally and fetches the required data and reports for loan processing.
The loan application process is divided into 5 simple stages: 1) Basic Details, 2) Eligibility, 3) Business KYC, 4) Promoter KYC, and 5) Review & Submit.
In this section
Basic Details
This section requires the basic information about your loan and provides the Partner details.
- Provide the Business Details.
- Company Name: Enter the legal Company Name, as per the GST Registration.
- Enter the complete address, including State, Pincode, and City.
- Provide the required Loan Details.
- Type of Loan: Choose the type of loan from the list.
- Loan Amount: Enter the loan amount as per your requirements. You can enter a minimum of Rs. 50,000 up to a maximum of Rs. 75,00,000.
Press F10 (Document Checklist) to view the list of documents required to apply for a business loan.
-
Under Partner Details, select the Name of your preferred partner.
You can contact this partner in case of any assistance during the loan application journey.

Similarly, you can go through the For Reference Only section to get an understanding of the minimum and maximum loan amounts, average time for disbursal, applicable interest rates, and a calculative analysis of the EMI per 1 lakh for different tenures. - Under Privacy Policy enable the option I agree to the Terms & Privacy policy.
If you want to view the terms and privacy policy, click Terms & Privacy Policy. - As always, press Ctrl+A to save the Basic Details.
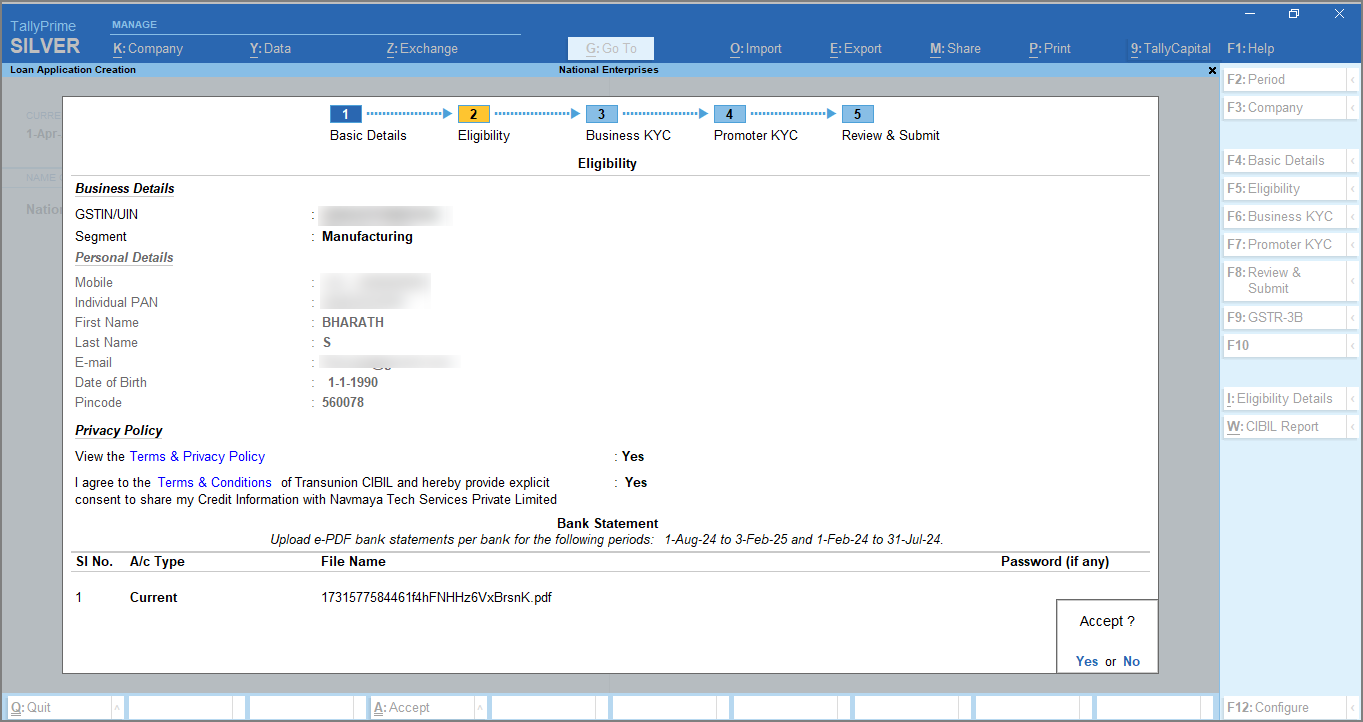
Eligibility
TallyCapital Plug-In supports checking your business eligibility during the application process itself. You can easily check the eligible amount by entering some Personal details and uploading your bank statements.
- Under Business Details,
- Enter the valid GSTIN/UIN, if available.
- Select the Segment of your business.
- Under Personal Details,
- Enter the Mobile number followed by the OTP.
- Enter the Individual PAN.
- Enter the First Name and Last Name.
- Enter the E-mail address.
- Enter the Date of Birth.
- Enter the Pincode.
- Enable the option View the Terms & Privacy Policy to view the terms and policy and agree to the terms and conditions.
- Enter the OTP received from CIBIL.
- Upload the Bank Statement for the last 12 months of all the banks associated with your company.
- A/c Type: Select the bank account type from the List of A/c Types.
- Under File Name, upload the bank statement.
You can upload only PDF files with a file size of up to a maximum of 10 MB.
- Under Password (if any), enter the file password if it is password protected.
- As always, press Ctrl+A to save the Eligibility details.
Once you accept the eligibility screen, it will take approximately 45 seconds to calculate your business loan eligibility. Click Yes to wait and check your business loan eligibility once it is generated.
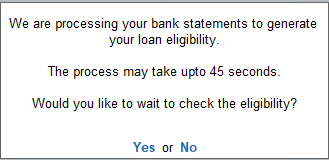
Click No if you don’t want to wait. The eligibility details will be sent to the E-mail address mentioned under Personal Details.
Press Alt+I (Eligibility Details) to view your eligibility once it is generated.
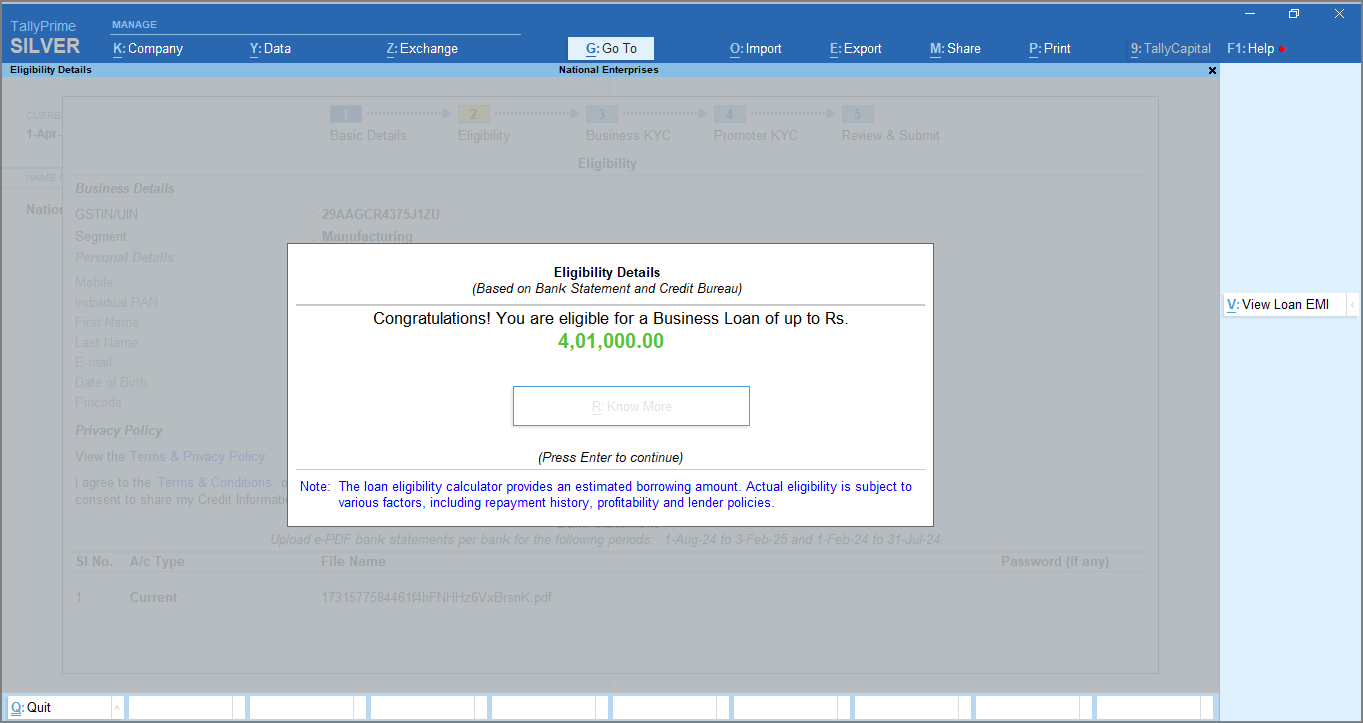
On the Eligibility Details screen, press F8 (View Loan EMI) for a detailed breakup of the loan EMI.
Business KYC
The KYC details of your business are another critical set of information for lenders to review your loan application. KYC details of your company validate the authenticity of your business. Therefore, ensure to provide valid and complete KYC information and upload any supporting documents, as necessary. Based on your firm type, you will have to upload the relevant documents in this section.
- Select the Business Property Type from the List of Property Types.
- Select the Current Business address proof from the List of Documents, and under File Name, upload a copy of the selected document.
- Select the Proof of Business from the List of Documents, and under File Name, upload a copy of the selected document.
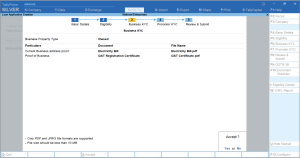

You can upload only PDF or JPEG files of up to a maximum of 10 MB.
List of documents required based on the type of firm
Partnership:
Firm PAN Card
Proof of Partnership Deed
Company:
Company PAN Card
Proof of Certificate of Incorporation
Proof of MoA/AoA
CA Shareholdings
LLP:
Proof of LLP Agreement
Promoter KYC
Similar to Business KYC, a KYC process for the applicant or the promoter is also required for the lenders to verify and approve your loan application. Therefore, ensure to provide valid and complete KYC information and upload any supporting documents, as necessary. Based on your firm type, you will have to upload the relevant documents in this section.
- Name of Promoter, Date of Birth, PAN, Mobile, and E-mail: These details will be pre-filled as per the Personal Details entered in the Eligibility screen.
If your firm type is Partnership, Company, LLP, or others, you need to enter multiple promoter details.

- Gender: Select the Gender of the partner from the list.
- Enter the KYC details.
- Set KYC Details to Yes.
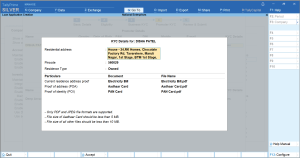
The KYC Details for: screen appears with the name of the promoter pre-filled. - Provide the current Residential address and Pincode.
- Select the Residence Type from the List of Residence Types.
- Select the Current residence address proof from the List of Documents and upload a valid copy.
- Select the Proof of address (POA) from the List of Documents and upload a valid copy.
- Select the Proof of identity (POI) from the List of Documents and upload a valid copy.
- Set KYC Details to Yes.
- To upload any additional documents supporting the KYC of the promoter, press F12 (Configure) > set Upload additional document to Yes.
The Additional document (if any) field appears on the KYC details for: screen. Upload additional documents, as needed. - As always, press Ctrl+A to save the Promoter KYC form.


You can also enter the KYC details of the co-applicant under the Co-Applicant Details, as you have done for the Promoter.
You can upload only PDF or JPEG files of the Aadhaar Card up to a maximum of 5 MB and for all other files up to 10 MB.
List of documents required based on the type of residence
Owned:
Electricity Bill (Not older than 3 months)
Sale Deed
Rented:
Rental Agreement
If you are uploading your Aadhaar Card during the KYC process, be assured that it will be masked internally.
Review & Submit
Once you have provided all the required details for the loan application, you can review and verify the information from the Review & Submit section.
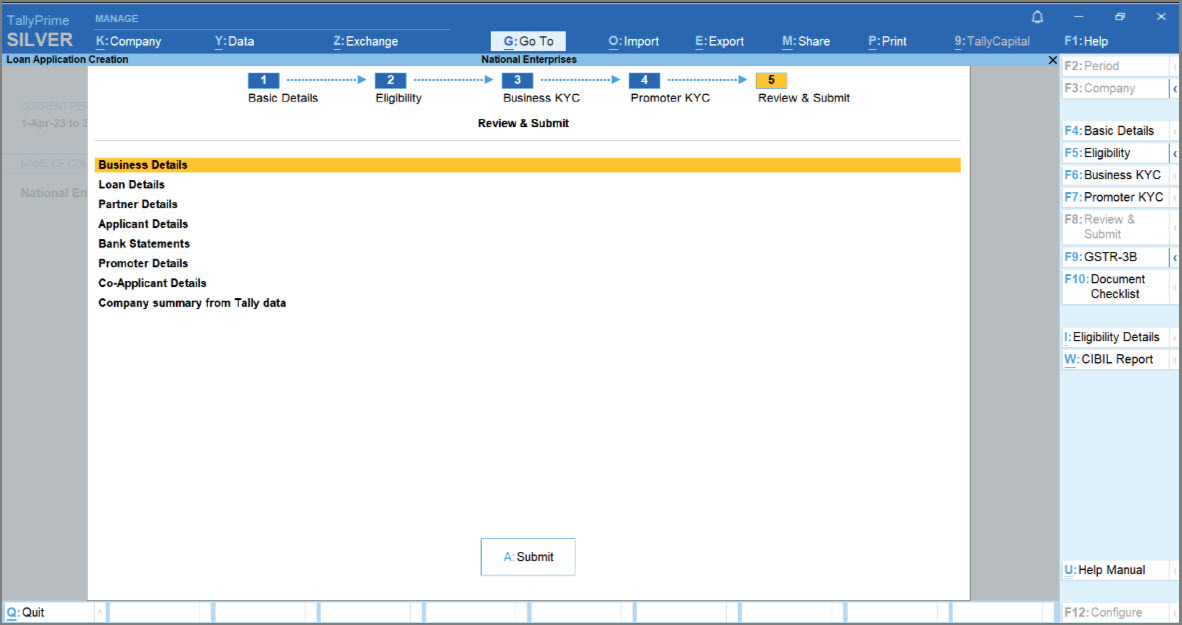
Press Alt+F5 for a Detailed view.
Before submitting the loan application, if you want to update any of the details, you can open the respective screen and update the details as needed.
- To open the Basic Details screen, press F4.
- To open the Eligibility screen, press F5.
- To open the Business KYC screen, press F6.
- To open the Promoter KYC screen, press F7.
- To open the Review & Submit screen, press F8.
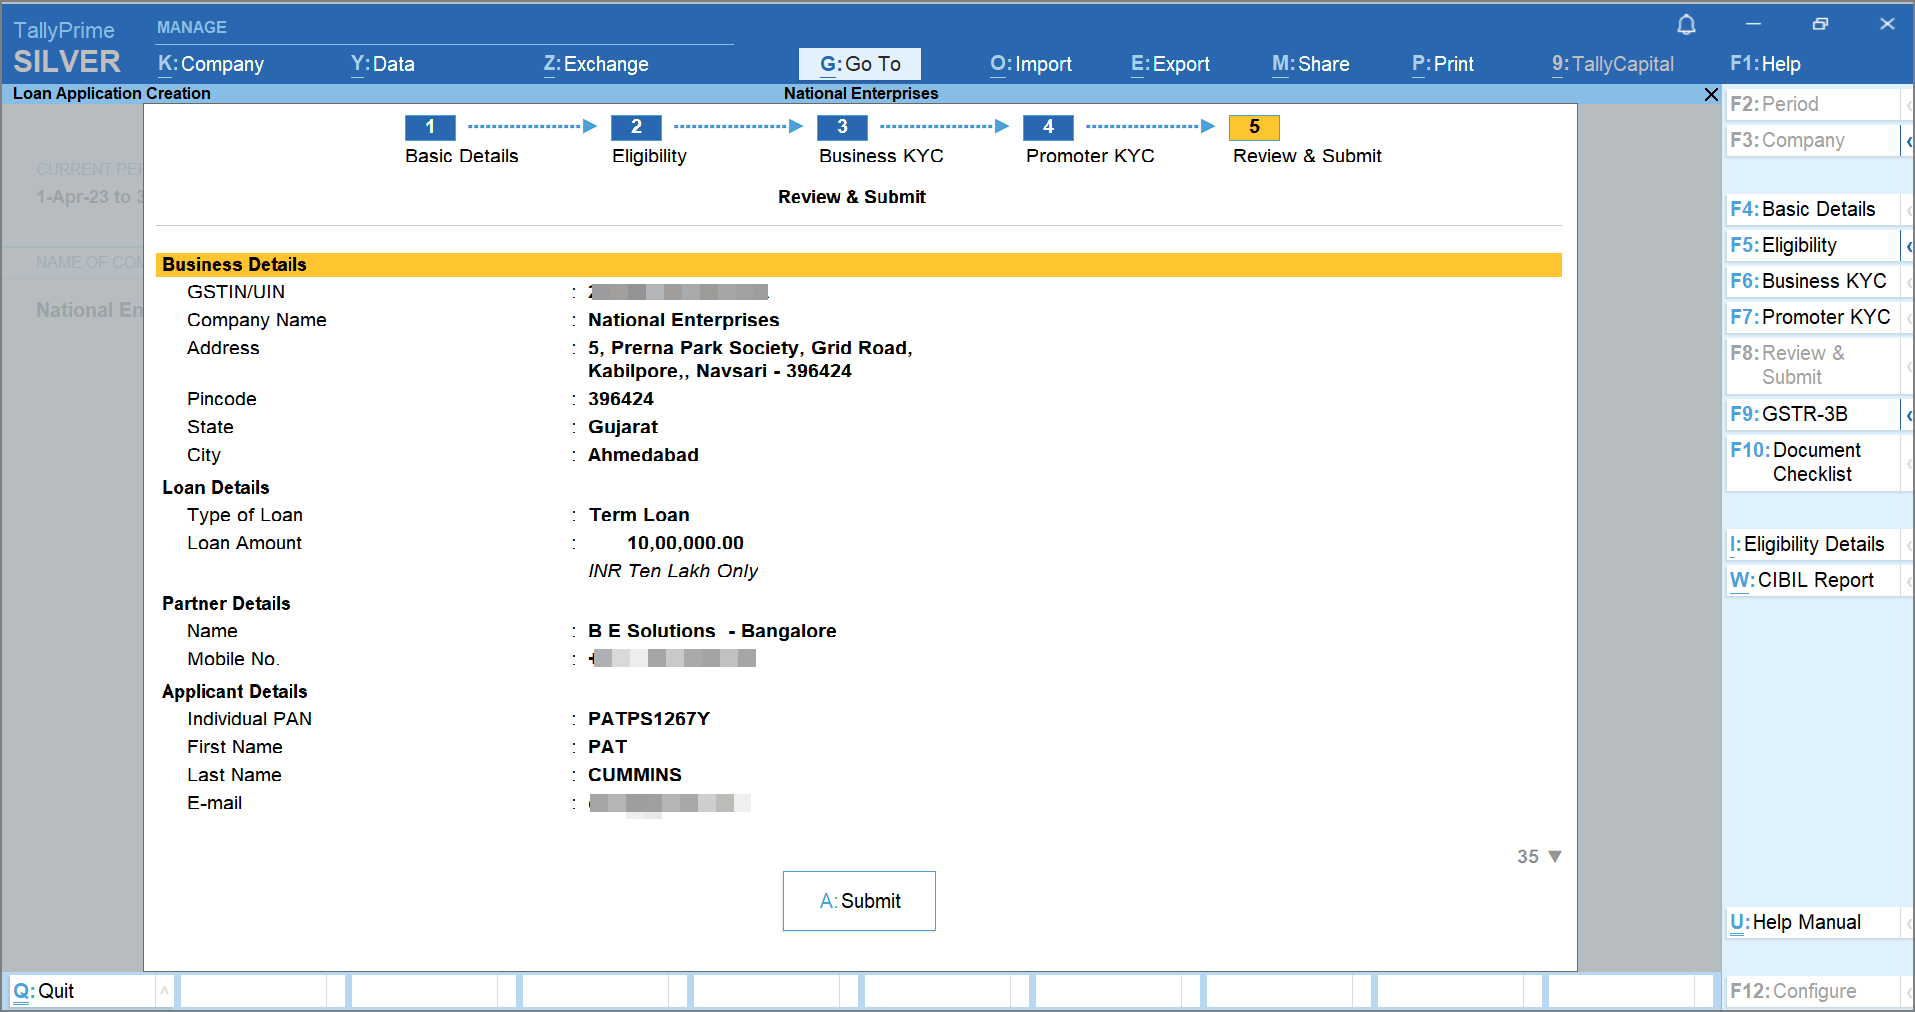
The following is a sample Loan Application: Review & Submit screen displaying the important sections and the documents uploaded, with all the necessary details, where needed.
Once you are sure about the details provided, you can apply for the loan.
Additional Documents
If the required loan amount is above INR 15 lakhs, it is recommended to upload your GTSR3-B report for the last 6 months and Annual Reports.
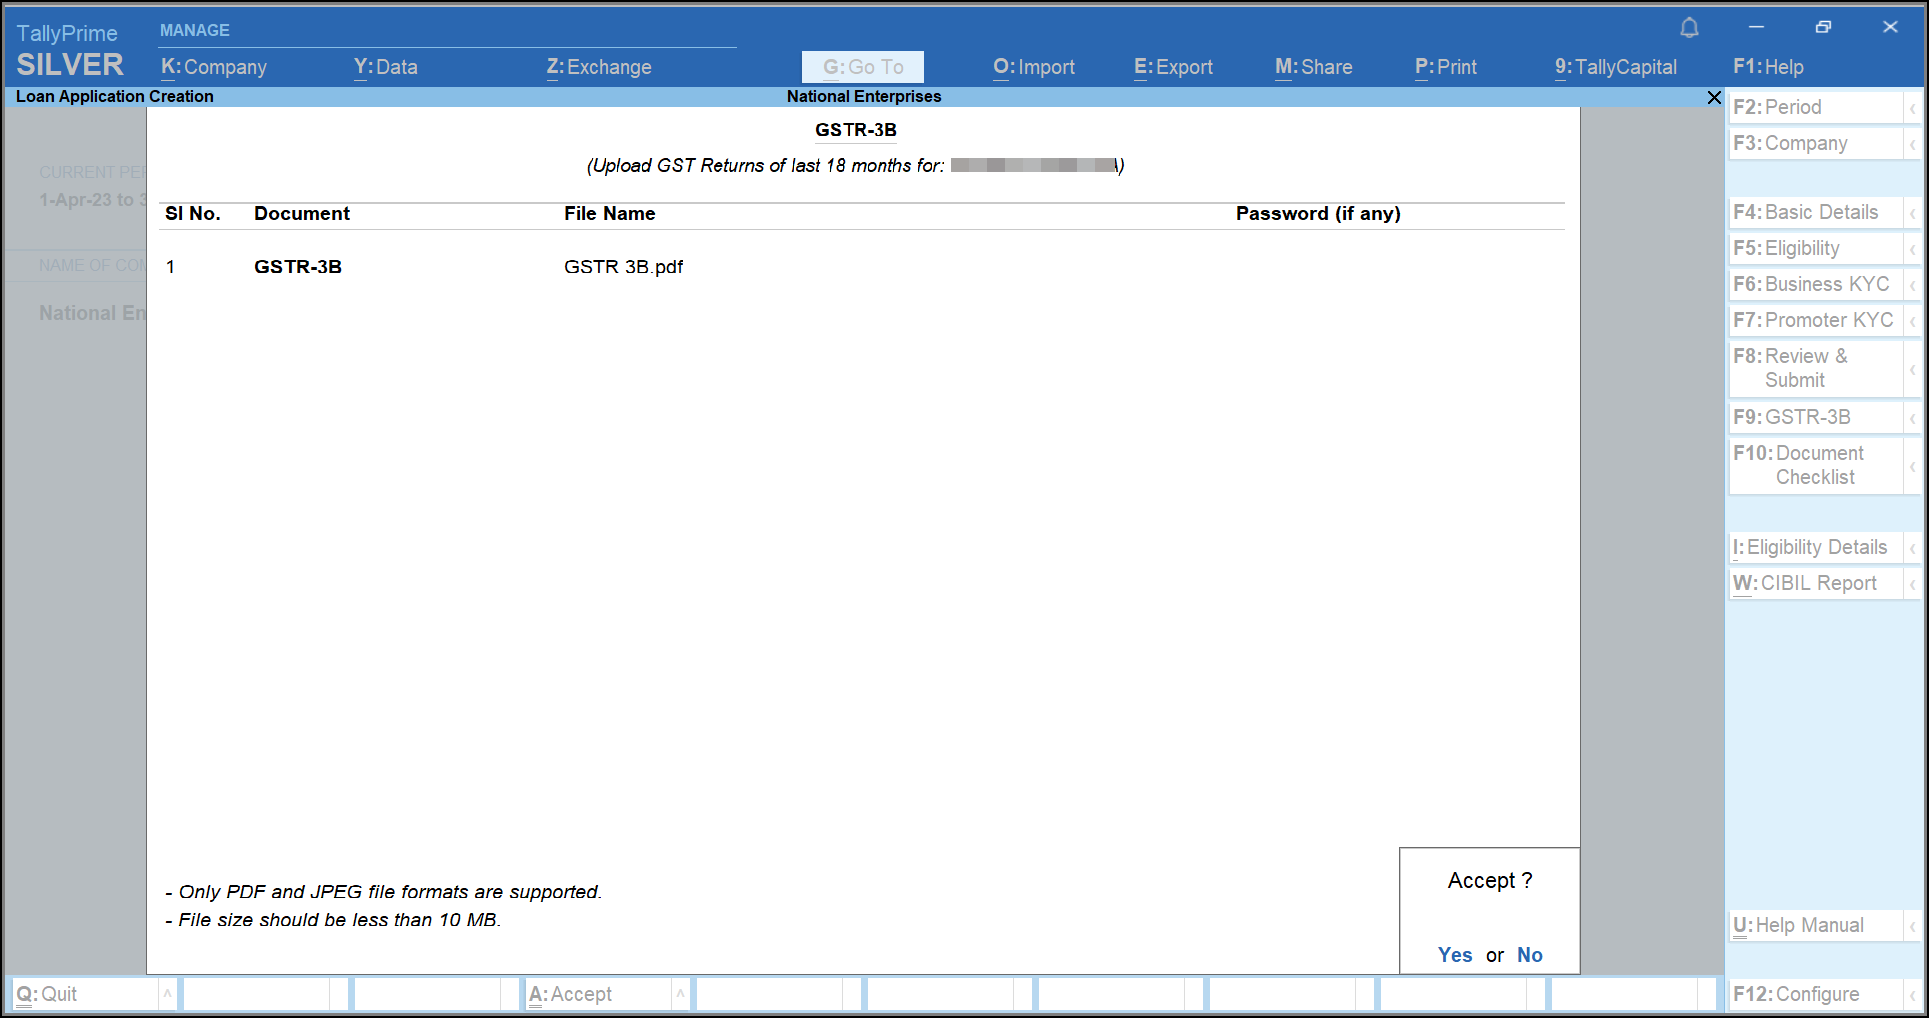
To upload GSTR3-B,
- Press Alt+9 (GSTR3-B).
- Under Document, select GSTR-3B from the List of Documents and upload a copy of the GSTR-3B document for the last 6 months under File Name.
- Under Password (if any), enter the file password if it is encrypted.

- Press Alt+F9 (Annual Reports).
- Under Document, select IT Returns from the List of Documents and upload a copy of the ITR document under File Name.
You can upload multiple ITR documents if needed.

Once you have uploaded the required documents,
- Press A or click the Submit button to submit your loan application.
The following information message appears confirming the submission of the loan application.
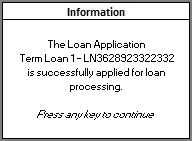
- Press any key to continue.
Bank Statement Errors
Note that in case of any error in the bank statements uploaded during the Eligibility section, a query box appears after you submit the loan application.
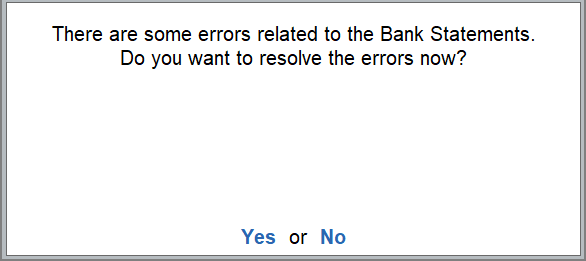
To resolve the bank statement error,
- Press Y or select Yes to resolve the bank statement errors.
Press N or select No to go ahead and submit the application.
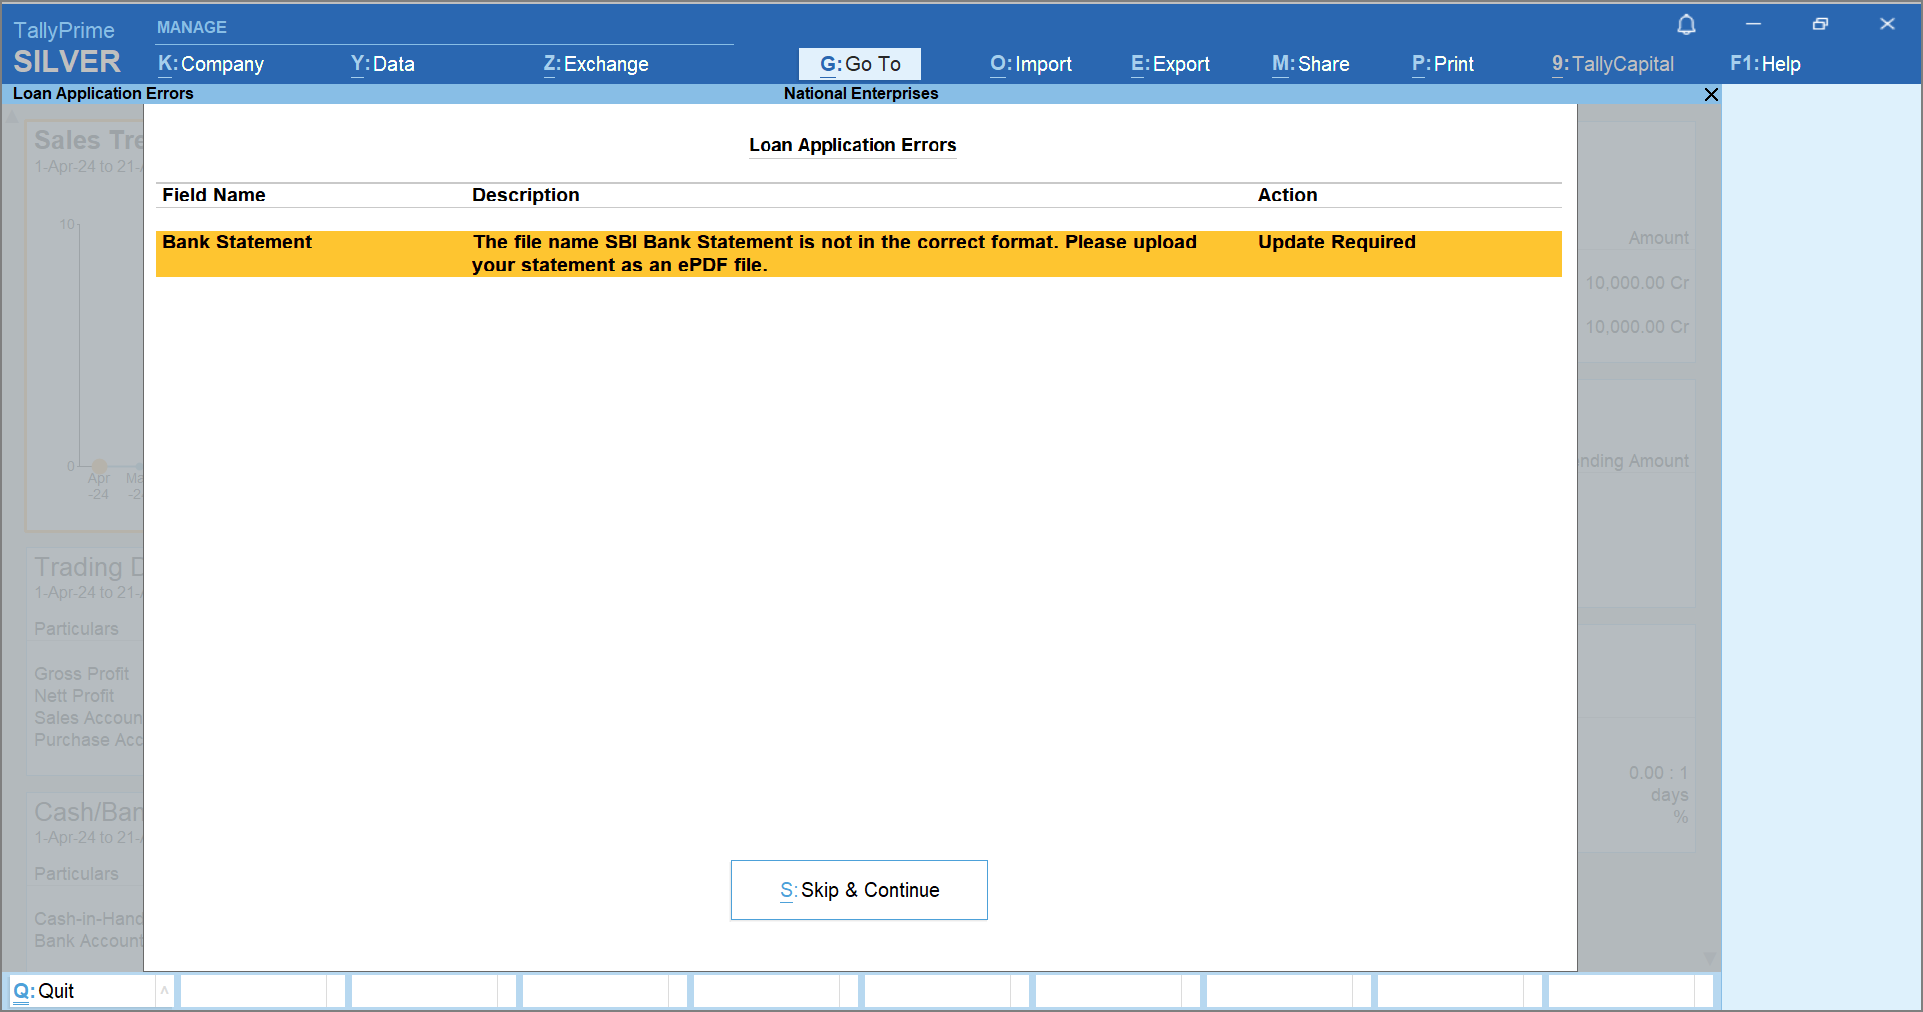
If you select Yes, the Loan Application Errors screen appears with the following details.
- Field Name: Represents the field where the update needs to be done.
- Description: Provides the details of the discrepancy that will help you to identify the exact discrepancy.
- Action: Displays what action is required for the corresponding description.

- Drill down from the row and make the necessary changes.
Once you have updated the details based on the description, the Action column displays the status as Updated against the corresponding Field Name.
However, you can press Alt+S (Skip & Continue), if you don’t want to resolve the bank statement later and proceed with submitting the loan application.
Loan Application Status
In TallyPrime, you can submit more than one loan application, depending on your requirements. Once you have submitted, the application is processed through different stages. Therefore, you might want to know the exact status of your application at any point.
- Gateway of Tally > TallyCapital.
You can press Alt+9 (TallyCapital) from any screen on TallyPrime. - Click Loan Application and enter the Mobile number followed by the OTP.
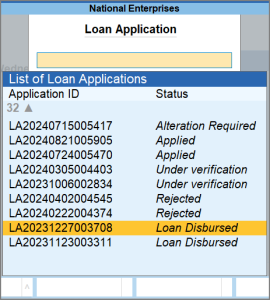
On successful authentication, the List of Loan Applications appears.
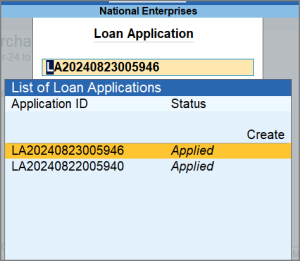
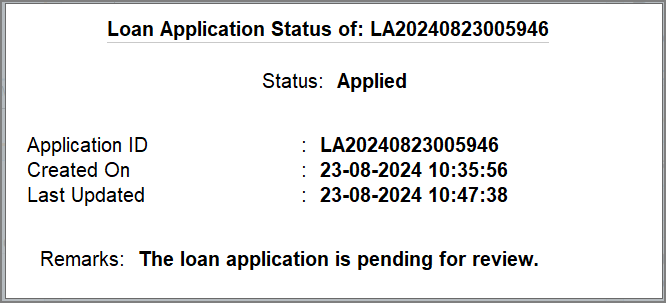
- Drill down from the application to view the details of the status.
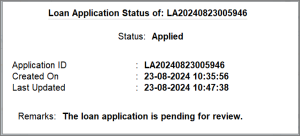

List of Statuses with Description
|
Status |
Description |
|
Applied |
The loan application is pending for review. |
|
Alteration Required |
Alteration flow will work in the Alteration Required status. |
|
Loan Sanctioned |
The loan against your application has been sanctioned, as per the approved loan amount. Details have been sent to your e-mail. |
|
Loan Disbursed |
The loan amount has been disbursed, as per the sanctioned loan amount. Details have been sent to your e-mail. |
|
Rejected |
The loan application has been rejected. Details have been sent to your e-mail. |
|
Under verification |
The loan application is currently under verification. |
|
Resubmitted |
The loan application is resubmitted and is under review. |
|
In Review |
The loan application is currently in review. |
|
Withdrawn |
The loan application is withdrawn. |
Alter Loan Application
Once you apply for the loan with all the relevant details for loan processing, the application is reviewed to verify the details. In case the reviewer finds any discrepancies or missing information in the application, your application is sent back for updation with the necessary details and supporting documents, where needed. In such cases, you can alter the loan application, based on the reviewer’s comments and take necessary actions.
You can also alter the loan applications that you have saved and not submitted yet.
- Gateway of Tally > TallyCapital > Loan Application.
You can press Alt+9 (TallyCapital) from any screen on TallyPrime. - Enter your Mobile number followed by the OTP.
On successful authentication, the List of Loan Applications appears. - Select the loan application you want to alter or with the status as Alteration Required, and press Enter.
The Message Centre for the selected loan application appears, with the Application Name and Application ID.
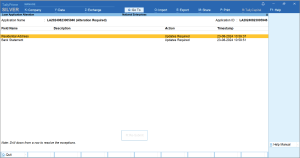
The message centre screen displays the details of the discrepancies or missing information in your loan application. You can refer to the details and update your loan application, as needed.
- Field Name: Represents the field where the update needs to be done.
- Description: Provides the details of the discrepancy that will help you to identify the exact discrepancy.
For example, in case the PAN entered under the Company Details section was incorrect, the Description column for Company PAN would display Company PAN is incorrect. - Action: Displays what action is required for the corresponding description.
- Time Stamp: Displays the date and time when the discrepancy was identified in the submitted loan application.
- Drill down from the rows, one after the other, to open the respective field that requires an update, and provide the relevant information.
Once you have updated the details based on the description, the Action column displays the status as Updated against the corresponding Field Name. - Press R or click Re-Submit.

Once you have resubmitted the loan application after the necessary corrections and updates, the application will be reviewed and processed, as applicable.
Loan Disbursement Summary
When you avail a loan, you will certainly want to view a summary of the loan disbursed. In addition, it is always beneficial to get a perspective on the EMIs, upcoming payments, and the overall repayment schedule of a loan. Therefore, the loan disbursement summary in TallyCapital Plug-In provides a comprehensive overview of the transaction history and repayment schedule of your term loan. You will get a complete understanding of the components of your EMI paid in transaction history and the repayment schedule will assist you in making your repayments on time.
In this section
You can view the loan disbursement summary in TallyPrime.
- Gateway of Tally > TallyCapital > Loan Application.
You can press Alt+9 (TallyCapital) from any screen on TallyPrime. - Enter the Mobile No. and OTP to log in.
- From the List of Loan Applications, select the application with the status Loan Disbursed and press Enter.
The Loan Disbursement Summary appears, as shown below:
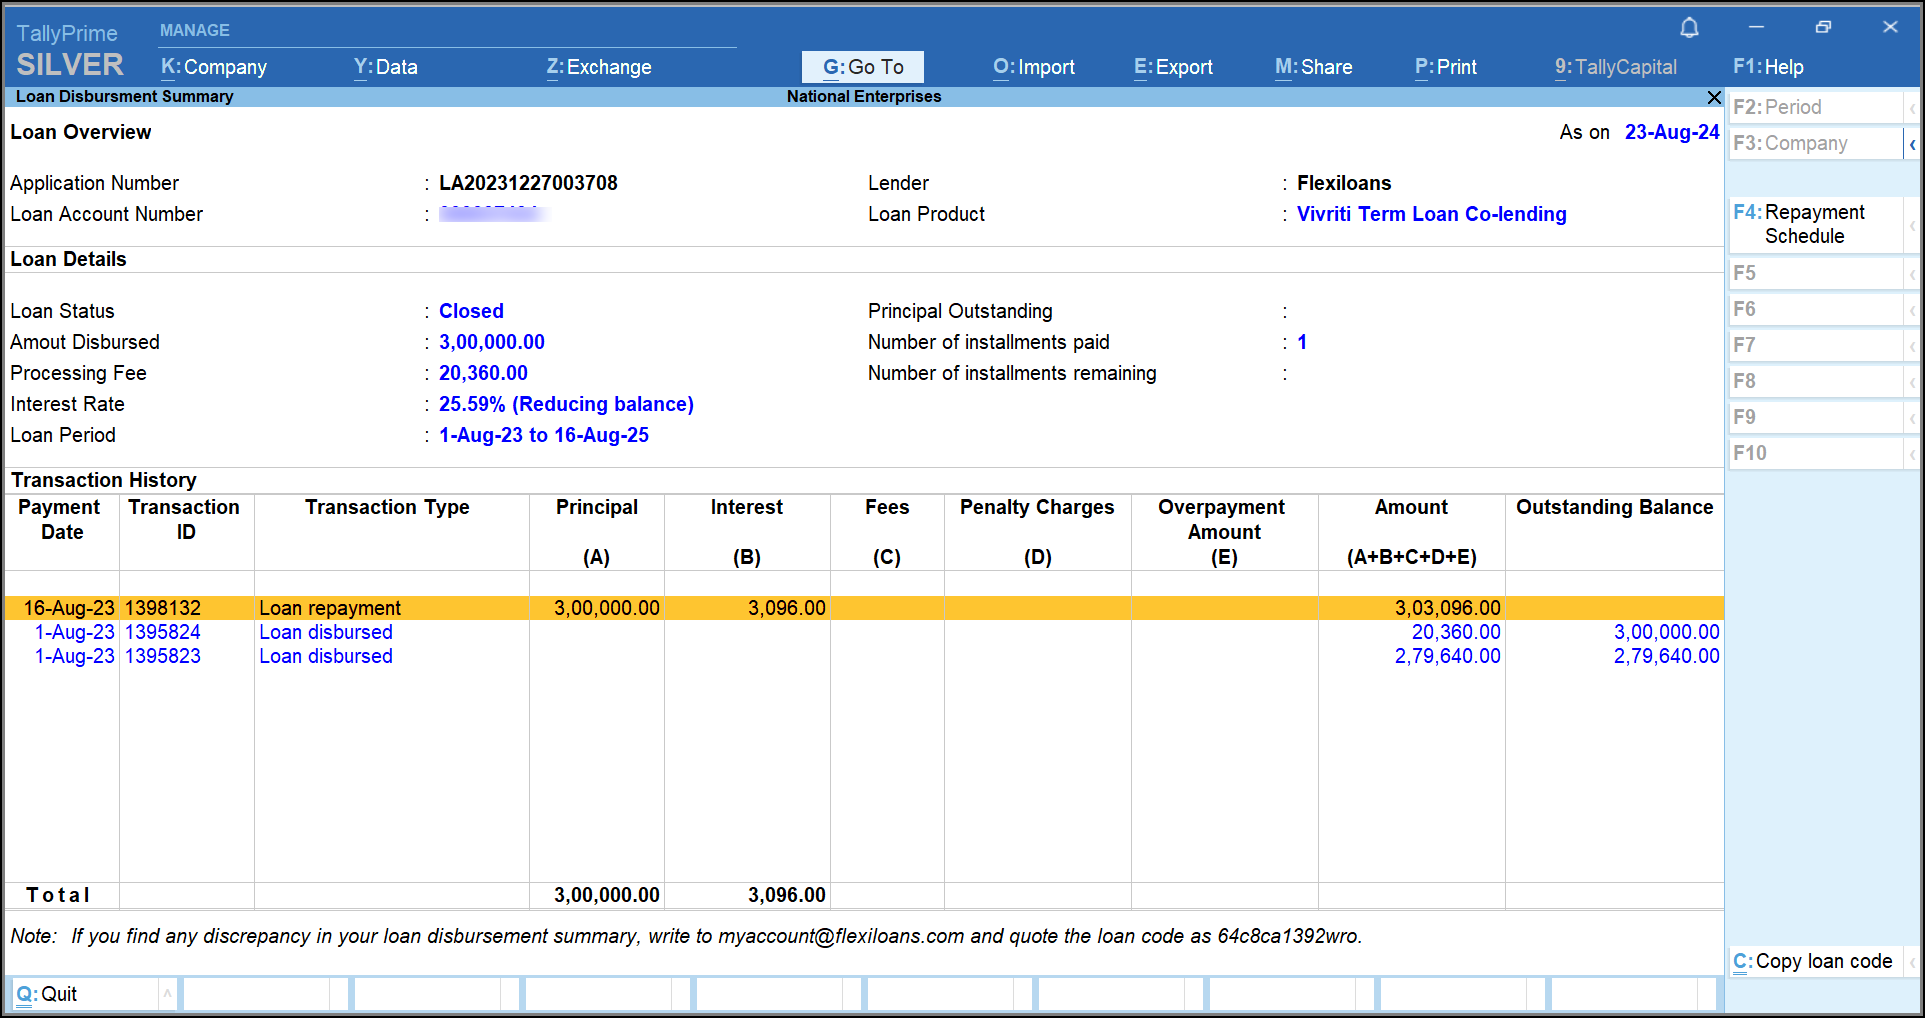
Loan Overview
This section shows the basic loan application details.
- Application Name: Displays the application name and the loan application number.
- Loan Account Number: Displays the loan account number generated when you submitted your loan application.
- Lender: Displays the lender name.
- Loan Product: Displays the loan product name of the respective lender.
Loan Details
This section outlines the specifics of the loan.
- Loan Status: Displays the status of the loan, whether it is active or closed.
- Amount Disbursed: Displays the total amount disbursed by the lender.
- Processing Fee: Displays the processing fee charged by the lender during disbursement of the loan amount.
- Interest Rate: Displays the interest rate charged by the lender.
- Loan Period: Displays the tenure of the loan (from the disbursement date to the expected maturity date of the loan).
- Principal Outstanding: Displays the unpaid principal amount of the loan till date.
- Number of installments paid: Displays the number of installments paid till date.
- Number of installments remaining: Displays the number installments remaining till date.
- Upcoming Payment: Provides details about the upcoming installment.
- Installment Amount: Displays the upcoming EMI amount to be paid.
- Due Date: Displays the due date for the upcoming installment.
- Overdue Amount: Displays the overdue amount to be paid on top of EMI amount.
Transaction History
You can refer to this section to get a complete understating of all the payments made towards the loan. You can view the date of payment, the amount paid towards principal and interest, fee and penalty charges, if any, and so on.
- Payment Date: Displays the date of EMI payment.
- Transaction ID: Displays the transaction ID of the payment.
- Transaction Type: Displays the type of transaction, such as loan repayment, loan disbursed, and so on.
- Principal: Displays the component of payment paid as the principal towards the outstanding principal balance of the loan.
- Interest: Displays the component of payment paid towards the interest on the pending loan amount.
- Fees: Displays the fees paid, if any.
- Penalty Charges: Displays the penalty charges paid, if any.
- Overpayment Amount: Displays the extra amount paid on top of the EMI, if any.
- Amount: Displays the total amount paid on each transaction date.
- Outstanding Balance: Displays the outstanding principal amount of the loan.
Repayment Schedule
The repayment schedule of a loan account outlines the gradual process of repaying the loan. It displays the split between the principal and the interest components of an EMI, revealing how the loan balance decreases as payments are made.
On the Loan Disbursement Summary, press Ctrl+R (Repayment Schedule) to view the repayment schedule.
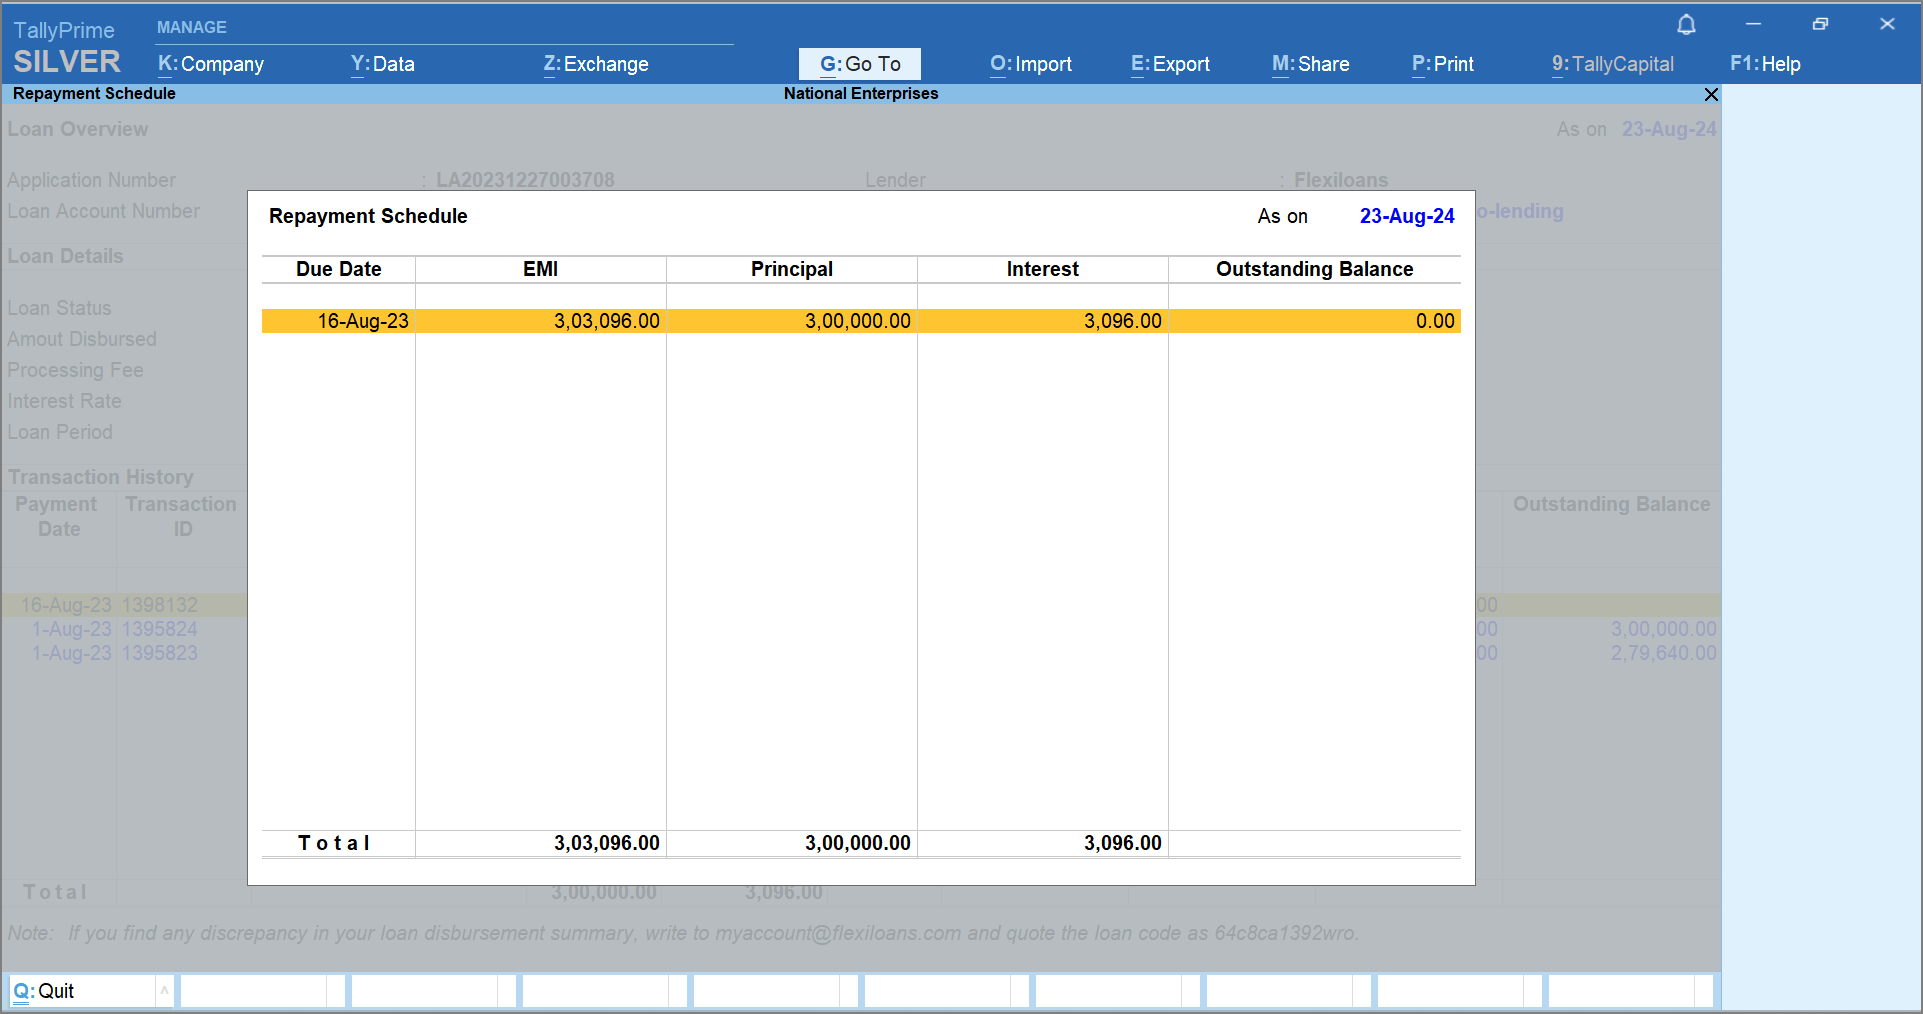
- Due Date: Displays the date on which EMIs are due.
- EMI: Displays the EMI amount due on the Due Date.
- Principal: Displays the principal component of each EMI.
- Interest: Displays the interest charged in each EMI.
- Outstanding Balance: Displays the outstanding principal balance after each payment.
Loan code
If you find any discrepancy in the Loan Disbursement Summary, you can copy the loan code from the summary report and write to FlexiLoans at myaccount@flexiloans.com and quote the loan code.
- On the Loan Disbursement Summary, press Ctrl+C (Copy loan code).
A message will be displayed as “Your loan code is copied” as shown below.
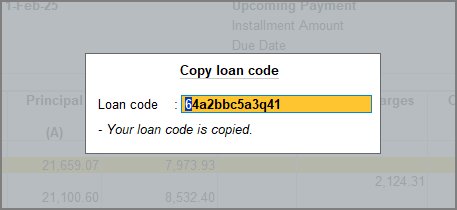
You can then write an e-mail to Flexiloans about the discrepancy, and paste the Loan code in your e-mail for their reference.
Business Loan Eligibility
In TallyCapital Plug-In, you can check the eligible business loan amount before applying for a loan. All you need to do is enter your registration details and PAN details. The Financial Services addon in TallyPrime will show you the eligible amount you may qualify for from Flexiloans based on your CIBIL score and the selected company data.
You can check your loan eligibility in TallyPrime either by uploading your bank statements or based on your company books data. It is recommended to check eligibility using bank statements to generate more accurate eligibility information.
In this section
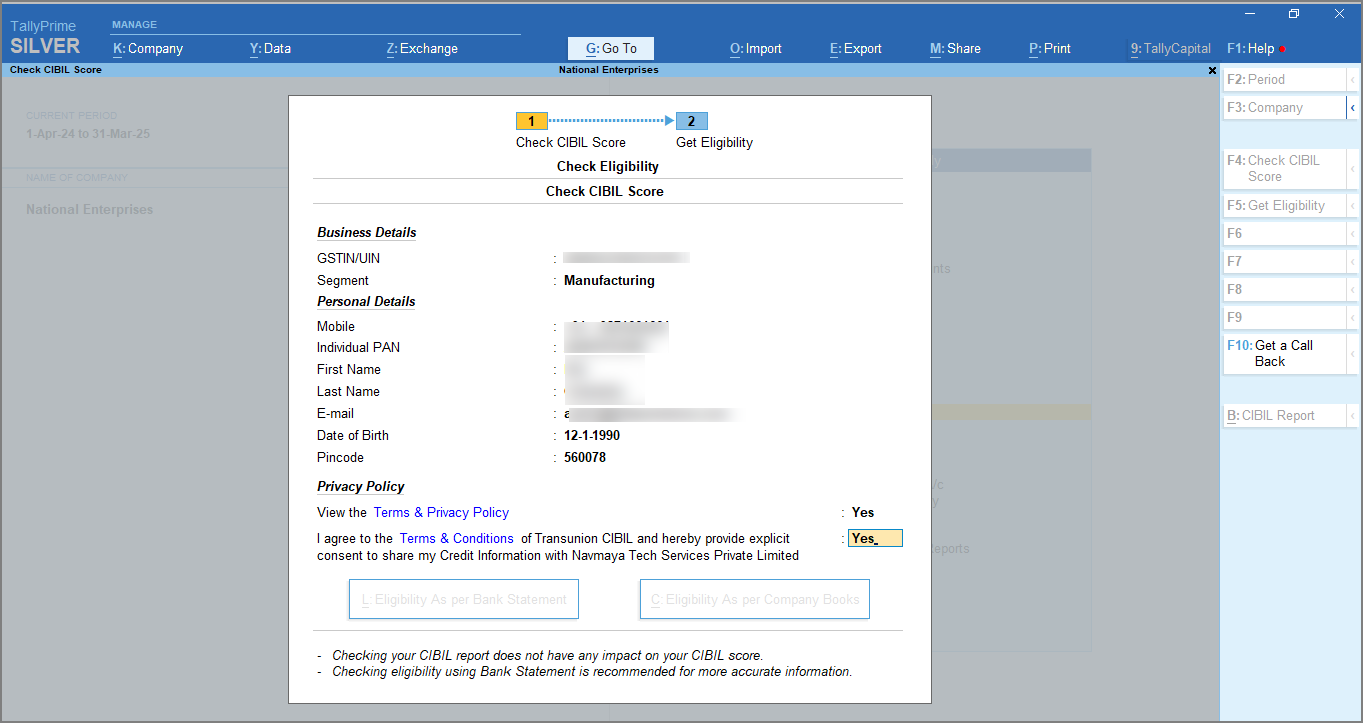
- Gateway of Tally > TallyCapital > press F5 (Check Eligibility).
You can press Alt+9 (TallyCapital) from any screen on TallyPrime. - Enter the Mobile and OTP to log in.
- Enter the Business Details.
- GSTIN/UIN: Enter the GSTIN/UIN of your business.
- Segment: Select the segment of your business from the List of Segments.
- Enter the Personal Details.
- Mobile: By default, the mobile number entered during login will be pre-filled.
- Individual PAN: Enter the individual PAN.
Checking CIBIL Score and Report is applicable only for Sole Proprietor firm type.
- Enter the First Name.
- Enter the Last Name.
- Enter the E-mail address.
- Enter the Date of Birth.
- Enter the Pincode.

- Accept the Privacy Policy.
- Enable the option View the Terms & Privacy Policy to view the privacy policy.
- Give your consent to fetch your CIBIL report by enabling the consent option.
- Enter the OTP received from CIBIL.
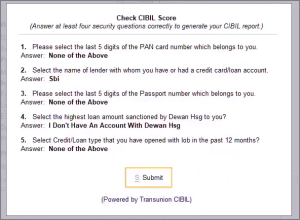
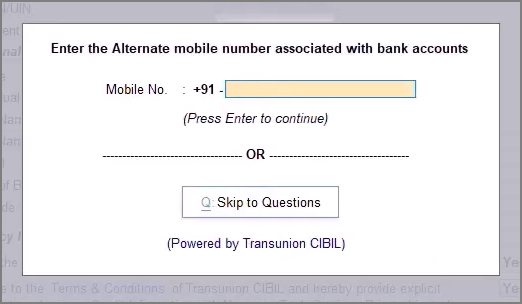
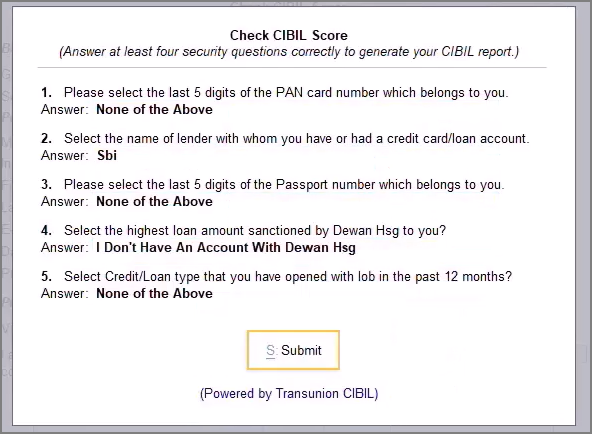
Note that if the Mobile number and E-mail address entered under Personal Details do not match your PAN, you will be prompted to enter an alternate number linked to your PAN. If no alternate number is available, click Skip to Questions to answer the security questions.
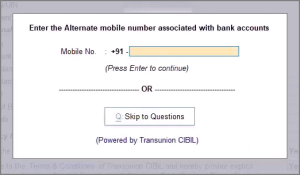
Also, if the alternate number entered does not match PAN, you will be redirected to answer security questions.
- To check eligibility by uploading your bank statements, press Alt+L (Eligibility As per Bank Statement).
To check eligibility based on your Tally Data, press Alt+C (Eligibility As per Company Books).
Eligibility As per Bank Statement
- Upload bank statements for the last 12 months of all the banks associated with your company.
- Under A/c Type, select the type of account from the List of A/c Types.
- Under File Name, upload a copy of the bak statements.
You can upload only PDF files with a file size up to a maximum of 10 MB. - Under Password (if any), enter the password for the file, if it is encrypted.

- Press Ctrl+A to accept the form.
To derive the eligibility results, it will take approximately 45 seconds. Once the eligibility has been calculated, you can see your loan eligibility amount. In case of any error in the bank statements or rejection due to credit score, you will be prompted with a message. Click Know More to learn about the reasons for rejection.
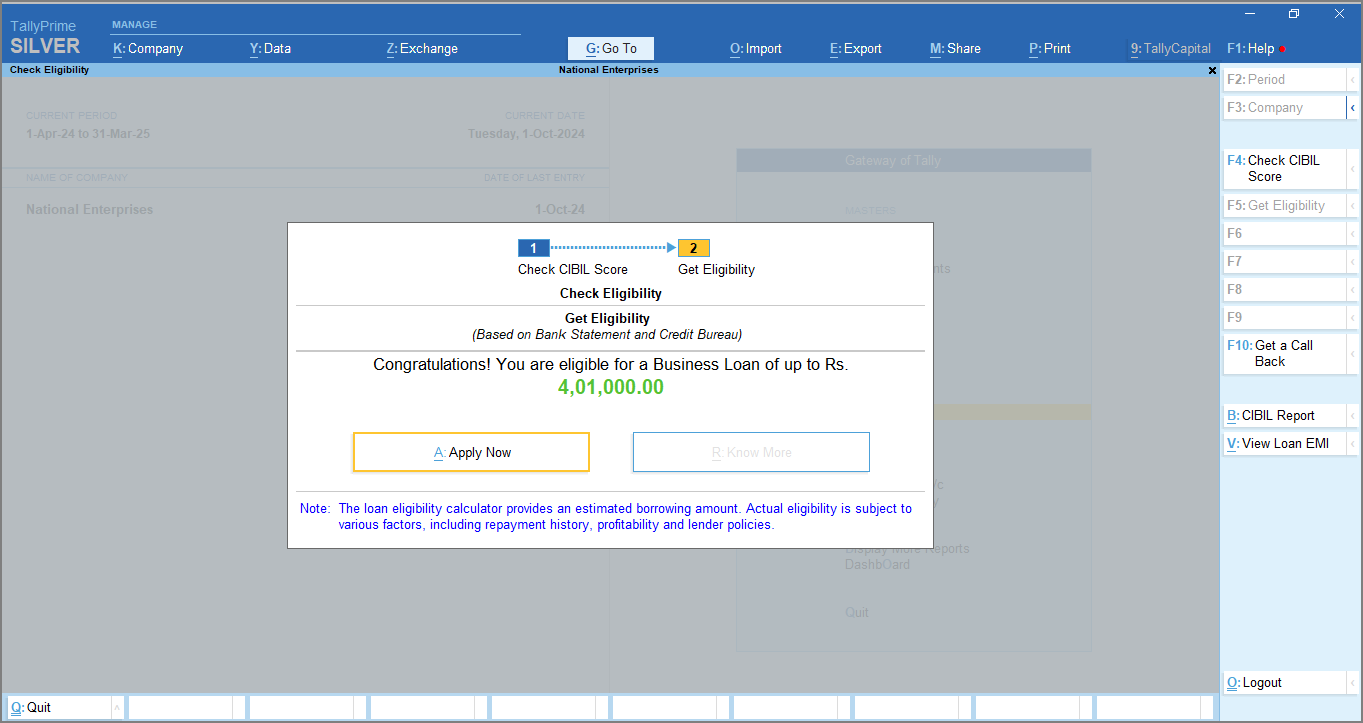
Press Alt+A (Apply Now) to apply for the business loan.
Press F4 (Check CIBIL Score).
Press F10 (Get a Call Back) to request a callback if you need any assistance.
Press Alt+B (CIBIL Report) to view your CIBIL report.
Press Alt+V (View Loan EMI) to view details of the EMI schedule.
Press Alt+O(Log out) to log out of your active session if required.
Eligibility as per Company Books
On the basis of the data available in the books of your company, the business loan eligible amount is calculated.
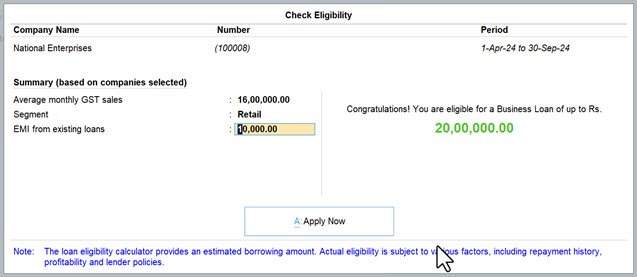
Note that the eligible amount is based on the summary of the selected companies. It includes the average monthly GST sales, your business segment, and your existing loan EMIs. You can select additional companies or directly alter the summary details if required. The loan offer will change accordingly.
Press Alt+A (Apply Now) to apply for the business loan.
Press F10 (Get a Call Back) to request a callback if you need any assistance.
Press Alt+B (CIBIL Report) to view your CIBIL report.
Press Alt+V (View Loan EMI) to view details of the EMI schedule
Check Credit Score
For any business person, it is imperative to have a sound knowledge of the credit score to maintain good financial health. To do so, one must be well-equipped with a comprehensive credit report that details all the accounts responsible for the fluctuation of credit score. In TallyPrime, you can access your credit report for free with details of active and closed accounts, and credit inquiries as well that impact your credit score. You can also refer to the tips to improve your credit score for a higher line of credit.
It should be noted that checking your credit score does not have any impact on your credit score.
Check Credit Score and Credit Report
You can check your credit score along with a detailed credit report in TallyPrime.
- Gateway of Tally > TallyCapital > Check Credit Score.
You can press Alt+9 (TallyCapital) from any screen on TallyPrime. - Enter the Mobile and OTP to log in.
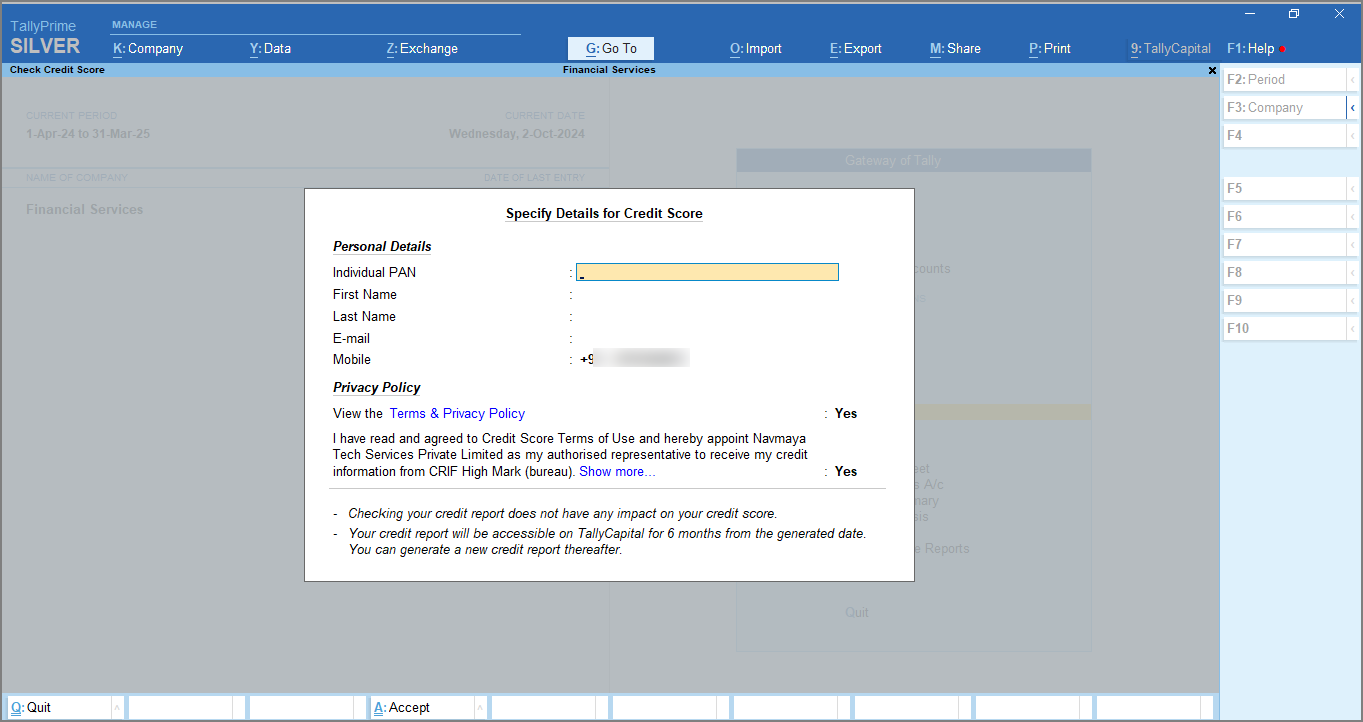
On successful authentication of the OTP, the Specify Details for Credit Score form opens. - Enter the Personal Details.
- Enter the Mobile followed by the OTP.
- Individual PAN: Enter the PAN number.
Checking Credit Score and Report is applicable only for Sole Proprietor firm type.
- Enter the First Name.
- Enter the Last Name.
- Enter the E-mail address.
- Accept the Privacy Policy.
- Enable the option View the Terms & Privacy Policy to view the privacy policy.
- Give your consent to fetch your credit report by enabling the consent option.
The Credit Report opens with details of your credit accounts.
Checking your credit score does not have any impact on your credit score.
Credit Report
The Credit report is divided into two sections.
- Details of: Active and Closed Accounts
- Details of: Credit Inquiries
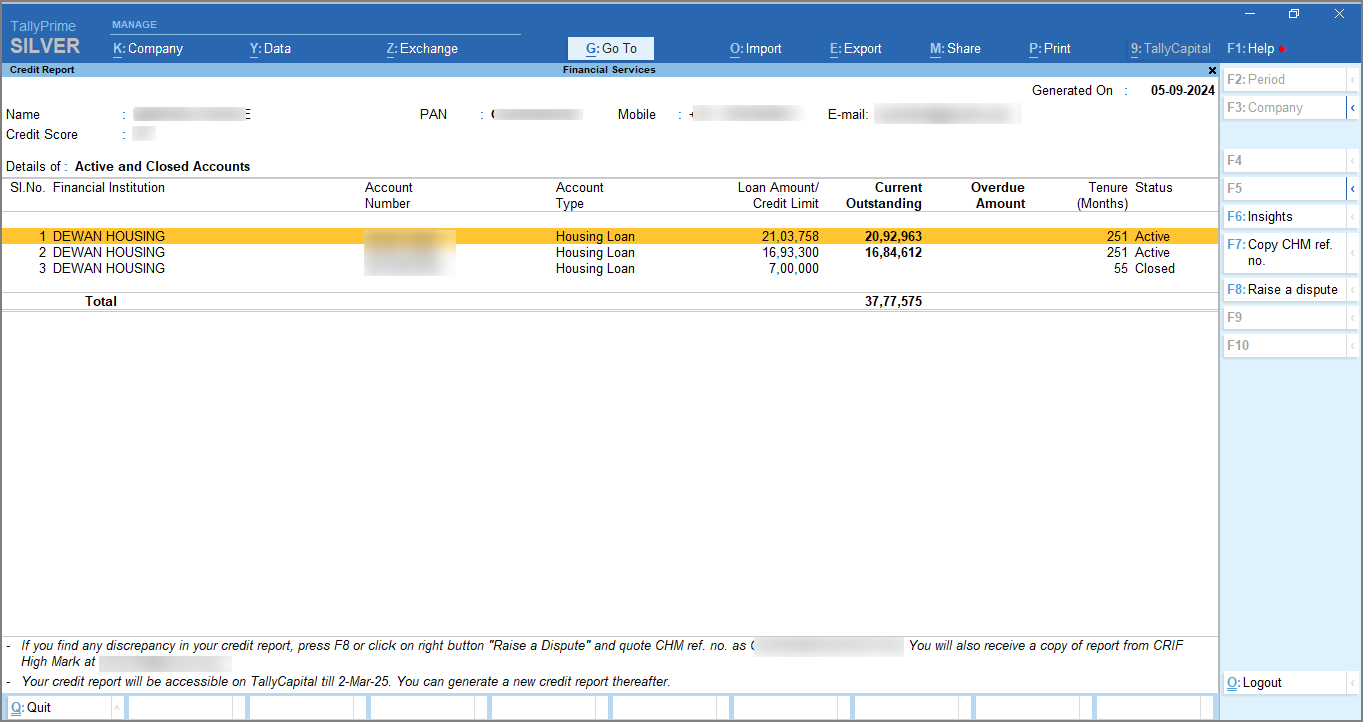
Details of Active and Closed Accounts
This section includes the details of your active and closed accounts impacting your credit score. You can see the account number and account type along with the loan amount or credit limit, overdue amount, and tenure. You can also see the name of the credit grantor under Financial Institution.
- Financial Institution: The list of credit grantors.
- Account Number: The list of loan account numbers.
- Account Type: Type of the loan.
- Loan Amount/Credit Limit: Loan amount or credit limit.
- Current Outstanding: Current outstanding balance of loan accounts.
- Overdue Amount: Overdue amount, if any, from the loan accounts.
- Tenure (Months): Tenure of the loan accounts.
- Status: Status of loan accounts.
If you find any discrepancy in your credit report, press F8 (Raise a Dispute) on the Credit Report screen.
The credit report will be available in condensed mode by default. Press Alt+F5 to view the detailed view of the credit report.
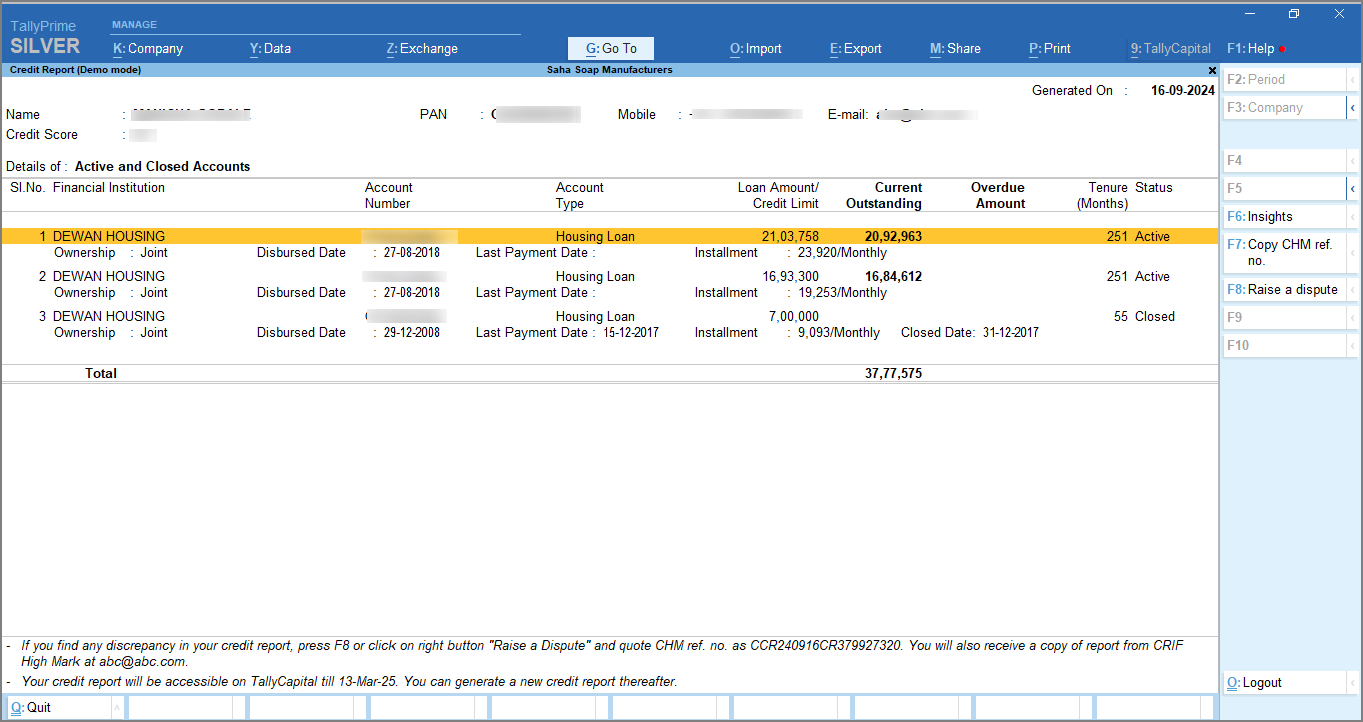
A detailed credit report consists of the following details.
- Ownership: The type of ownership.
- Disbursed Date: Loan Disbursal date.
- Last Payment Date: Last Payment Date.
- Installment/Payment Interval: Installment amount of loan and payment frequency.
- Number of Late Payments: Number of late payments, if any.
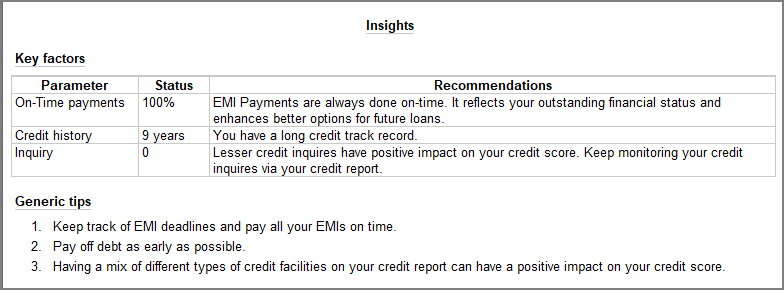
- Closed Date: The date on which the account was closed.Tips to Refer
If you want to improve your credit score, TallyPrime provides you with some tips that you can refer to. On the Credit Report screen, press Ctrl+T (Insights).
Loan EMI Calculator
TallyPrime provides you with an EMI calculator which will help you to estimate your monthly loan repayment amounts accurately. It considers factors like loan amount, interest rate, and tenure, providing a clear understanding of financial commitments before taking a loan. This tool assists in budgeting, planning, and ensuring that you can comfortably manage your repayments without straining your finances.
- Gateway of Tally >TallyCapital > press F4 (Loan EMI Calculator).
You can press Alt+9 (TallyCapital) from any screen on TallyPrime. - Enter the Loan Details to calculate EMI.
- Loan Amount: Enter the required loan amount.
- Reducing Interest Rate: Enter the reducing rate of interest.
- Tenure/ Period (in Years): Enter the tenure/period in years.
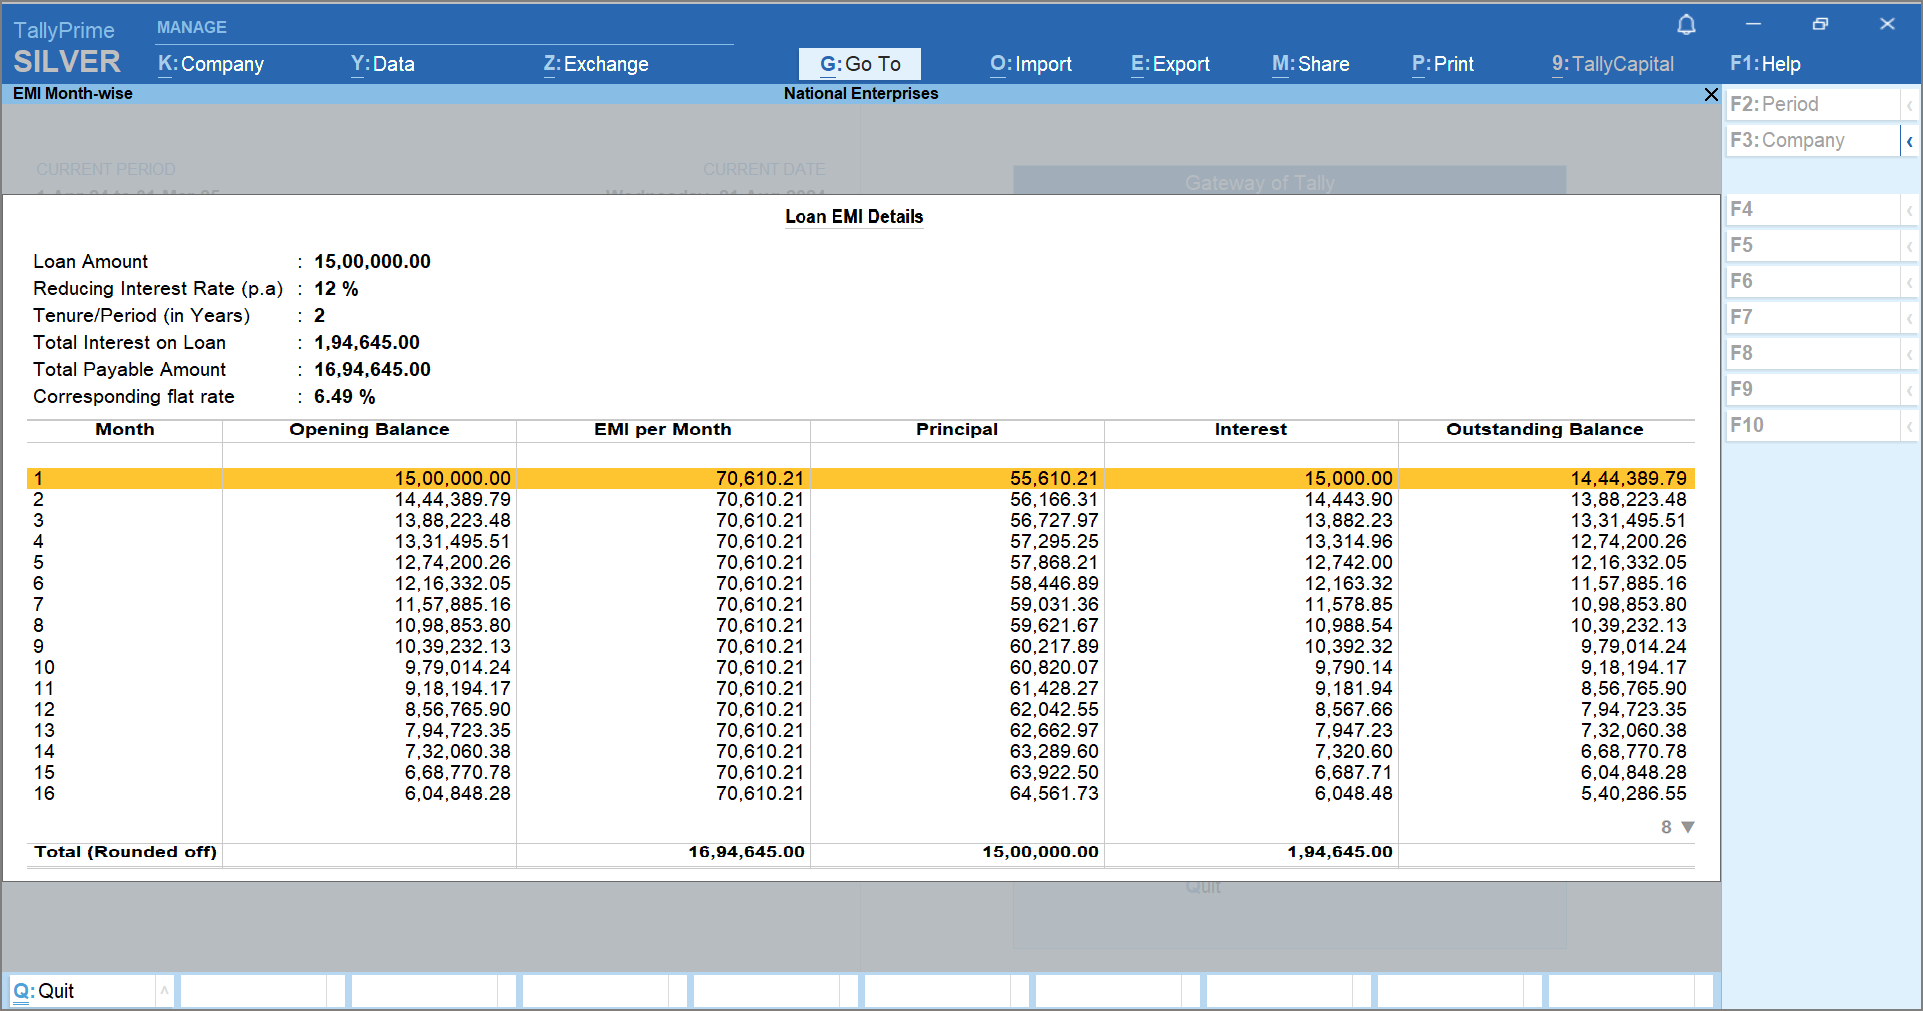
Once you have entered all the loan details, you can view the EMI per Month, Total Interest on Loan, Total Payable Amount, and Corresponding Flat Rate.
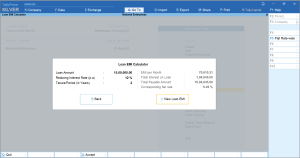
- Press Alt+V or click View Loan EMI to view the Loan EMI Details month-wise.


You can view the EMI per month, along with the Principal, Interest, and Outstanding Balance.
Connectivity Error
In case you are getting the connectivity error while using the TallyCapital Plug-In, add the URL fsbackend.tallysolutions.com Windows Proxy or Firewall Exceptions to seamlessly avail the services of TallyCapital. To learn how to add URLs to the exceptions list, refer to the topic Add IP Addresses, URLs, and Hostnames to Windows Proxy or Firewall Exceptions List.


