One-Time Setup for e-Way Bill
e-Way Bill in TallyPrime is a delightfully smooth experience that will help you generate e-Way Bills for your business, in the course of your regular invoicing. Getting started with e-Way Bill is also equally easy! You only have to register on the e-Way Bill portal.
Create e-Way Bill Profile on the Portal
To get started with e-Way Bill, you have to first register your business on the e-Way Bill portal, and then create an API user profile by selecting Tally India Pvt Ltd as your GSP.
Enable e-Way Bill in TallyPrime
The second step in your e-Way Bill journey consists in enabling the e-Way Bill facility in TallyPrime. You only have to go to the Company features and configure the e-Way Bill options. That’s it! You are now ready to generate e-Way Bills for invoices through TallyPrime.
Create e-Way Bill Profile on the Portal
To get started with e-Way Bill, you have to first register your business on the e-Way Bill portal, and then create an API user profile by selecting Tally India Pvt Ltd as your GSP.
Register on e-Way Bill portal
- Open the e-Way Bill portal, and click Registration > e-Way Bill Registration.

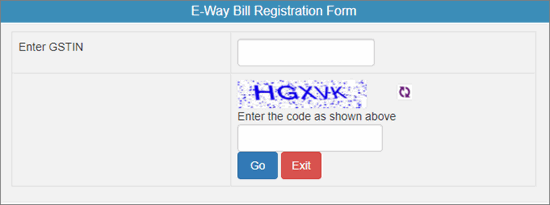
- Enter the GSTIN of your business in the following e-Way Bill Registration Form, followed by the CAPTCHA code, and click Go.
The business details will appear as per the GSTIN entered.
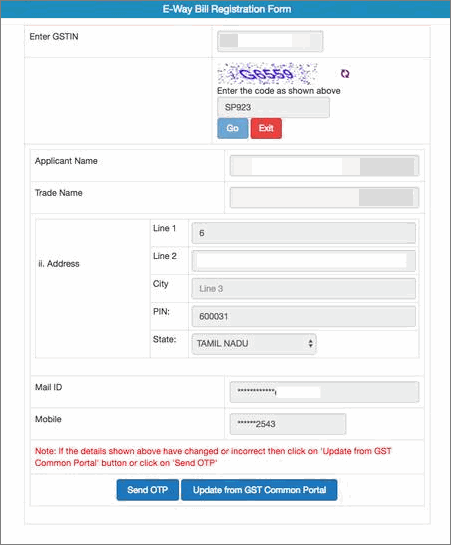
- Click Send OTP to verify the details.
If you want to update any details, then click Update from GST Common Portal. The latest data will be fetched from the GST portal.
- Enter the code received on your registered mobile number, and click Verify OTP.
After verifying the OTP, you will have to enter a username and password to create your login credentials.
Create API User Profile
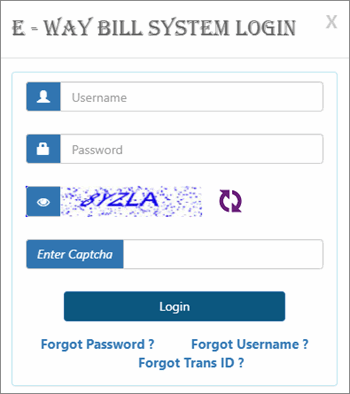
- Open the e-Way Bill portal, and click Login.
- Log in with the username and password created earlier.
- Click Registration > For GSP.
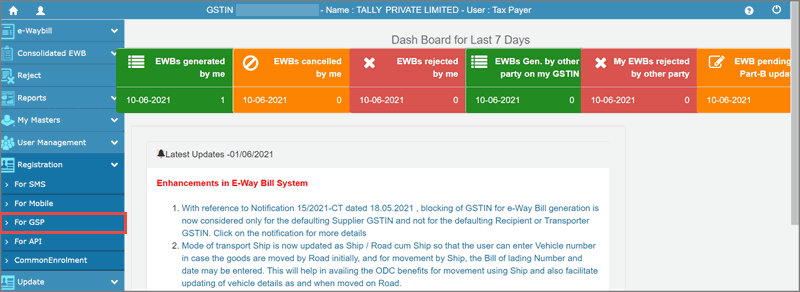
The following screen appears, where the e-mail ID and mobile number will be prefilled.
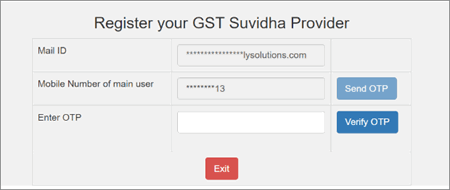
- Click Send OTP. An OTP will be sent to the registered mobile number.
- Enter the OTP and click Verify OTP.
Once the OTP is verified, the following screen appears, where you can add your preferred GSP.

- Select Add/New. The following screen appears.
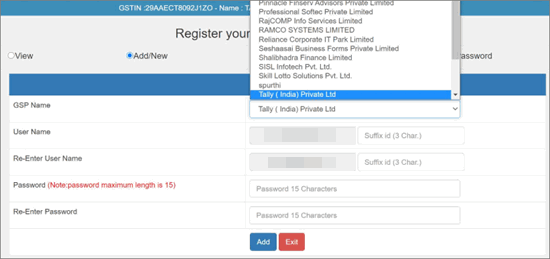
- Select Tally (India) Private Limited IPL under GSP Name.
- Enter your preferred username and password, and click Add to save the details.
The API user credential is different from your e-Way Bill credential.
A user profile will be created with Tally (India) Private Ltd as the GSP. You have to use these API credentials in TallyPrime to log in to the e-Way Bill portal and perform online e-Way Bill-related activities from TallyPrime.
Enable e-Way Bill in TallyPrime
To enjoy the benefits of e-Way Bill in TallyPrime, you have to enable the e-Way Bill facility in your company features.
- Press F11 and set Enable Goods and Services (GST) to Yes. The GST Details screen opens.
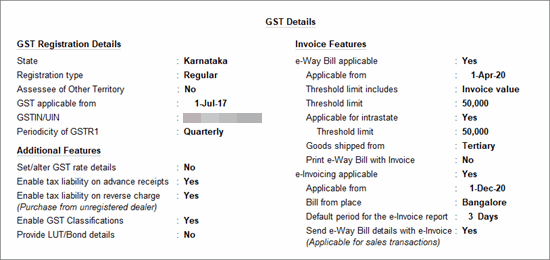
If you are using the multiple GST registrations feature of TallyPrime Release 3.0 or later releases, then the GST Registration screen appears.
Select the GST Registration for which you want to enable e-Invoicing and press Enter. - Set the option e-Way Bill applicable to Yes. You will find options to set the date of applicability, threshold limit, and so on. You also have the option to generate e-Way Bill details along with the e-invoice, if required.
- Set the required details and accept the screen. As always, you can press Ctrl+A to save the details.
To know how to generate e-Way Bill and perform other e-Way Bill activities, refer to the e-Way Bill in TallyPrime topic.


