
Manage User Access and Account Settings
If you have multiple users working on the same company data, TallyPrime Cloud Access allows you to manage user access flexibly and efficiently. You can easily add or remove users based on your business needs, and toggle users between active and inactive status as required.
For instance, if your subscription plan supports a maximum of four users accessing TallyPrime from four different computers simultaneously, you can still create up to six user accounts. At any given time, any four of those six users can be made active to access the virtual machines, while the remaining users stay inactive until needed.
Add & Edit Users
-
On the Computer & User Management portal, under Action against the account name, click the ellipse sign (…), and select Settings > Manage Users.
The Manage Users screen appears.
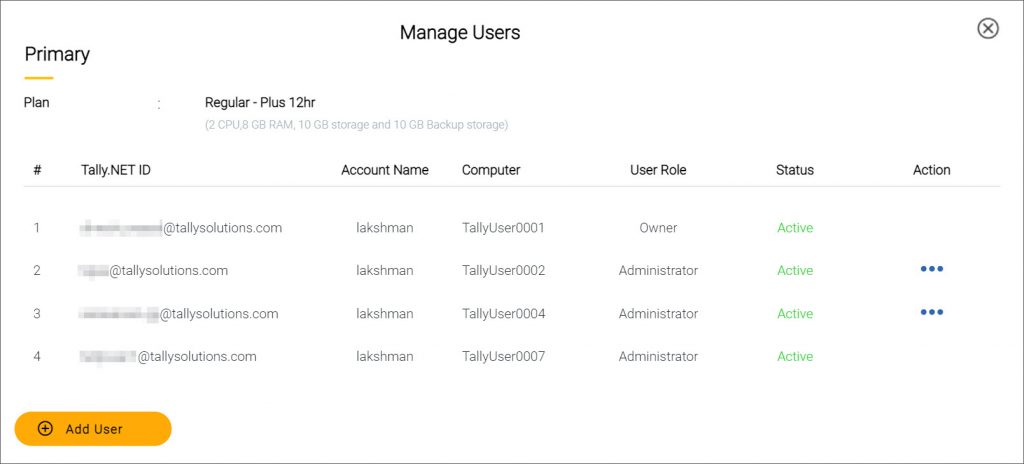
- Click Add User.
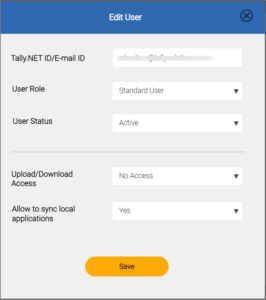
The Edit User screen appears.
-
Enter the following details:
-
Tally.NET ID/E-mail ID – By default, it lists all the Tally.NET ID linked to your account ID. Select an existing Tally.NET ID or enter a valid e-mail ID of a user. If the e-mail ID is not already registered as Tally.NET ID, on adding the user, the e-mail ID is automatically registered as a Tally.NET ID.
-
User Role – You can add a user as a Standard User or Administrator.
-
User Status – Set the user as Active or Inactive, depending on the need. You can edit the status anytime you want to.
-
- Provide access to upload or download files and folders, if needed.
The permissions to Upload/Download Access and Allow to sync local applications can only be given by an owner.
-
Set Upload/Download Access to Full Access.
-
- If you have enabled the option to sync with local application on the portal, you can allow this user to use the sync option.
-
Set Allow to sync local applications to Yes.
-
A message will be displayed allowing the person to sync with local applications. Changes will be effective once you re-login the Virtual Machine.
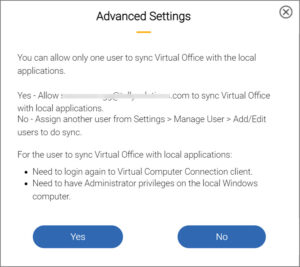
Suppose you want to add a user and there is an existing user who has already been given access to sync with local applications,
A message is displayed stating that only one user is allowed to sync Virtual Office with local applications.
-
Select Yes to allow the user to sync with local applications.
-
Select No and assign another user to do the sync from.
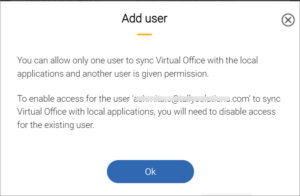
If one or more users already have access to sync with local applications, a message is displayed on the Add User screen. To enable the sync for a new user, the sync access for existing users must be disabled.
An owner’s account cannot be edited or deleted. The accounts of an admin or a standard user can however be edited and deleted by the owner.
The settings can be edited by the owner if they want to add a standard user or an admin and give the sync permission.
On adding a user, a computer is automatically assigned based on the user details you have provided and an e-mail with the login credentials, including the Secure PIN, are sent to the user.
You can edit the details of an existing user anytime you need.
-
On the Manage Users screen, click the ellipse sign (…) under Action, and select Edit.
-
Change the details as needed, and then click Save.
You can choose to assign the same computer to a different user by providing the Tally.NET ID or e-mail ID of a different user.
Delete Users
-
On the Computer & User Management portal, under Action against the account name, click the ellipse sign (…), and select Settings > Manage Users.
The Manage Users screen appears with the list of existing users. -
Click the ellipse sign (…) under Action adjacent to an existing user and select Delete.
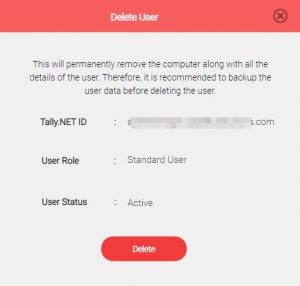
The Delete User screen appears.
-
Confirm the details displayed on the screen, and then click Delete.
The details of the user along with the user data gets permanently deleted from the Virtual Computer Connection.
Manage Account & Users
The Computer & User Management portal provides quick access to the Control Centre for managing your Tally.NET account. In addition, you can change the Secure PIN for the Virtual Computer Connection client from the portal.
Open Control Centre | Tally.NET Account
-
On the homepage, under Manage Account and Users, click Tally.NET Account.
It opens the Control Centre where you can manage your Tally.NET Account and other activities related to the account.
Change Secure PIN
- On the homepage, under Manage Account and Users, click Change Secure PIN.
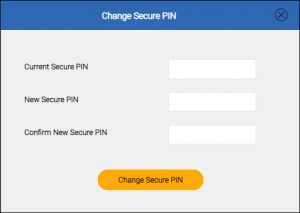
The Change Secure PIN screen appears.
-
Enter the Current Secure PIN, New Secure PIN, and Confirm New Secure PIN.
- Click Change Secure PIN.
The Secure PIN of your account gets changed.
You can use the new Secure PIN while logging in to the Computer & User Management portal.
Access to Accounts & Users Management Portal
While you are using the Virtual Computer Connection, you may require managing your virtual computer and users associated with your virtual machine. Once you login to the portal, you can perform various activities, such as taking data backup, downloading data, adding or editing users, updating TallyPrime application, and so on.
To open the Computer & User Management portal
-
Under Manage Account and Users, click Computer & User Management.
-
Login to the portal page by providing your user credentials.
To open the Control Centre portal for managing your Tally.NET account
-
Under Manage Account and Users, click Tally.NET Account.
-
Login to the portal page by providing your user credentials.
You can add multiple users to your office account. The number of active users at a given time will depend on your plan. You can also access the Control Centre portal to manage your Tally.NET accounts and users.
Connection Settings
Depending on your business practices, you may need to follow certain network protocols – especially the port and proxy settings for your Internet connection.
-
Click Connection Settings.
-
Configure the network proxy or network transport protocol, as applicable to your business.
-
Click Save to save the changes.
About
Click this option to see the following information:
-
Version of the Virtual Computer Connection
-
Version of the virtual computer
-
Terms of license agreement


