Export & Import Entire Data (Masters & Transactions) to a new Company
For TallyPrime 3.0 & earlier
In TallyPrime, you can export and import the entire data to a newly created company in Excel, XML, or JSON (Data Exchange) formats. You have to export the masters first and then the transactions. Ensure that company features (F11) of the exporting and the importing company are the same.
The price lists of the old company mentioned in F11 features can be imported and exported in a similar manner to the new company.
Export Masters
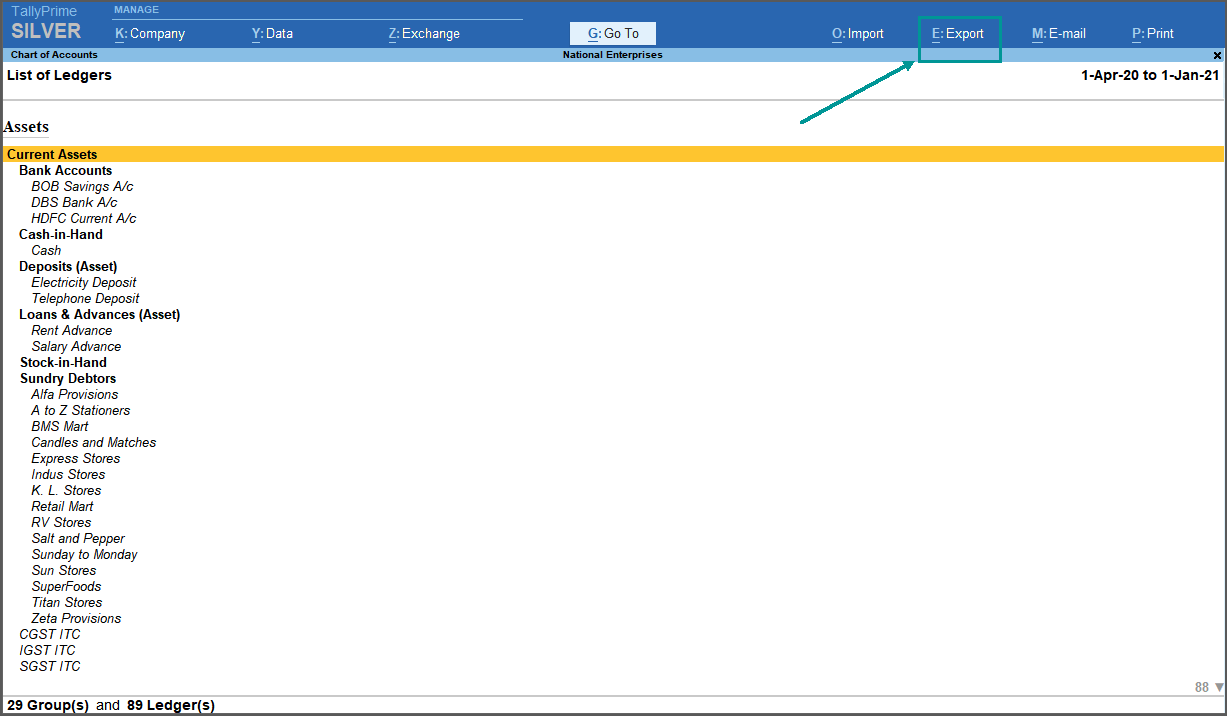
- Press Alt+G (Go to) > type or select List of Accounts > select Ledgers and press Enter.
Alternatively, Gateway of Tally > Chart of Accounts > Ledgers.
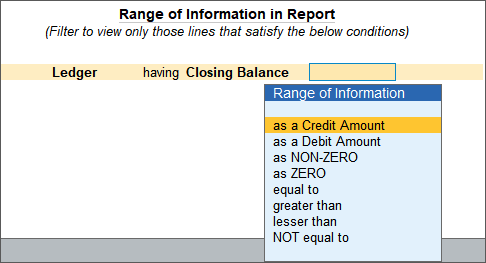
- Press Alt+F12 (Range) to select the masters you want to export. Skip this step if you want to export all the masters.
- Press Alt+E (Export) > press Enter on Current.
- In the Export screen, press C (Configure) > select the File Format as XML (Data Interchange)
- The Folder Path will be set to C:Program FilesTallyPrime. You can change this, if needed.
- The File Name will be set to Master.XML. You can change this, if needed.
- Set the Type of Master to All Masters.
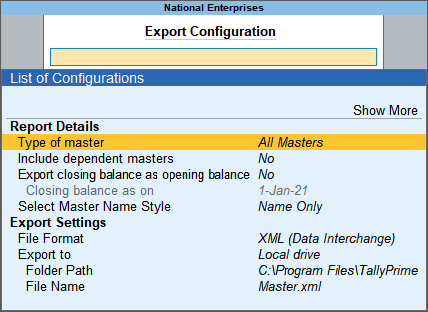
- Press Esc to return to the Export screen.
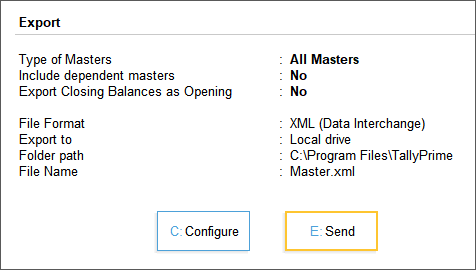
- Press E (Send) to export.
Export Transactions
- Press Alt+G (Go to) > type or select Day Book.
Alternatively, Gateway of Tally > Day Book. - Press Alt+F2 (Period) and provide the required From and To dates.
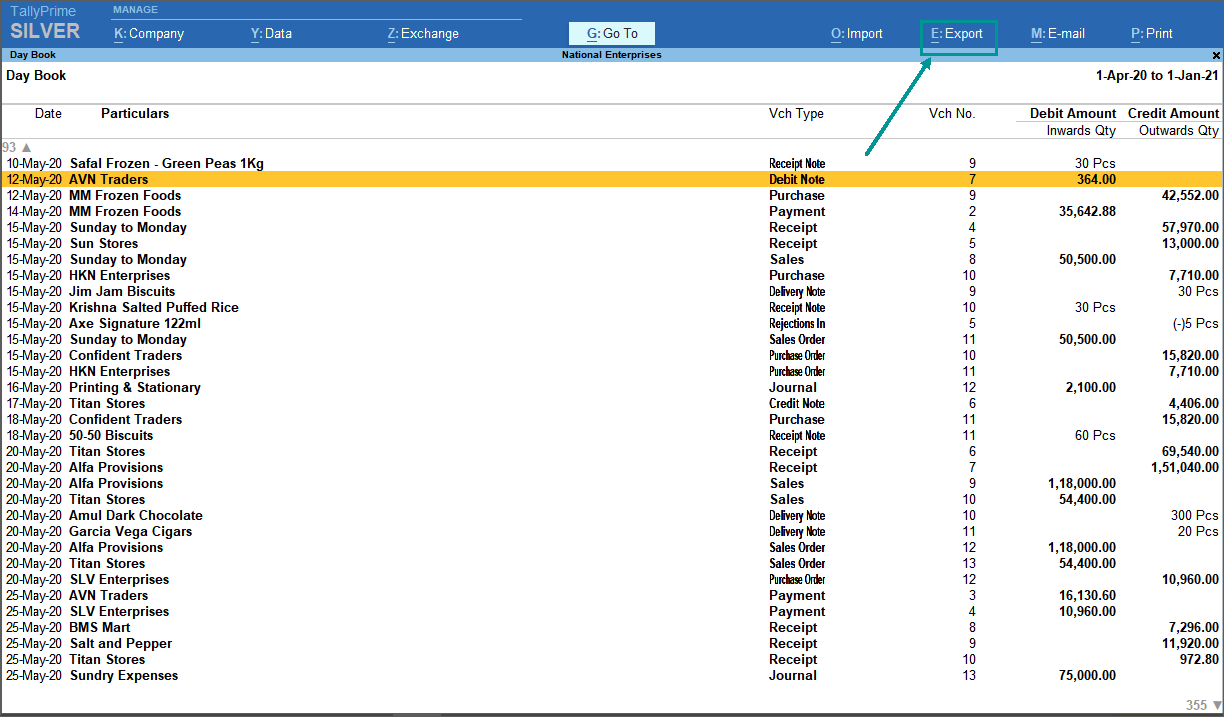
- Press Alt+F12 (Range) to select the masters you want to export. Skip this step if you want to export all the transactions.

- Press Alt+E (Export) > press Enter on Current.
- In the Export screen, press C (Configure).
- Select Narration and press Enter to set it to Yes. Similarly, set the required options to Yes.
- Set the Type of Vouchers to All Vouchers.
- Select the File Format as XML (Data Interchange).
- The Folder Path will be set to C:Program FilesTallyPrime. You can change this, if needed.
- The File Name will be set to DayBook.xml. You can change this, if needed.
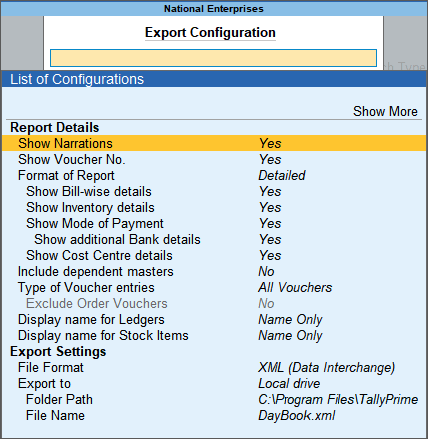
- Press Esc to return to the Export screen.
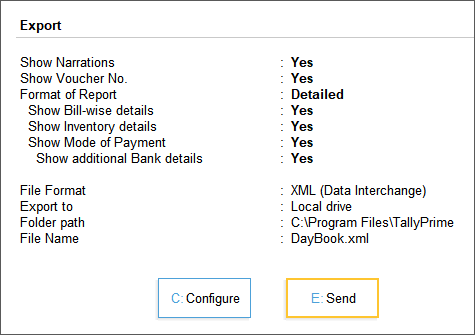
- Press E (Send) to export.
Import Masters
- Select the required company.
- Press Alt+O (Import) > Masters.
- In File to import (XML) select the filename containing the exported masters.
- In Behaviour of import if masters already exists, select Modify with new data.
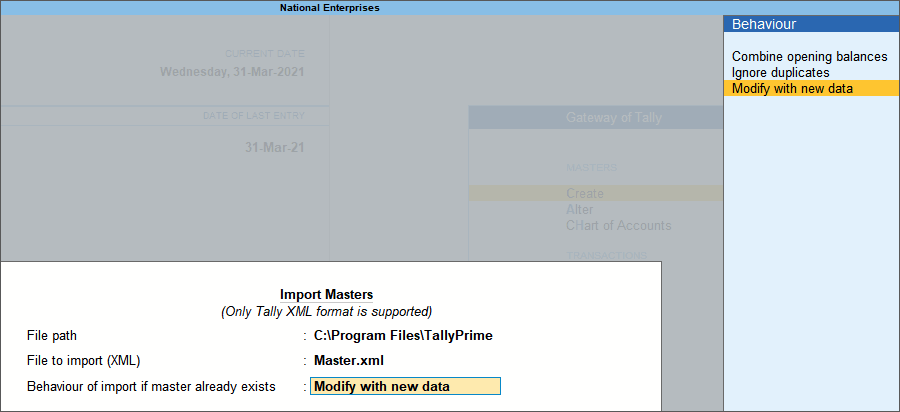
- Press Enter to import the masters.
- Once the import process is complete, compare the statistics of both importing and exporting company.
- To view these details, press Alt+G (Go To) > type or select Statistics > and press Enter.
Import Vouchers
- Select the required company.
- Press Alt+O (Import) > Transactions.
- In File to import (XML) select the filename containing the exported transactions.
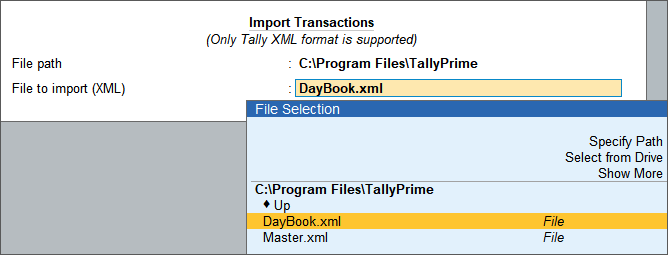
- Press Enter to import the transactions.
- Once the import process is complete, compare the statistics of both importing and exporting company.
- To view these details, press Alt+G (Go To) > type or select Statistics > and press Enter.
Is this information useful?
YesNo