
Approve User Access and Manage User Rights to TallyDrive
TallyDrive User Rights FAQ | Errors and Resolutions
As the admin, you can easily approve and manage user access to TallyDrive services, which is essential when multiple users work under the same license. When a user requests TallyDrive access, you receive an email notification. You can then approve the request by signing in to the Tally Solutions Customer Portal. The portal also allows you to manage specific rights for users; for example, granting backup rights but restricting deletion or restoration.
You can also initiate and complete the approval directly in TallyPrime by entering the user’s Tally.NET ID and approving it with your admin credentials, after which the user can immediately use TallyDrive services.
Approve User Access to TallyDrive
As an admin, you can easily approve user access to TallyDrive services from the Tally Solutions Customer Portal. Also, TallyPrime gives you the flexibility to initiate and complete the approval process directly in TallyPrime by entering the Tally.NET ID that requires approval.
Approve User Access from Portal
Once the user initiates the approval to access TallyDrive services in TallyPrime, you will receive a notification via e-mail to approve. You can log in to the Tally Solutions Customer Portal to approve the user.
![]()
-
Log in to the Tally Solutions Customer Portal.
-
Click CONTROL CENTRE > User Management > Manage Users.
-
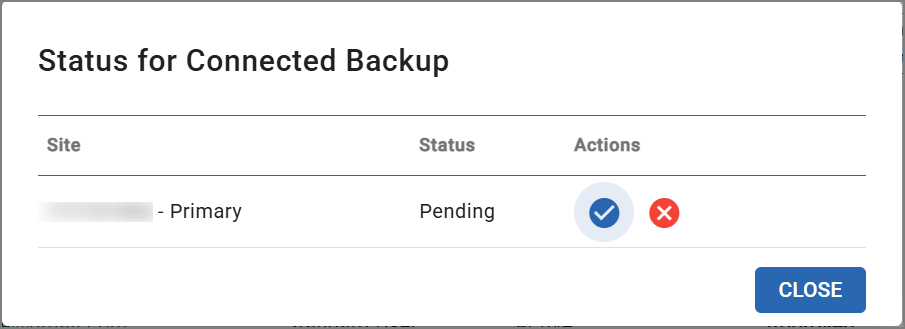
Under Connected Backup User Status, click Pending on the required user’s row.
-
Click the tick mark icon (✓).
-
Click OK.
The Tally.NET ID will be approved to use the TallyDrive services in TallyPrime.
As an admin you can also create a new Tally.NET ID and approve it for using TallyDrive services directly from the portal.
Initiate and Approve User Access from TallyPrime
As an admin, you can initiate and complete the approval process directly in TallyPrime by entering the Tally.NET ID that requires approval to use TallyDrive Services. You can also create an e-mail id as a Tally.NET ID and approve it to access TallyDrive services.
![]()
-
Log In to TallyDrive.
-
Press Alt+Y (Data) > Backup & Restore > TallyDrive Login & Logout.
-
Enter the Tally.NET ID that requires approval to access TallyDrive services.
You will be prompted to enable TallyDrive services for the entered Tally.NET ID, or, if the ID is new, to create it as a Tally.NET ID and approve the services.
-
-
Press Y or click Yes to initiate the approval flow.
-
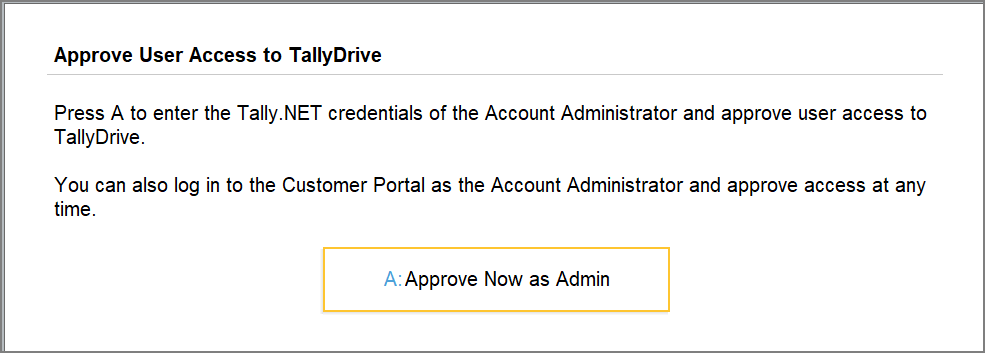
Press A to Approve as Admin.
-
Enter the Tally.NET ID and Password of the Account Administrator or owner for approval.
The Tally.NET ID will be approved to use the TallyDrive services in TallyPrime.
Initiate approval as a non-admin
As a standard user, with a Tally.NET ID but unapproved for TallyDrive services, you can initiate approval while taking backup or scheduling backup. While saving the backup or the backup schedule, on the log in to TallyDrive screen, you can enter your Tally.NET ID and initiate approval. Once approved by the admin, you will be able to use TallyDrive services.
Manage User Rights for TallyDrive
As an admin, you can manage TallyDrive access rights for any user through the User Management section in the Customer Portal. For example, you may want to give backup rights to some users but restrict them from deleting or restoring backups. In all such cases, you can easily manage these permissions from the Tally Solutions Customer Portal.
You can access the User Management page directly from the TallyDrive Management report in TallyPrime.
-
As the license administrator, regularly review which Tally.NET users have permission to back up, restore, download, or delete data from TallyDrive.
-
Grant access based on role and responsibility and limit backup and restore rights to trusted users only.
-
Periodically audit user permissions by removing access for inactive or unverified users to prevent unauthorized operations.
![]()
-
Press Alt+Y (Data) > Backup & Restore > Manage TallyDrive > F7 (Manage User Rights).
Or, log in to the Tally Solutions Customer Portal. -
Click CONTROL CENTRE > User Management > Manage Users.
-
Click the Tally.NET ID for which you want to manage the permissions.
-
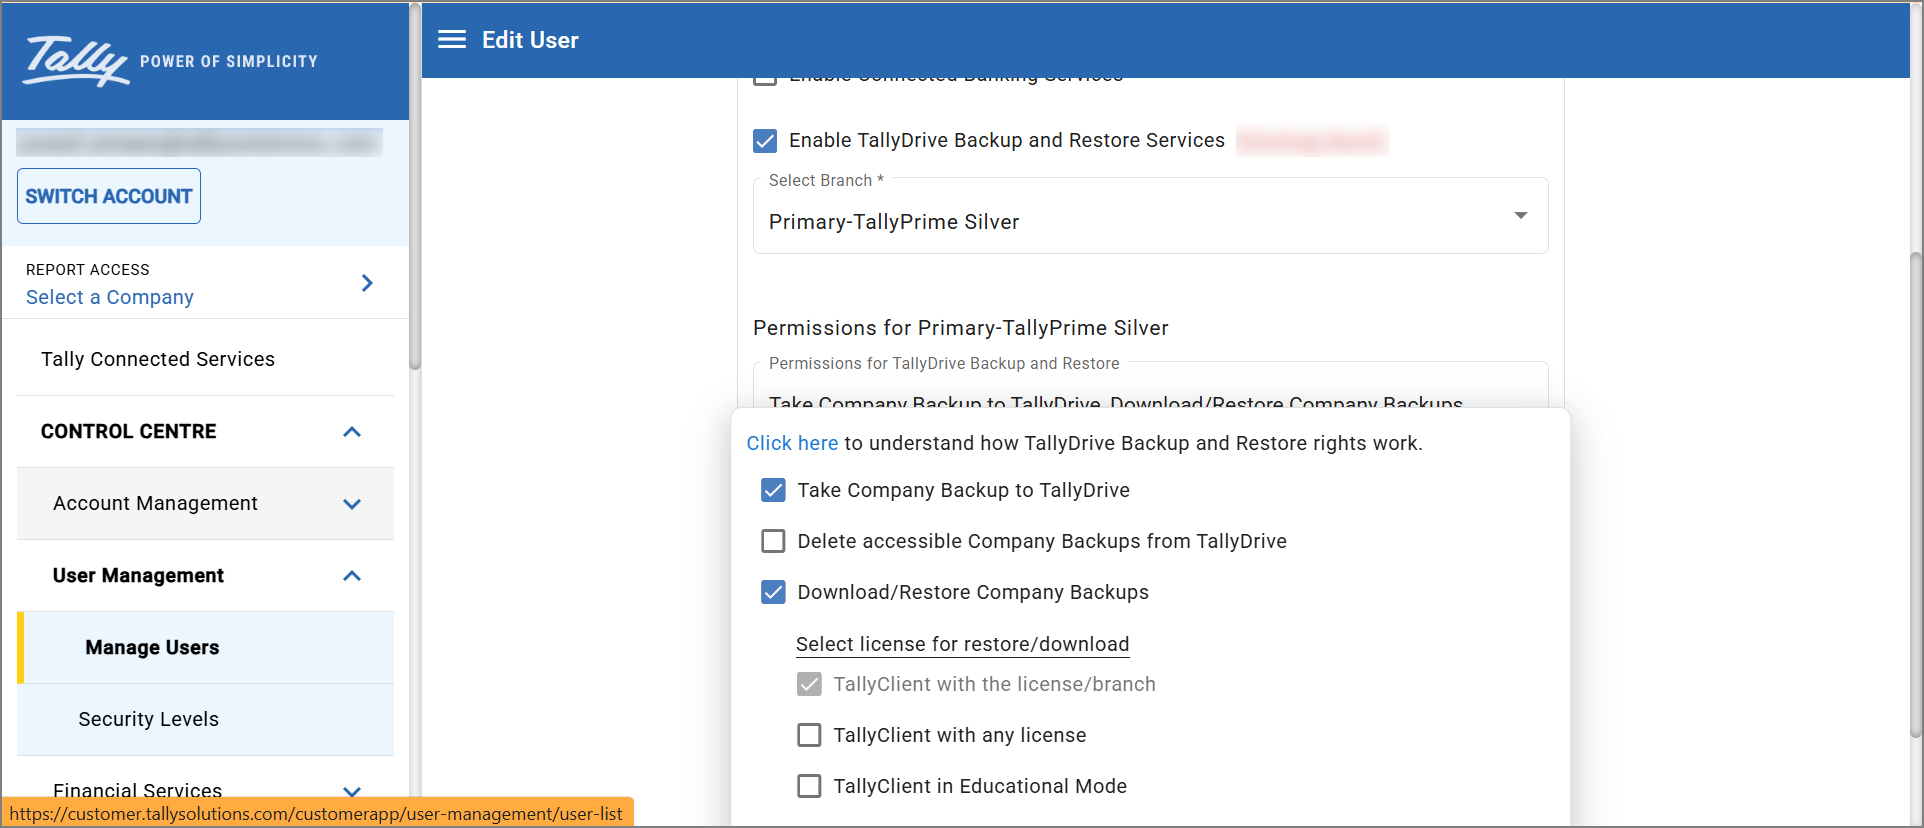
For TallyDrive services, click the dropdown under Permissions for <Branch name>.
Ensure that checkbox for Enable TallyDrive Backup and Restore Services and the required branch are selected.
-
Manage TallyDrive user rights as required.
-
Take backup on TallyDrive – Enable this option to allow the user to take backup on TallyDrive.
-
Delete backup from TallyDrive – Enable this option to allow the user to delete backup from TallyDrive.
-
Restore backup from TallyDrive – Enable this option to allow the user to restore backup from TallyDrive.
-
Select license for restore
-
TallyPrime with the current license/branch – Enable this option to allow the user to restore backup only from Tally client with the license for which the permissions are given.
-
TallyPrime with any license – Enable this option to allow the user to restore backup from Tally client with any license.
-
TallyPrime in Educational Mode – Enable this option to allow the user to restore backup from Tally client even in Educational mode.
-
-
Select backups to restore
-
Created by current user – Enable this option to allow the user to restore backup created only by the current user.
-
Created by any users – Enable this option to allow the user to restore backup created by any users.
-
-
-
Once configured, the user will be able to use TallyDrive services as per the permissions.


