
Sync TallyPrime with Local Applications
If you’re an existing TallyPrime on AWS user, the Sync TallyPrime with Local Applications feature is supported. This feature is currently not available if you are using TallyPrime Cloud Access.
At times, you may require local applications to integrate with TallyPrime for specific business operations. TallyPrime, powered by AWS, now supports the integration of third-party applications to exchange data as needed. You can enable the Synchronisation feature in the Self Service Portal (SSP) to establish a sync between your local applications and the Virtual Office. To sync with local applications, install the Virtual Computer Connection Client version 1.2 or higher on your computer.
Enable Sync with Local Applications in the Self Service Portal
Once you login to the Self Service Portal (SSP),
-
Click the ellipses under Actions > Settings > Advanced Settings.
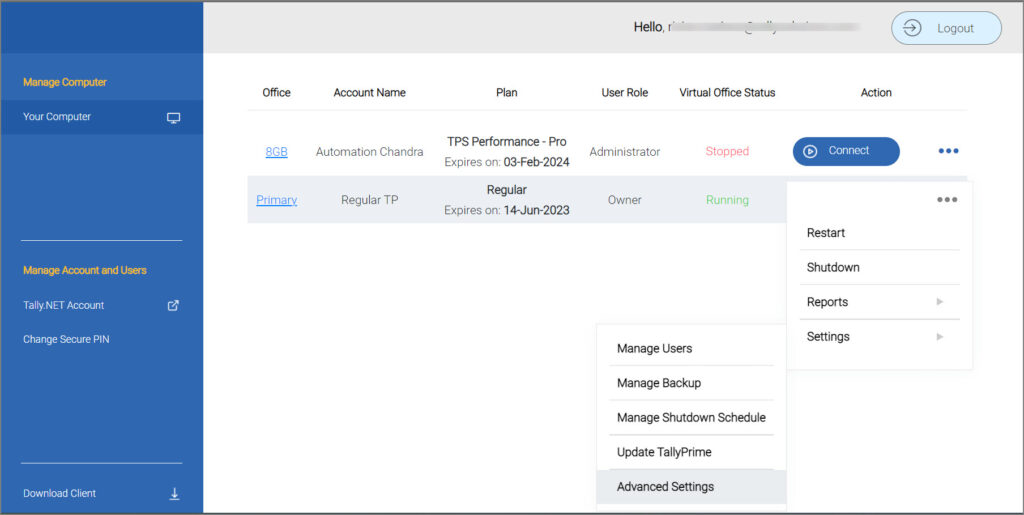
As an Owner, you can give the permission to sync with local applications. - Set Allow synchronising Virtual Office with local applications to Yes.
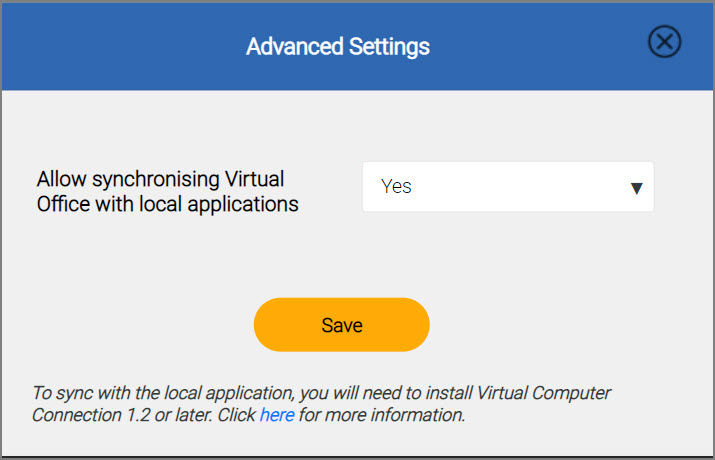
This will allow the current user, to sync with local applications, when needed. On saving this setting, the following message appears:
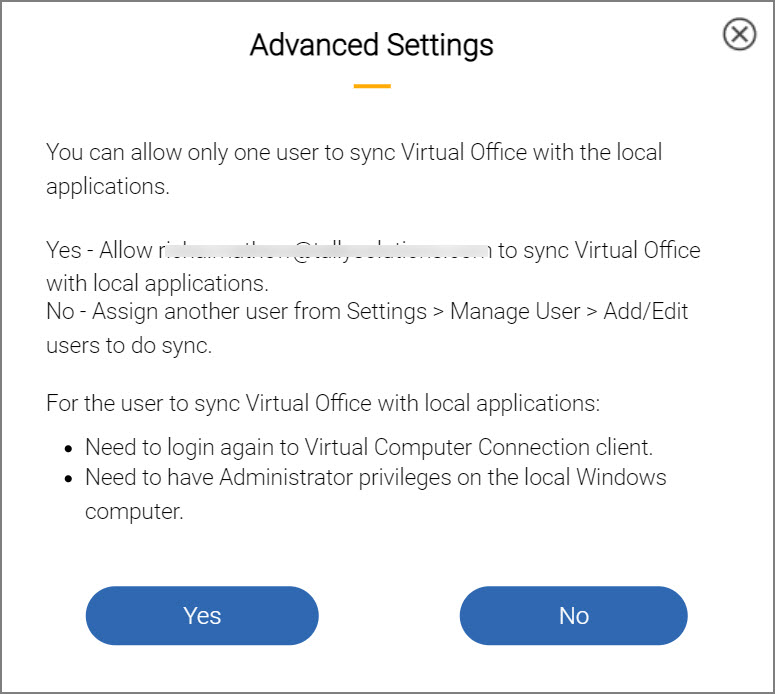
- In the Advanced Settings screen,
-
Select Yes, to allow the current user account to sync with local applications.
You need to re-login to the latest Virtual Computer Connection Client for the changes to take effect. You will also need to have Administrator privileges on the local Windows Computer to start the sync process. - Select No, if you do not want to allow the current user to proceed with the sync process.
However, at any given time you can give permission to other users to sync with local applications through Manage Users.- Go to Settings > Manage Users.
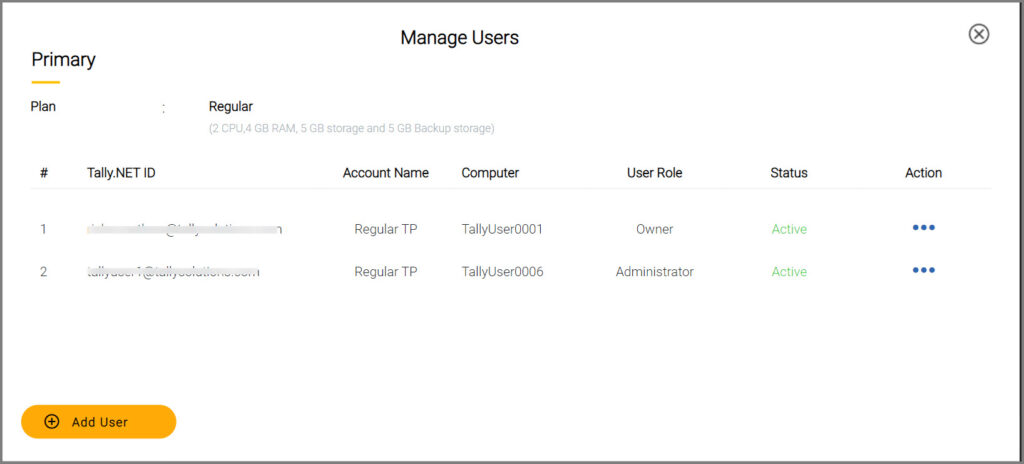
- On the Manage Users screen, select Add User.
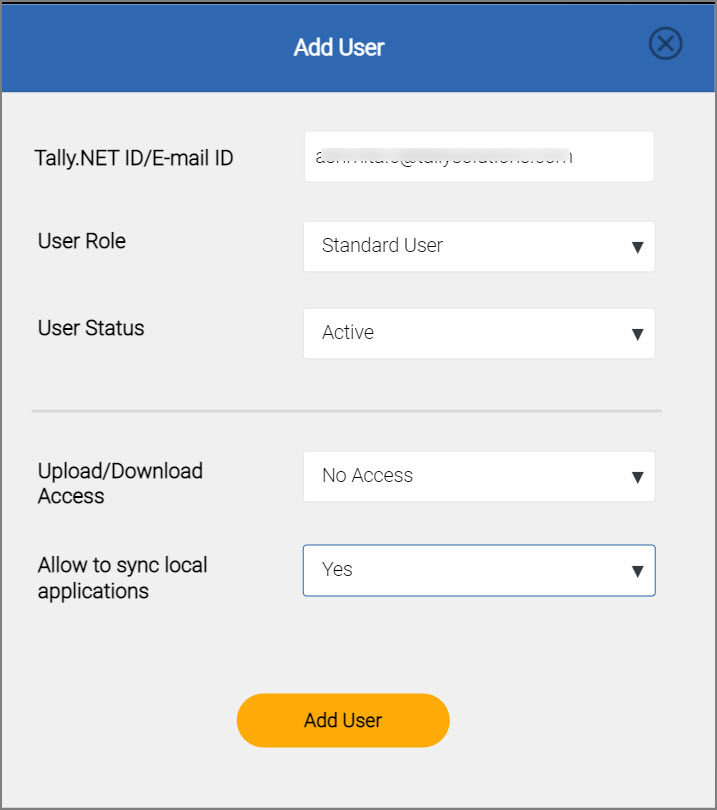
- In the Add User screen,
-
Provide the necessary user details.
-
Set Allow to sync local applications to Yes and click Add User.
-
- Go to Settings > Manage Users.
-
Install the Latest Virtual Computer Connection (VCC) Client
You will be able to use the Sync with Local Applications feature only if Virtual Computer Connection Client 1.2 or above is installed in the Virtual Computer. If you are an existing user, click on Update Client. For new users, clicking on Download Client will initiate the installation process.
Sync with Local Application in the VCC Client
You can proceed with the Synchronisation process when:
-
You have enabled Allow synchronising Virtual Office with local applications.
-
You have the permission to sync with local applications in the SSP.
-
You have installed the latest VCC client.
-
You have Administrator privileges on the local Windows Computer.
Now, to sync with local application in the VCC client:
-
Open the VCC using your Tally.NET credentials and Secure PIN.
When the sync permission is enabled and you login to the VCC, two new columns appear in the client.
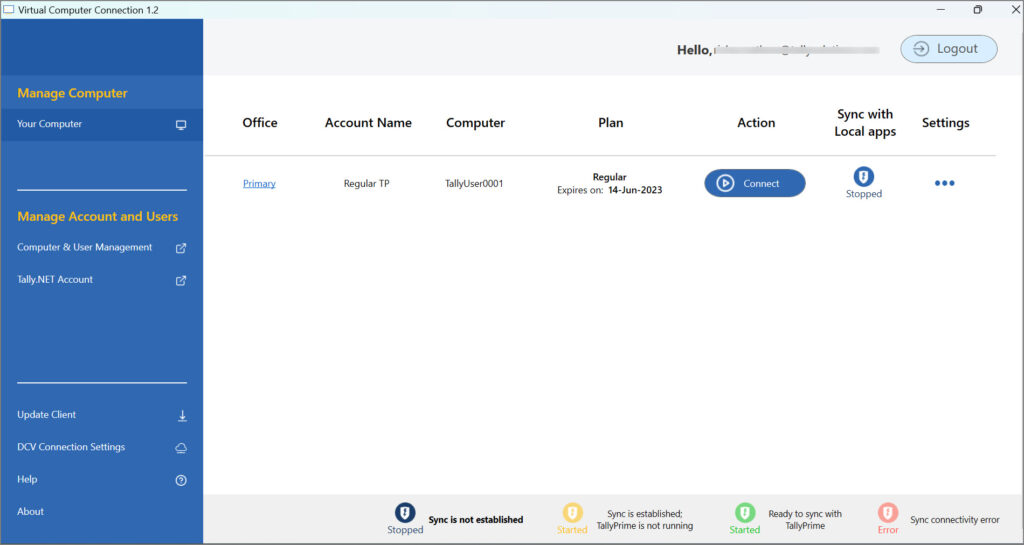
-
The Sync with Local apps column displays the sync status and is in the Stopped (Blue) state by default. This indicates that the sync is not established yet.
- The Settings column displays the options to start the sync automatically and the Sync Connectivity Information.
-
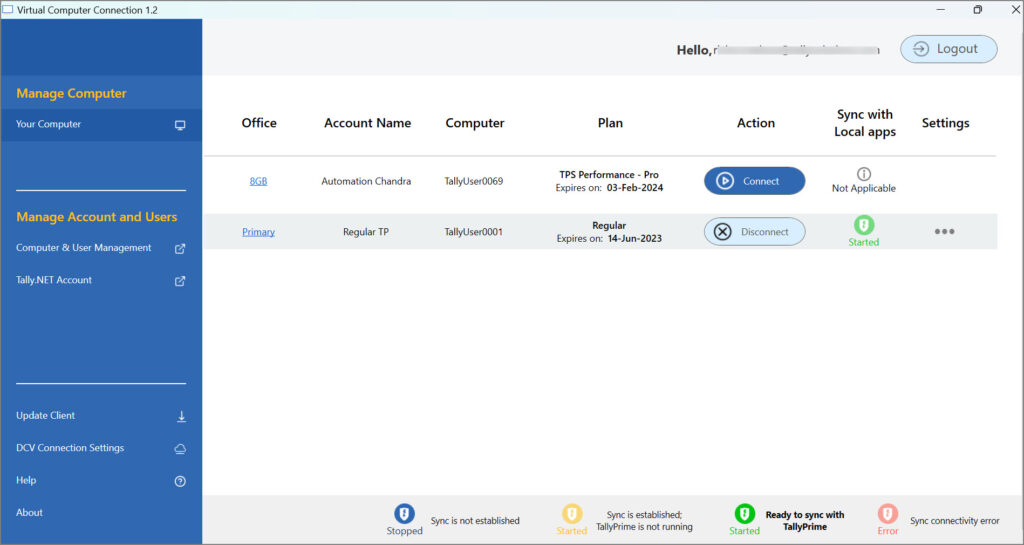
To start sync with local applications, run the TallyPrime application on the Virtual Computer.
-
Click the Stopped button to start the sync. The Sync with Local apps status changes to Started (Yellow). Once you open TallyPrime in the Virtual computer, the Sync with Local apps status changes to Started (Green) indicating that TallyPrime in the Virtual Computer is ready to integrate with third-party applications.
- Check the ODBC connectivity and the port configuration.
- Click Settings > Sync Connectivity Information.
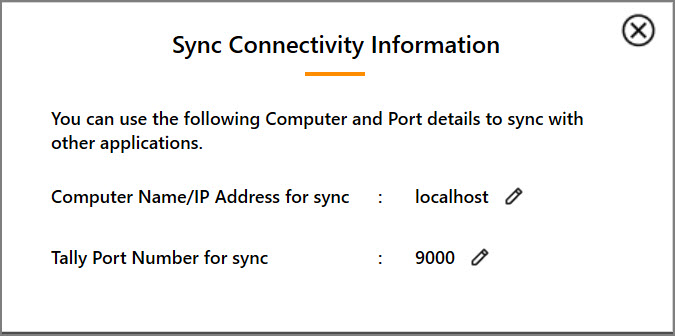
You can use these Computer and port details in your third-party application for integrations. The port number here should be the same as in the TallyPrime in your Virtual Computer. - If you want to update either of the Sync Connectivity Information,
-
Click the edit icon.
-
On the Edit Port Number screen, enter the Tally Port Number for sync.

-
Click Save to save the changes.
-
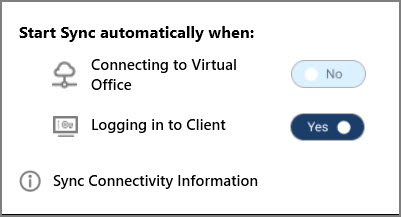
- If you now want to start sync automatically, click Settings again.
-
Set Connecting to Virtual Office as Yes if you want to enable sync when you connect to the Virtual Computer.
-
Set Logging in to Client as Yes if you want to start the sync every time you login to the VCC client.
-
- Click Settings > Sync Connectivity Information.
-
-
Extracting Data from Local Application to TallyPrime on Virtual Computer
-
Open Microsoft Excel on your computer.
-
Click Data > Get External Data > From Other Sources > From Microsoft Query, as shown below:
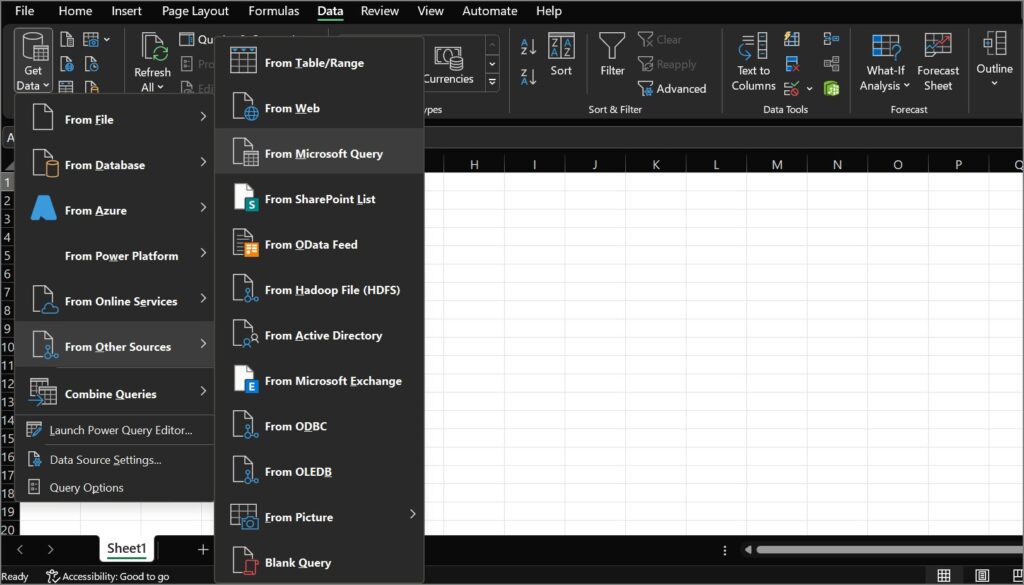
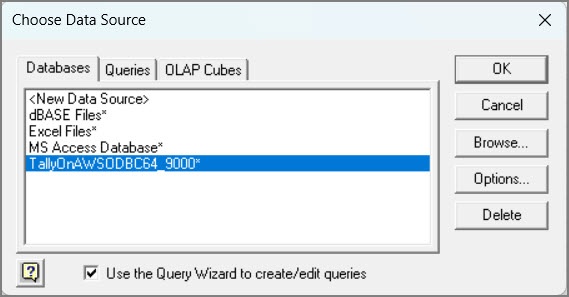
The Choose Data Source screen appears as shown below:
-
Select TallyOnAWSODBC64_9000*, as ODBC is enabled on the server 9000.
-
Click OK. The Query Wizard – Choose Columns screen appears.
-
Click Stock Item and expand the list to select the required fields.
- Click Next. The Query Wizard – Filter Data screen with the column names appears as shown below:
- Click Next. The Query Wizard – Sort Order screen appears as shown below:
-
Select Ascending or Descending for each drop-down list under Sort by, as required.
-
Click Next. The Query Wizard – Finish screen appears as shown below:
-
Select Return Data to Microsoft Excel.
-
Click Finish.
The Import Data screen appears as shown below:
-
Click OK.
The Microsoft Excel sheet with the imported Data appears as shown below:
Similarly, any data can be extracted from TallyPrime by using the Microsoft Excel Query Wizard.
Sync with Local Applications Status
-
Stopped (Blue): The default state where the sync is not established.
-
Started (Yellow): The sync is established but TallyPrime is not running in the Virtual Computer, or the ODBC Port is not configured in Tally.
-
Started (Green): The sync is established, and TallyPrime is running in the Virtual Computer and configured to the ODBC Port.
-
Transition (Grey): Transition of data between local applications and the Virtual Computer. At this stage, this button is not clickable.
-
Error (Red): Either the channel is in error state or if user tried to start the channel while the Virtual Computer is not running.


