
Getting Started with TallyPrime Cloud Access
TallyPrime Cloud Access (TPCA) allows you to run TallyPrime from anywhere, anytime, without the need for a local setup. With a secure Virtual Computer on the cloud, you can easily access your data, collaborate with users, and continue working just like on your desktop.
Follow the steps below to start using TallyPrime Cloud Access.
If you are an existing TallyPrime on AWS user, you will continue with your current features until you are migrated to TPCA. Once migrated, you can enjoy all the benefits of TPCA with the same simplicity you are used to. Stay tuned for updates.
Before You Begin
Ensure the following are in place before you get started:
-
You are using TallyPrime Release 6.0 or above.
-
The TallyPrime Cloud Access Client (TPCA Client) is installed on your system.
-
The Remote Desktop Connection (RDP) is available on your computer.
-
Ensure that your Tally.NET ID, Tally.NET Password, and Secure PIN (shared on your registered email after purchase) are readily available.
System Requirements
Ensure that you meet these system requirements for a smooth experience with TallyPrime Cloud Access.
Software Requirements:
-
Browser: Latest version of Google Chrome (Windows and Mac)
-
Operating System: Windows 7 or later
-
Client Access: Available only Windows OS
Hardware Requirements:
-
Processor: Dual-core, 1 GHz or higher
-
Memory (RAM): At least 4 GB
-
Disk Space: 103 MB for TPCA client and 4.5 GB for .NET Framework
-
Internet: Stable connection, minimum 10 Mbps recommended for best performance
Step 1: Purchase TallyPrime Cloud Access
- Open the Tally Solutions website.
-
Under Product > select TallyPrime Cloud Access.
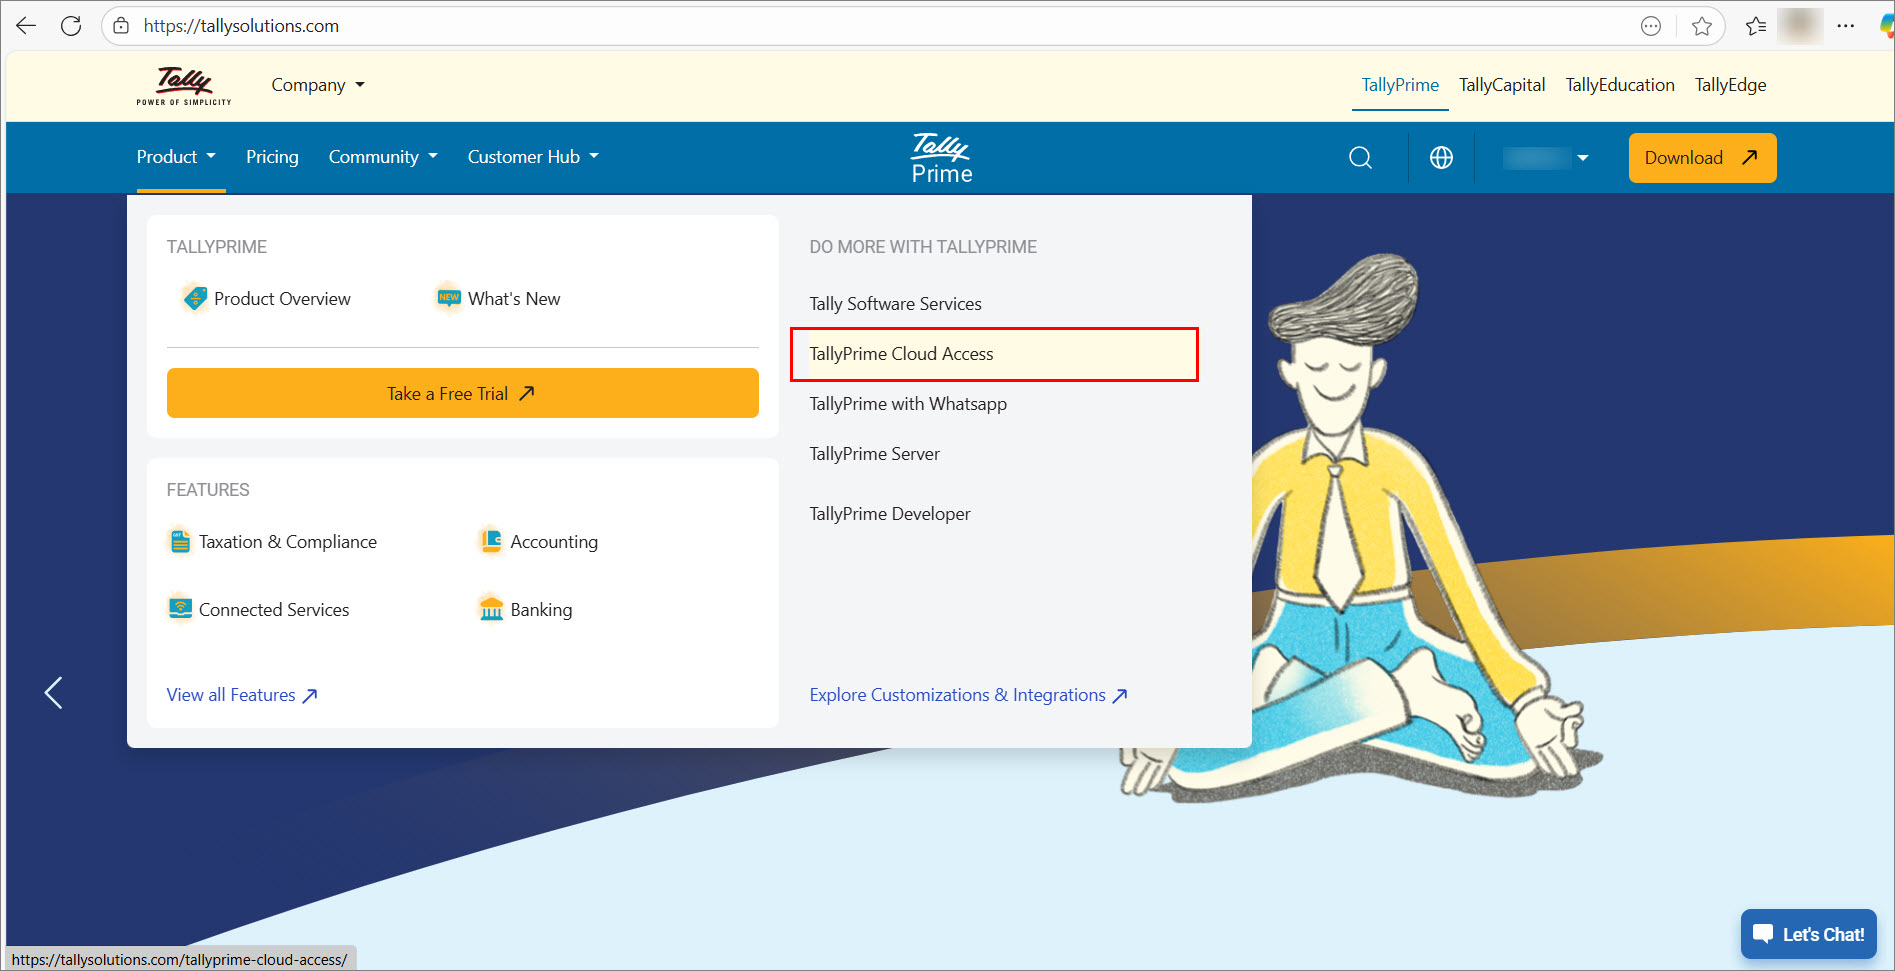
The TallyPrime Cloud Access product page appears.
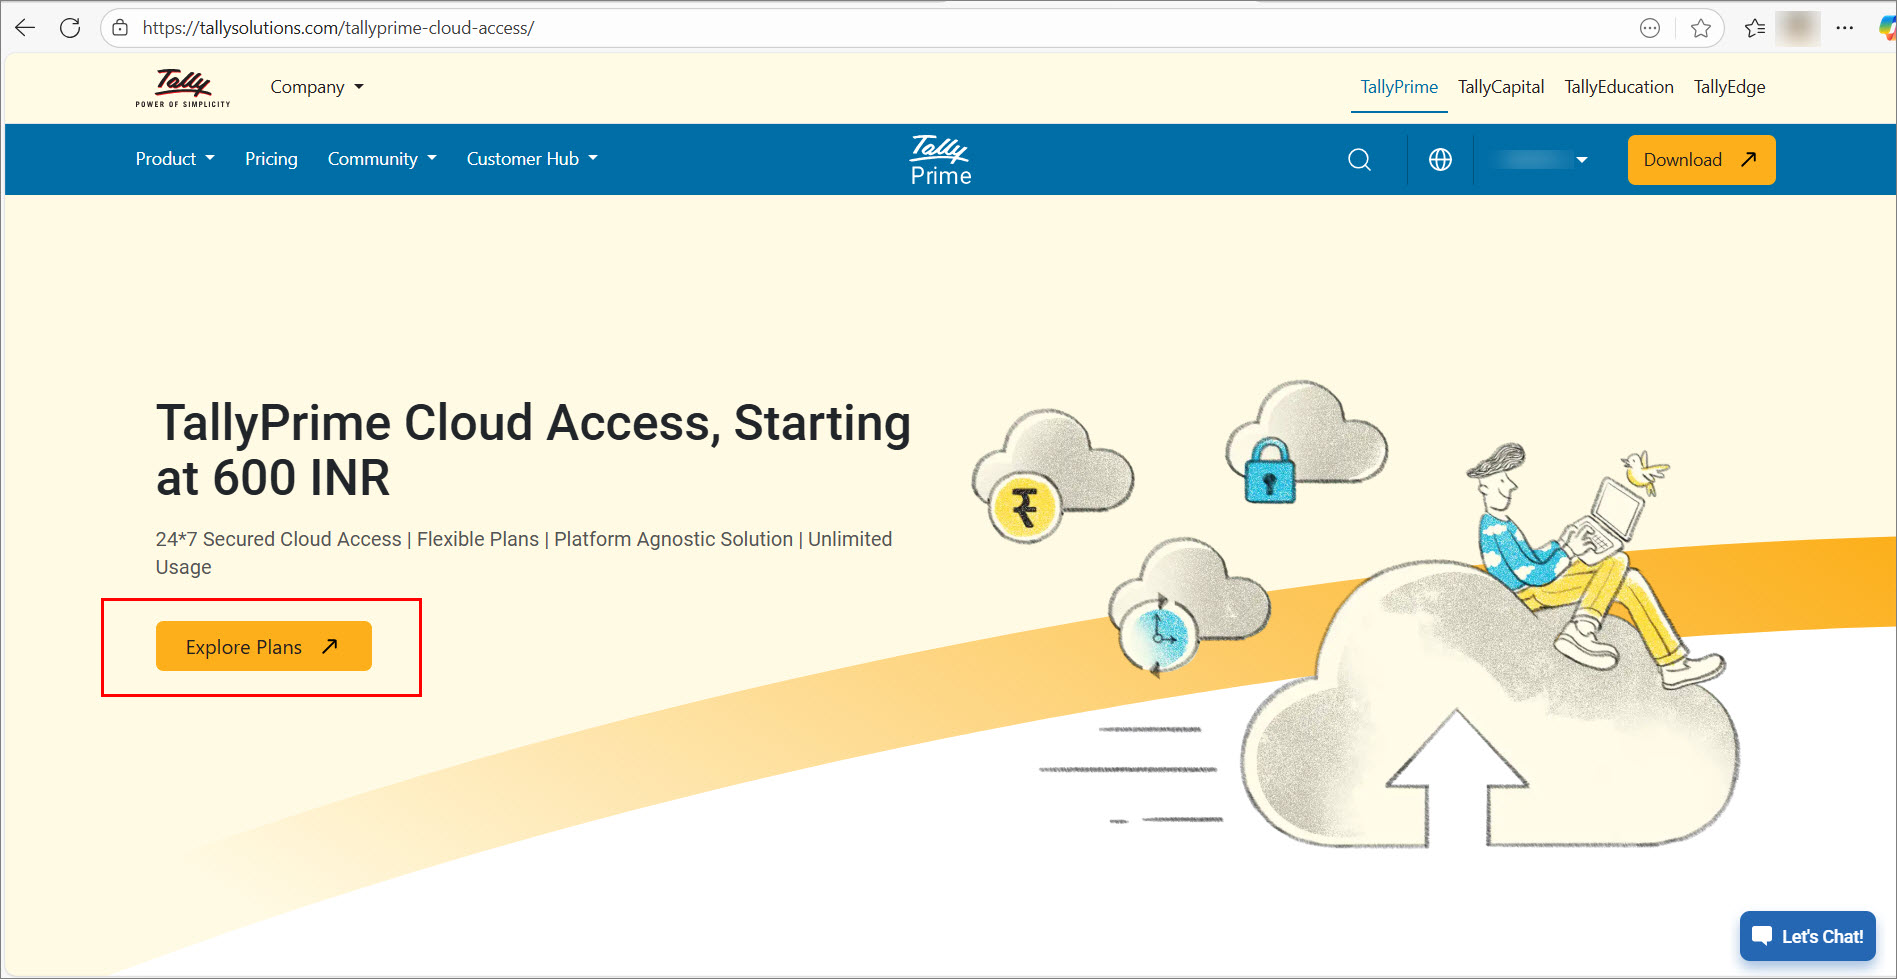
- Click Explore Plans.
You will be directed to the available subscription plans. -
Select the appropriate option for your business and click Buy Now.
Your subscription includes:-
A Virtual Computer that allows you to access TallyPrime on the cloud.
-
Cloud storage for your Data and Backup.
-
-
Check your e-mail for VM Details.
Once your virtual environment is provisioned, you will receive an-email with the following details:-
Subscription plan details
-
Tally.NET ID, Tally.NET Password, and Secure PIN – Keep these credentials handy for logging in.
-
Self-Service Portal (SSP) link
-
TPCA Client application download link
-
Step 2: Access Your Virtual Office
You can connect to your Virtual Computer in two ways:
a. Via Browser (Web-Client)
-
Log in to TallyPrime Cloud Access.
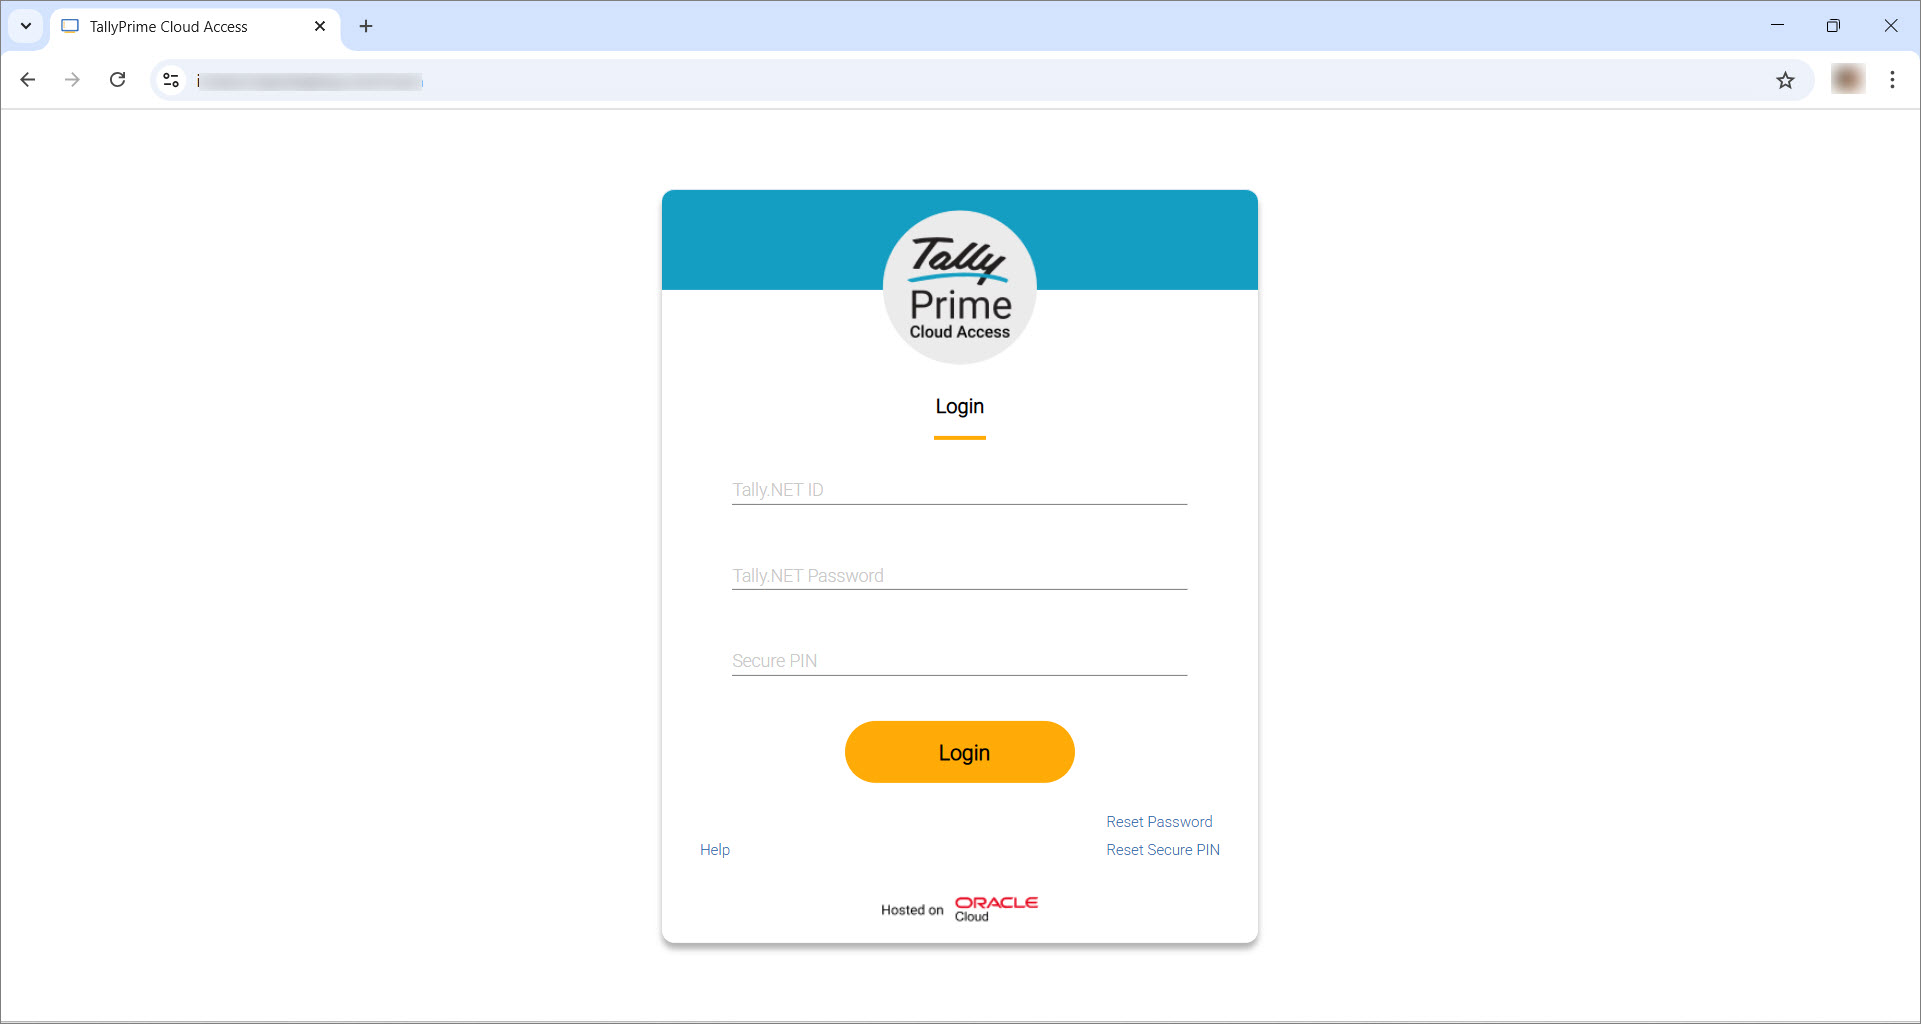
-
Enter your login credentials: Tally.NET ID, Tally.NET Password and Secure PIN.
For first login, a temporary Secure PIN will be generated. You must set a new PIN.
After logging in successfully, the Computer & User Management dashboard appears, displaying your virtual machine (s).
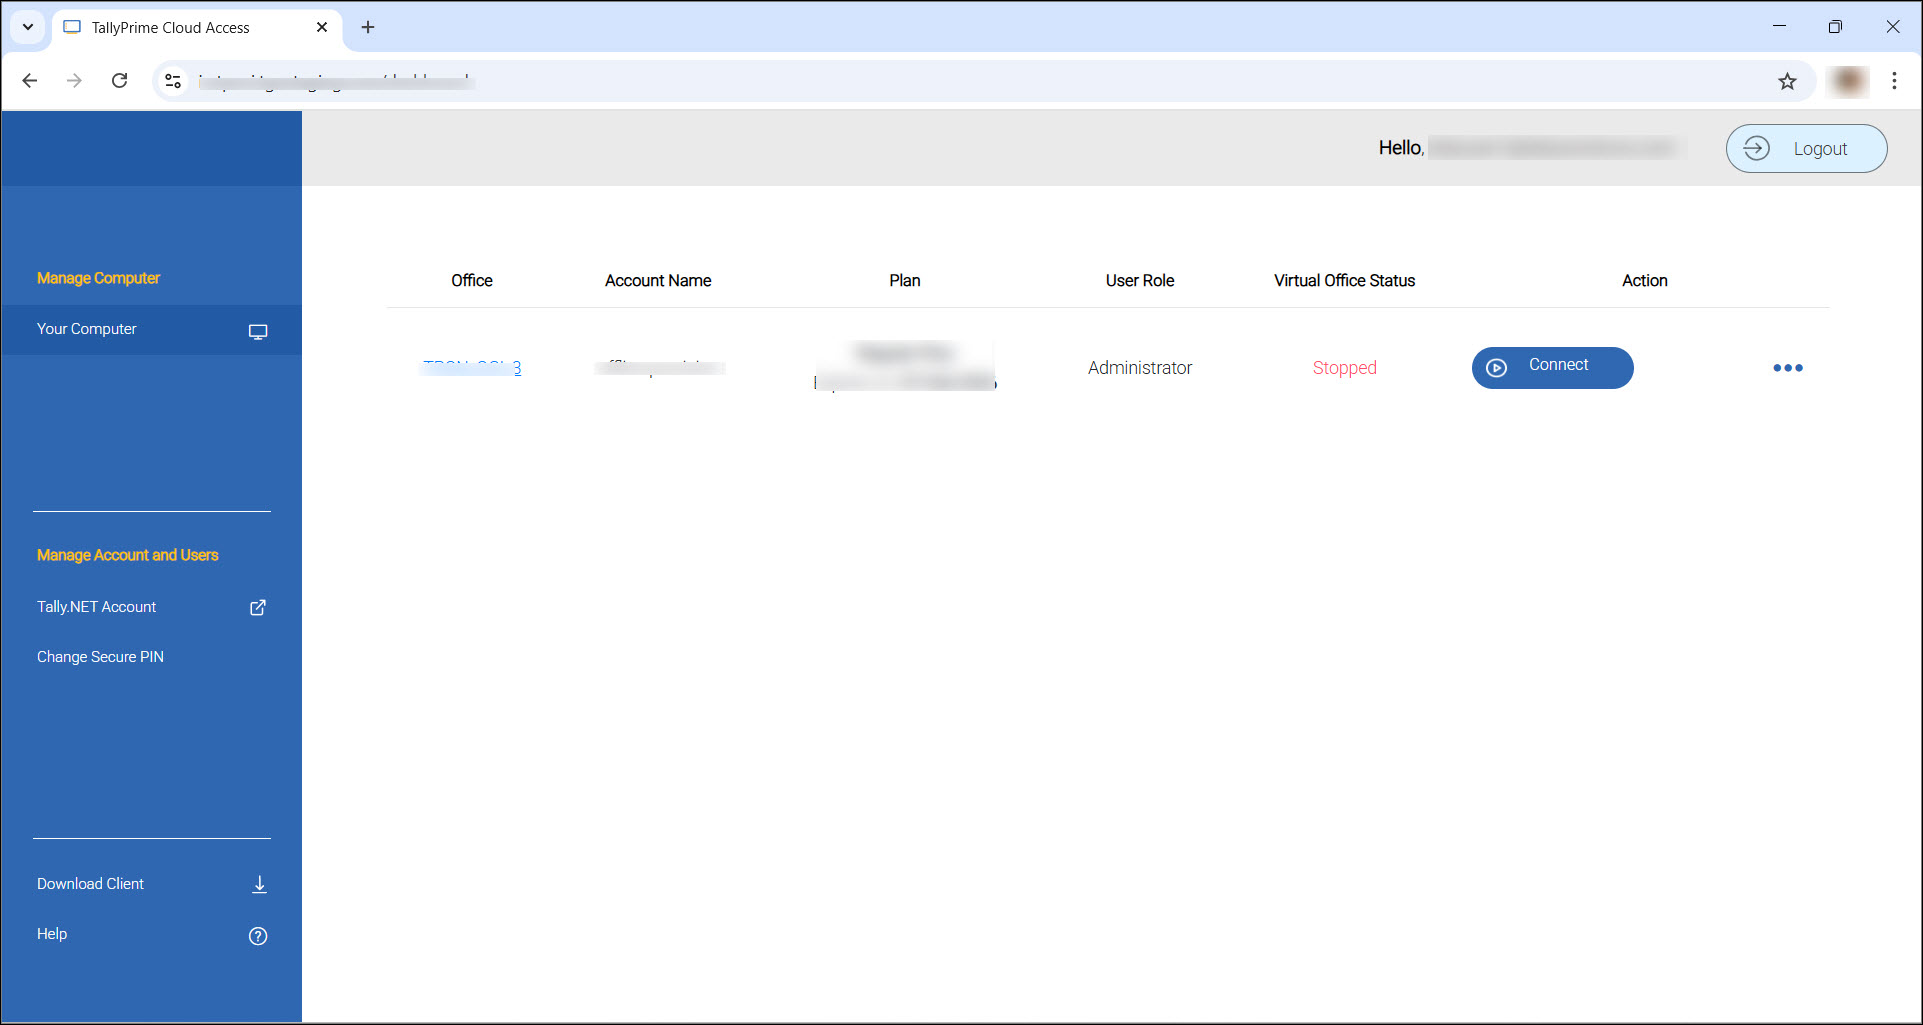
-
Click Connect to start your virtual office.
This opens your Virtual Computer.
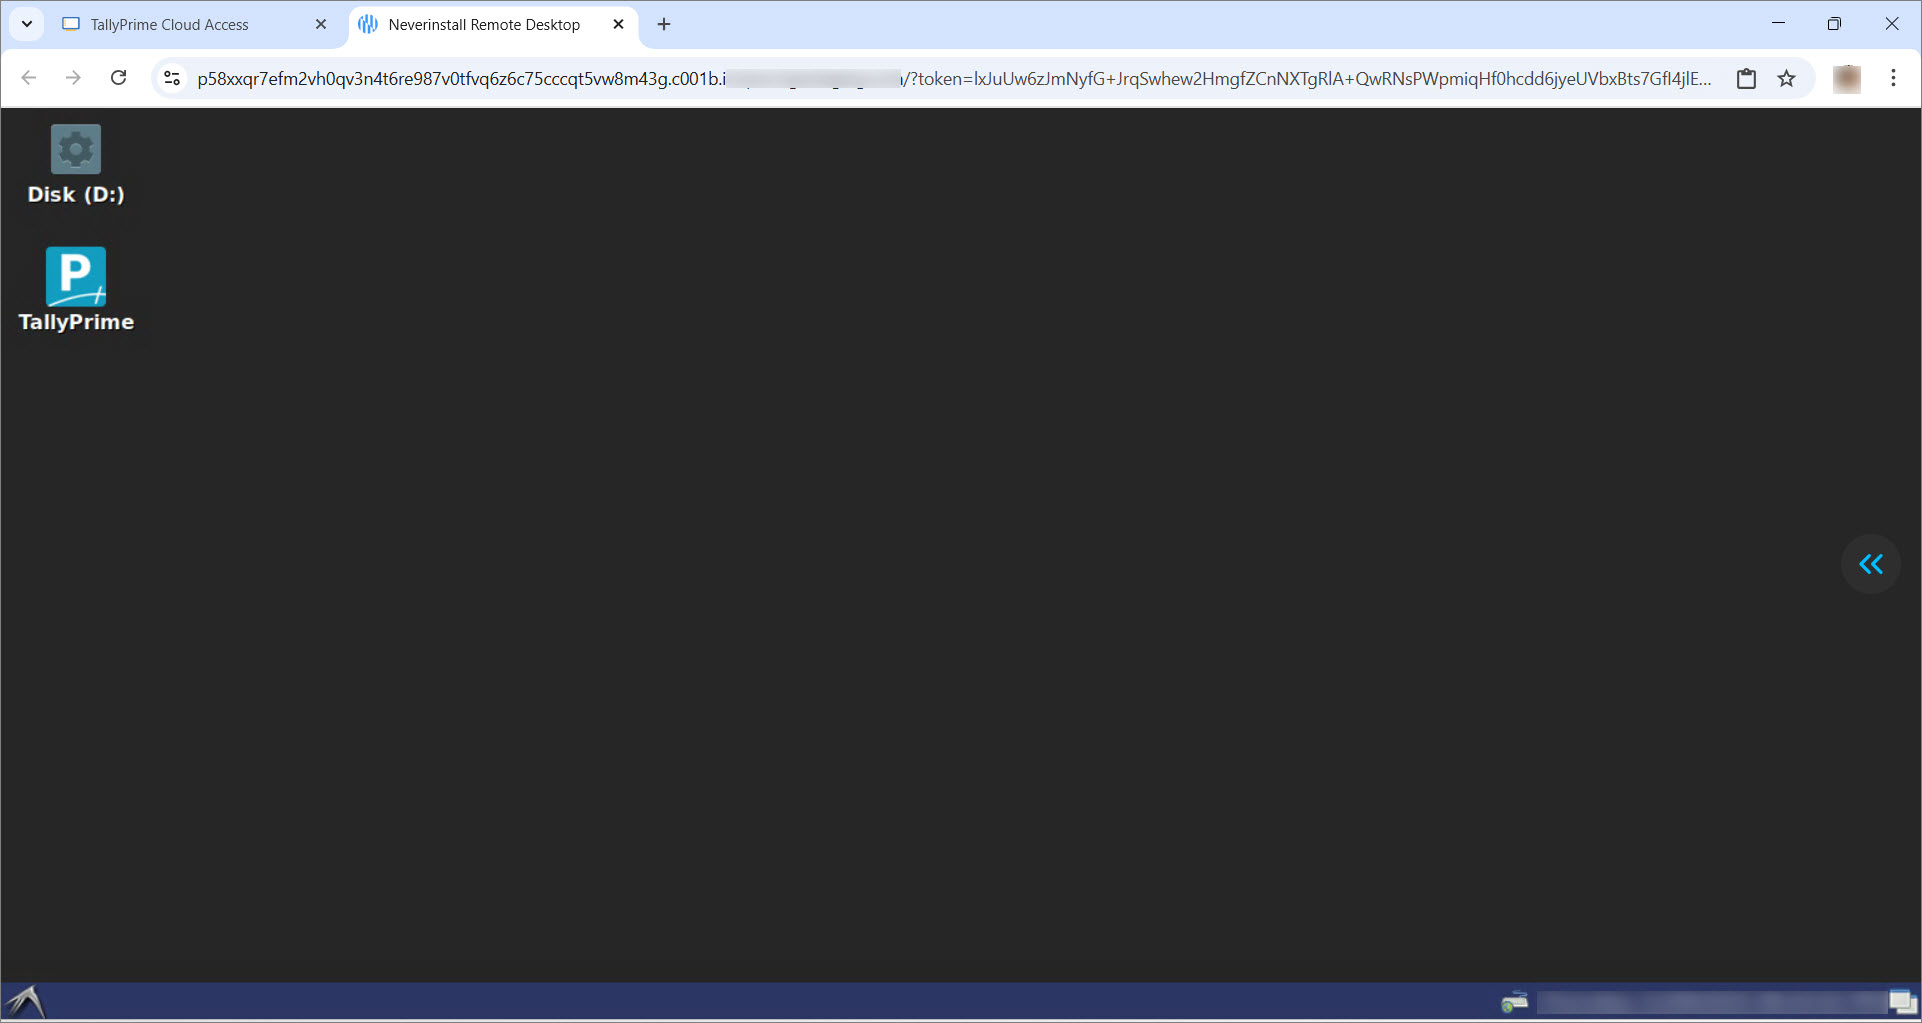
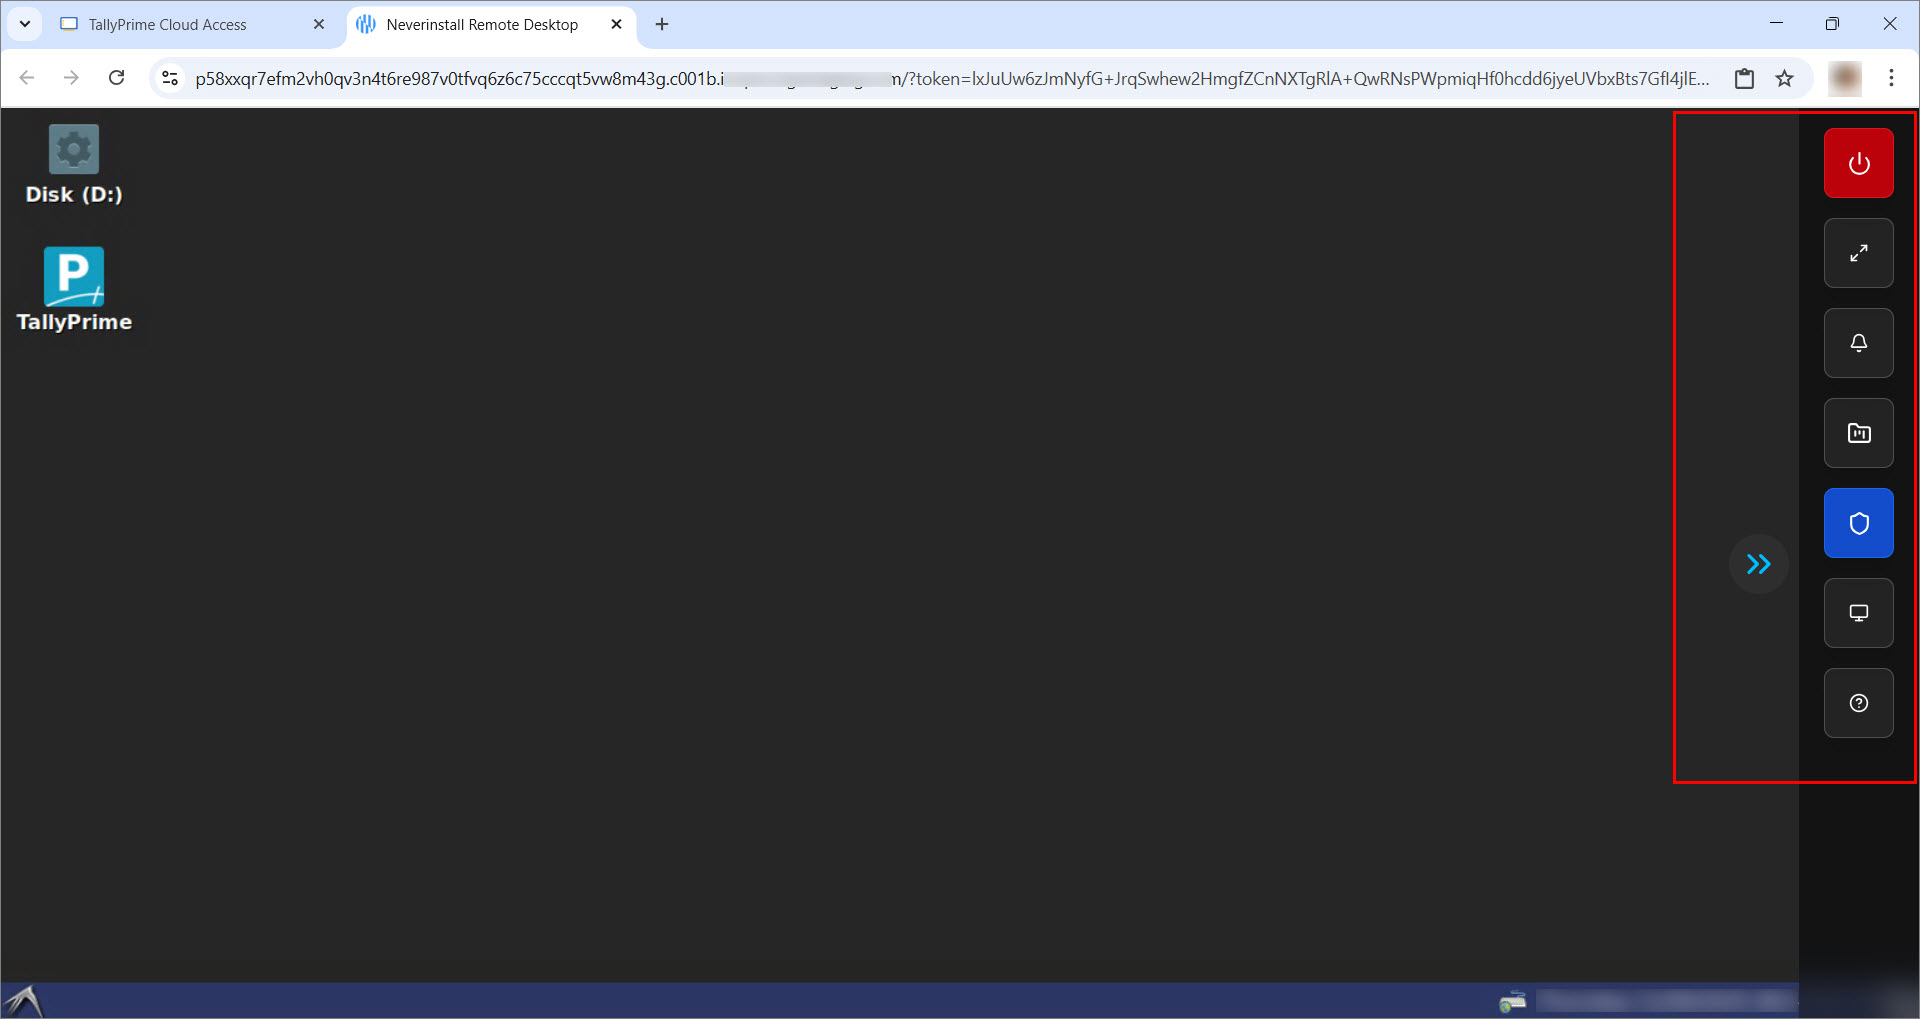
The collapsible Control Panel in your Virtual Computer gives you quick access to features like Disconnect, Full Screen, Notifications, File Manager, Permissions Manager, Resolution and more.
-
Start using TallyPrime as you normally would on your desktop.
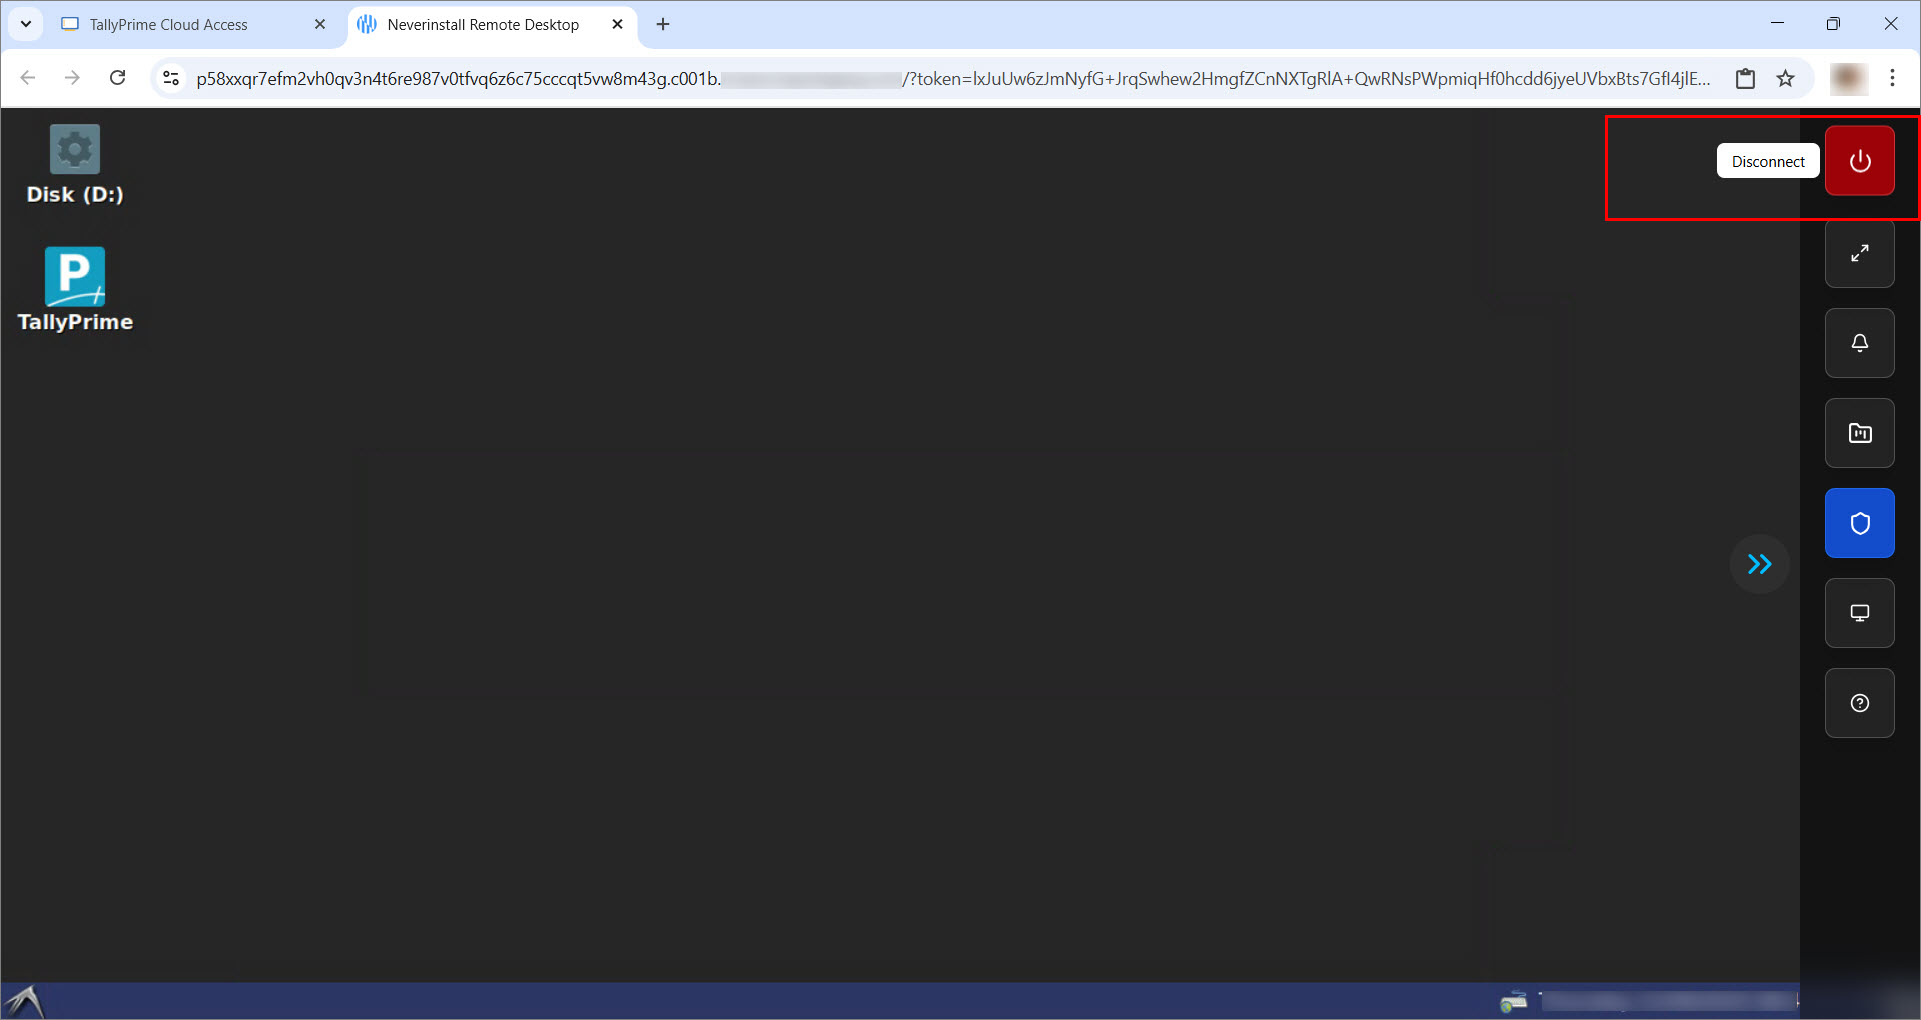
Disconnect your computer from the browser or close the Virtual Computer window, when you are away.
-
Open the Control Panel > click Disconnect.
b. Via TPCA Client
-
Download and install the TPCA Client.
The TPCA Client uses the Remote Desktop Connection (RDP) application to establish a secure connection with your Virtual Computer, ensuring an enhanced experience. -
Ensure RDP is available:
-
Press Windows + R, type RDP, and press Enter.
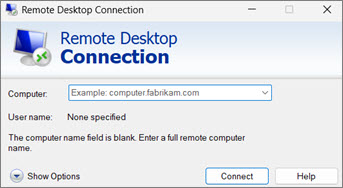
-
If not, download and install the RDP application on your computer.
If you face any error while installing or accessing RDP, refer to the following topics for troubleshooting:
– Authentication Error
– Connection to the Server Failed
-
-
Open the TPCA Client and log in with your Tally.NET ID, Tally.NET Password, and Secure PIN.
After logging in successfully, the Computer & User Management dashboard appears, displaying your virtual machines.
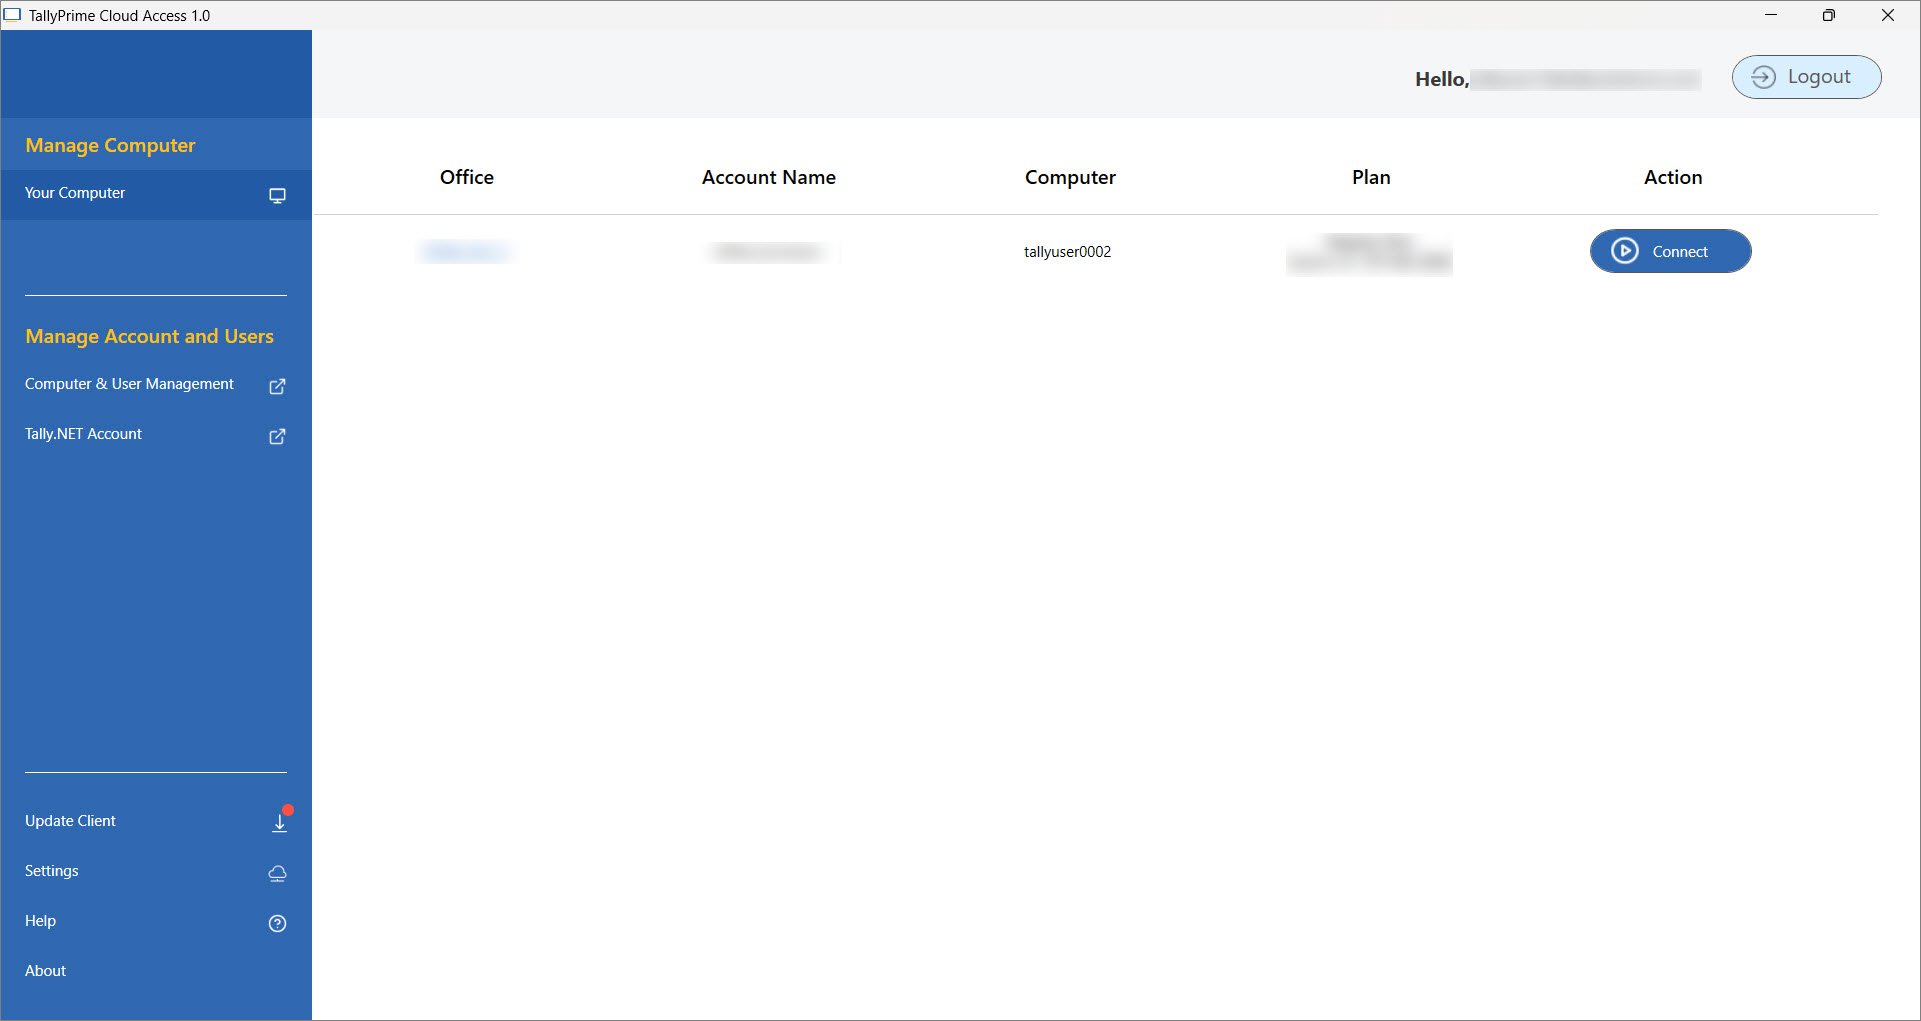
- Click Connect to start the virtual office.
The Remote Desktop Connection security warning screen appears.
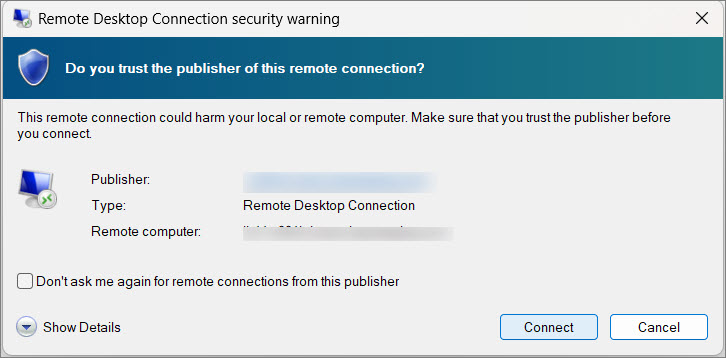
-
Click Connect to establish a connection.
This will open your Virtual Computer.
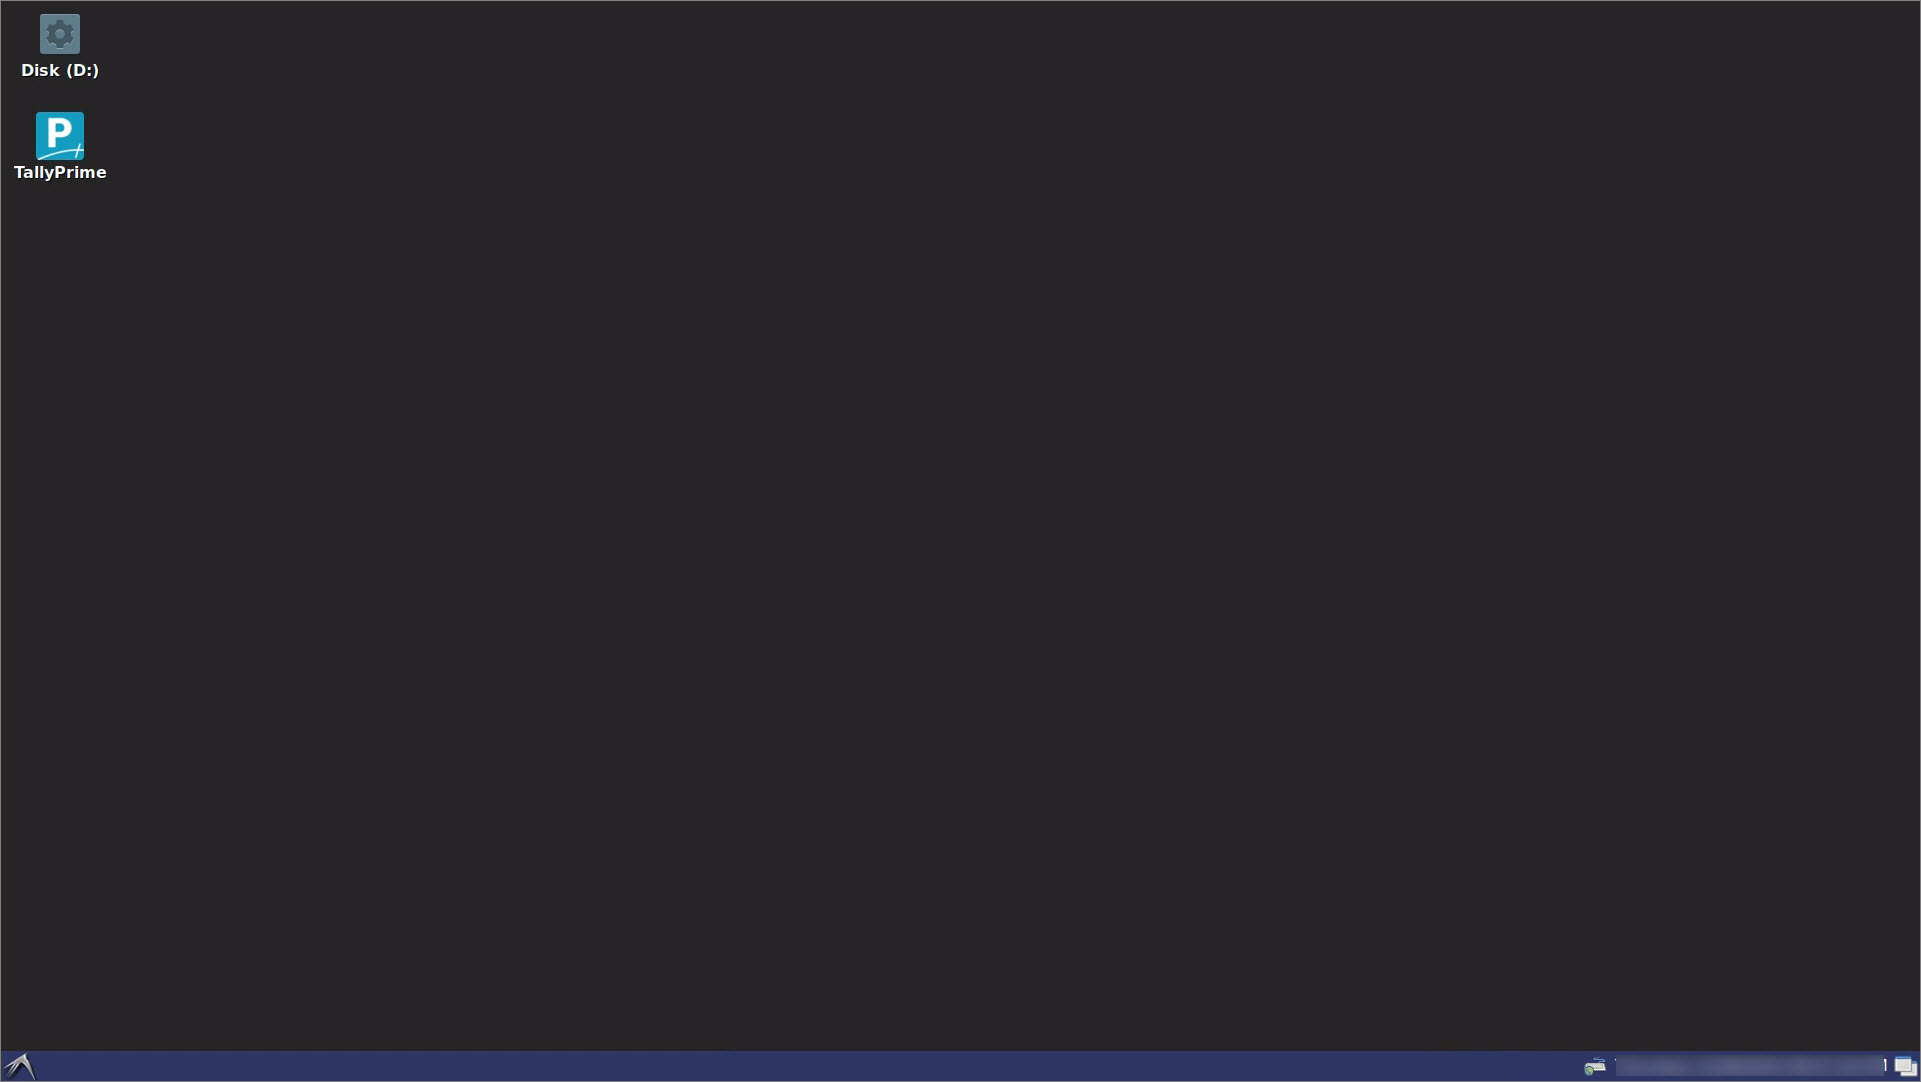
-
Start using TallyPrime as you normally would on your desktop.
Disconnect your computer using the client or close the Virtual Computer window, when you are away.
-
Close the RDP connection or,
- Under Action > click Disconnect.
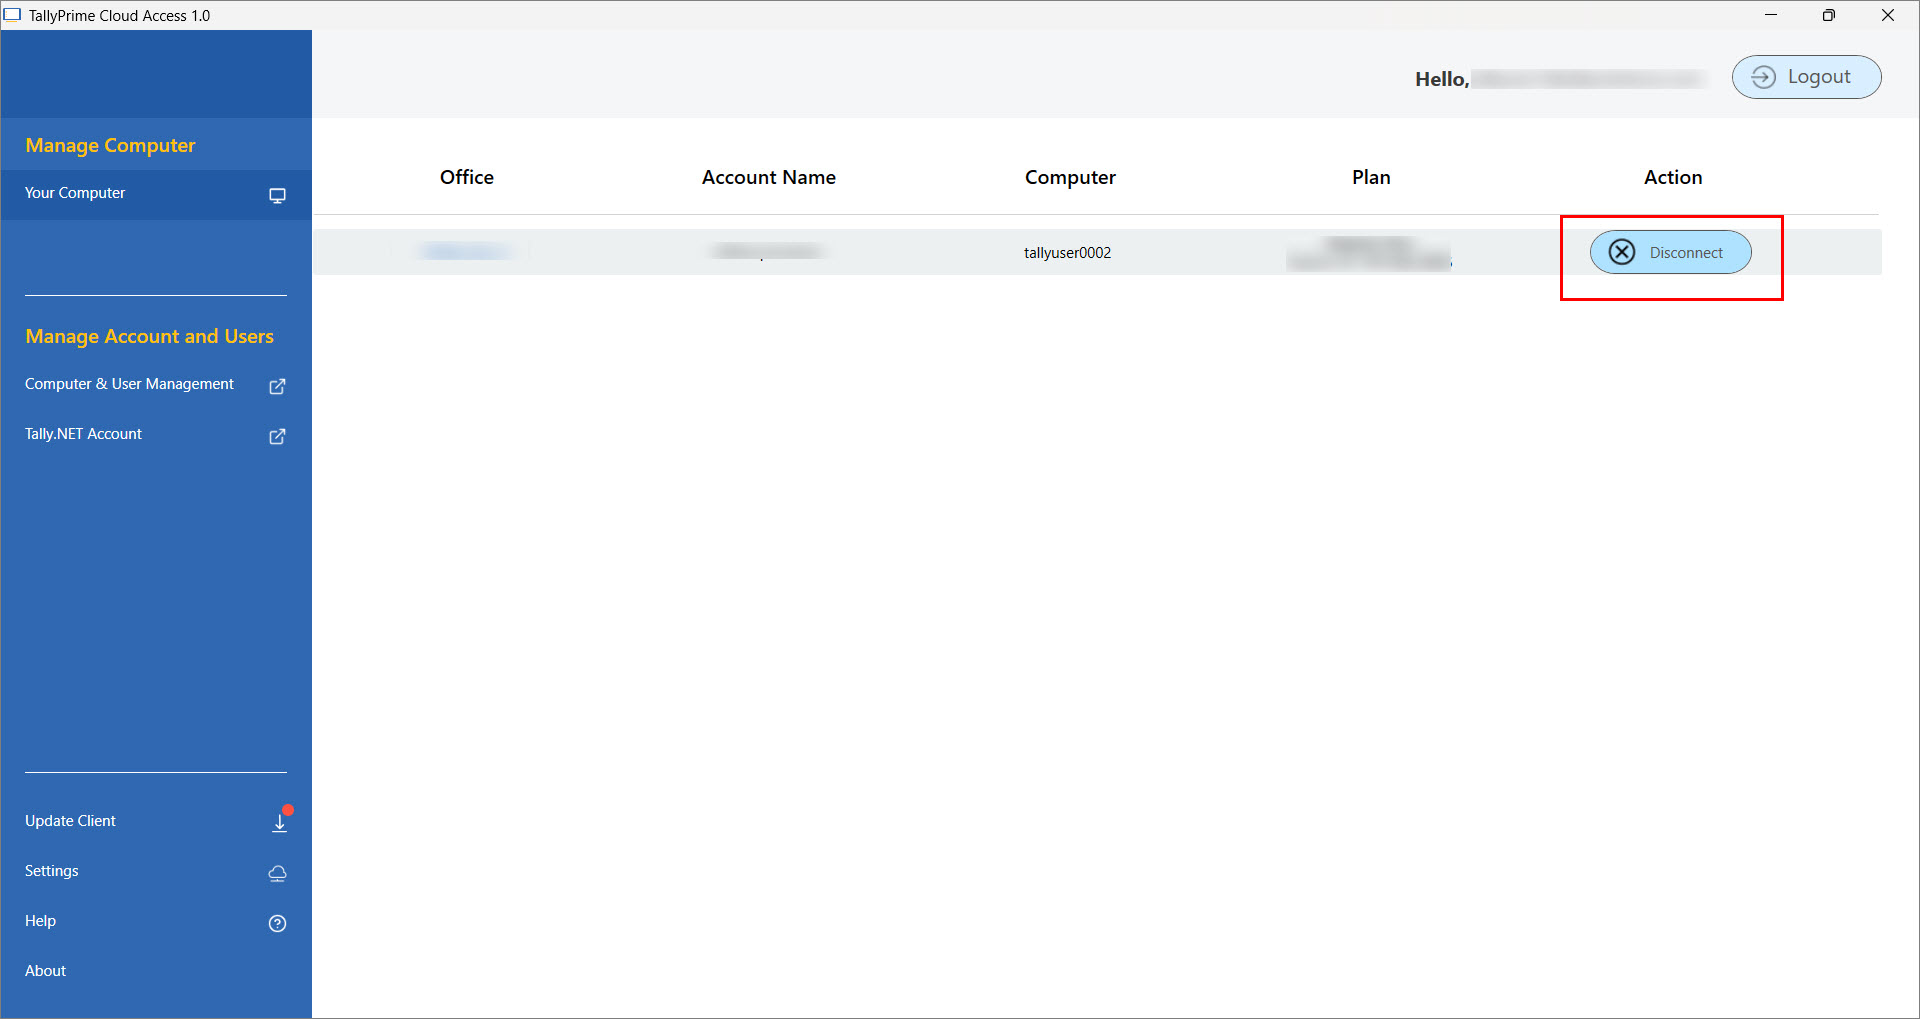
- Click the cross (X) on the connection bar in the Remote Desktop Connection.
Step 3: Update TallyPrime Release
To start using TallyPrime on Cloud, you will need to surrender your license on the local computer and reactive the same on the Virtual Computer.
-
In the Self Service Portal (SSP) > Action > Settings > Update TallyPrime.
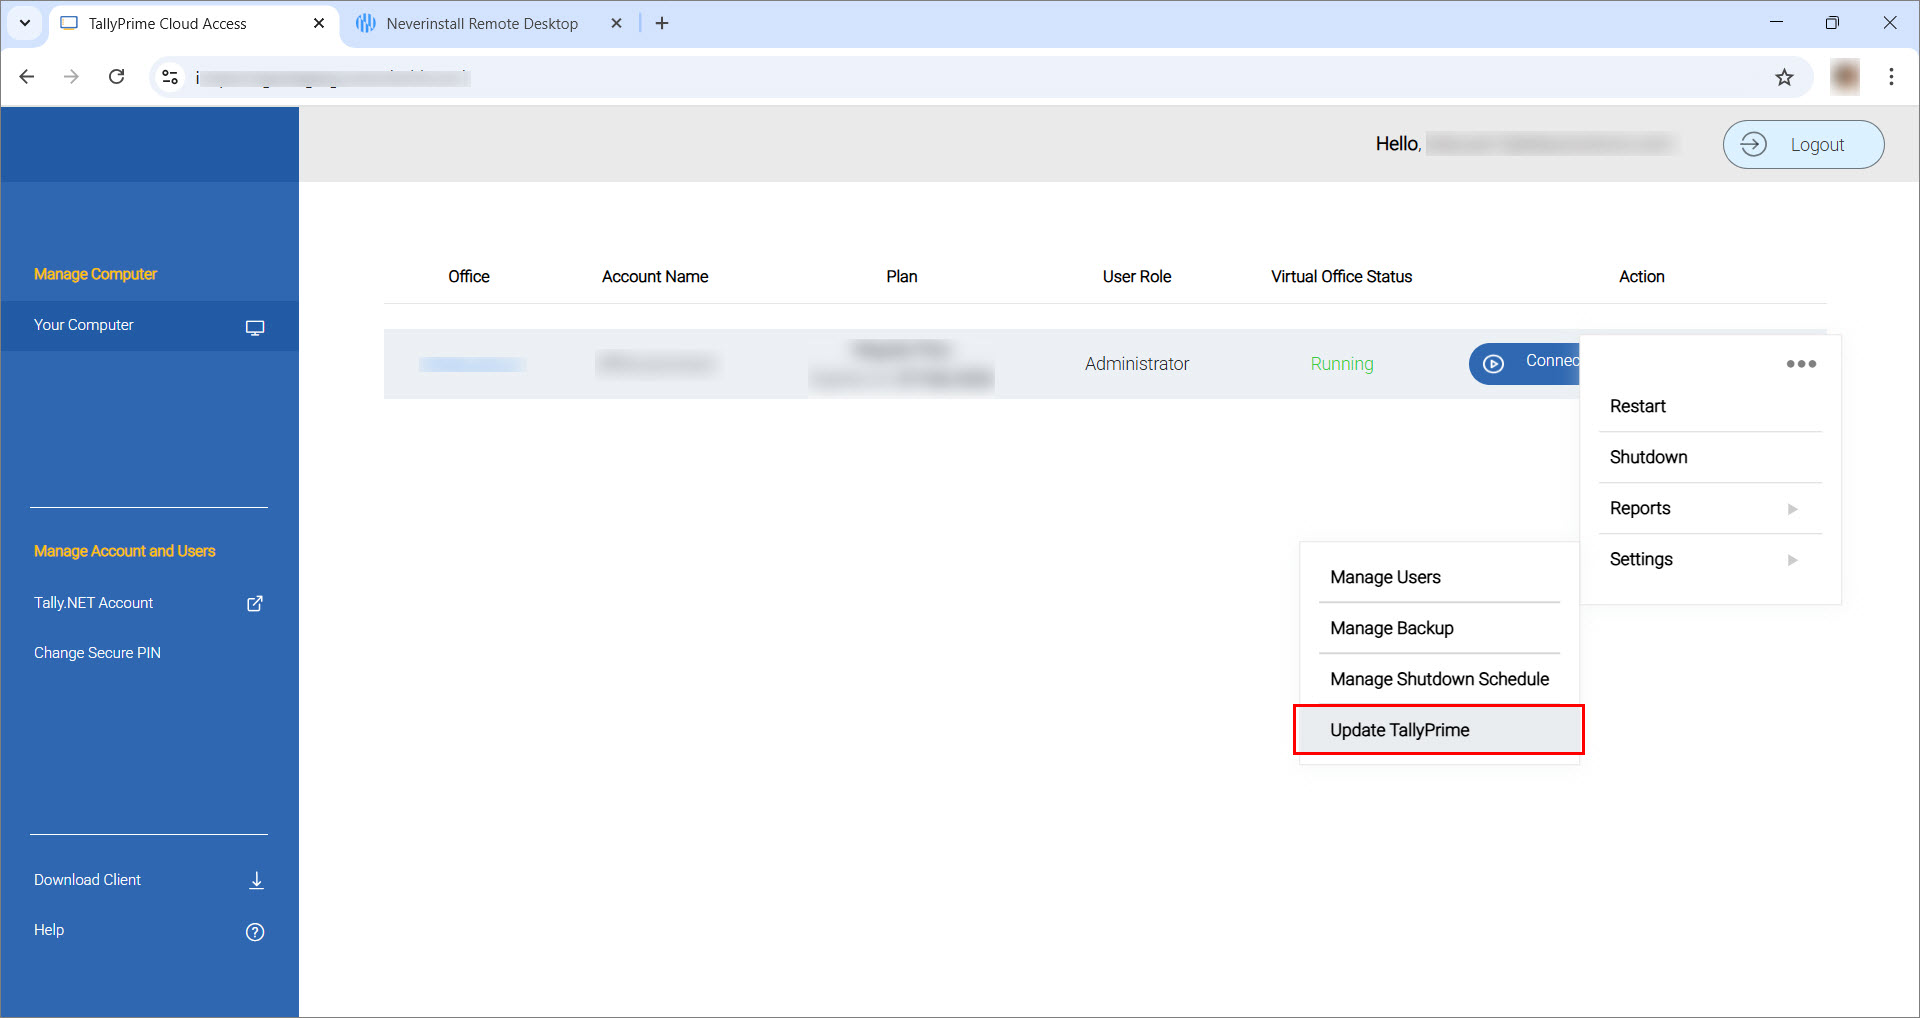
The Update TallyPrime Releases screen appears.
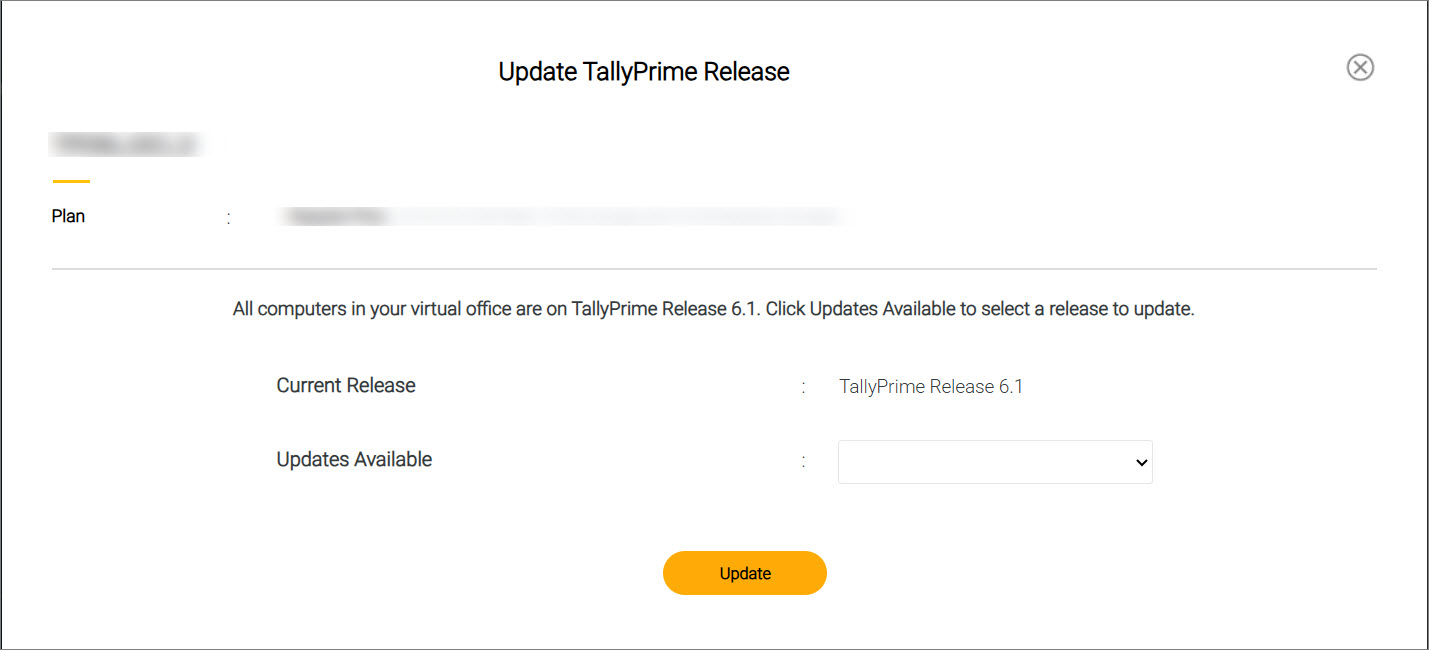
-
Click the dropdown in Updates Available to select the required release to upload.
-
Click Update.
The Virtual Computer will restart to apply the selected release. -
Open TallyPrime on the Virtual Computer from the Desktop or My_Applications folder.
-
Select Reactivate Existing License and provide your license details.
Step 4: Upload & Access Data
If you’re starting fresh and don’t have any TallyPrime data yet, simply create a new company in TallyPrime and get started right away.
If you already use TallyPrime, you can upload your existing data to the Virtual Computer. This ensures that data can be accessed by you — and by other authorised users, if required.
Before you begin, make sure you are using the correct TallyPrime release.
You can upload data in two ways:
-
Upload via Browser
- Open the Control Panel and select File Manager.
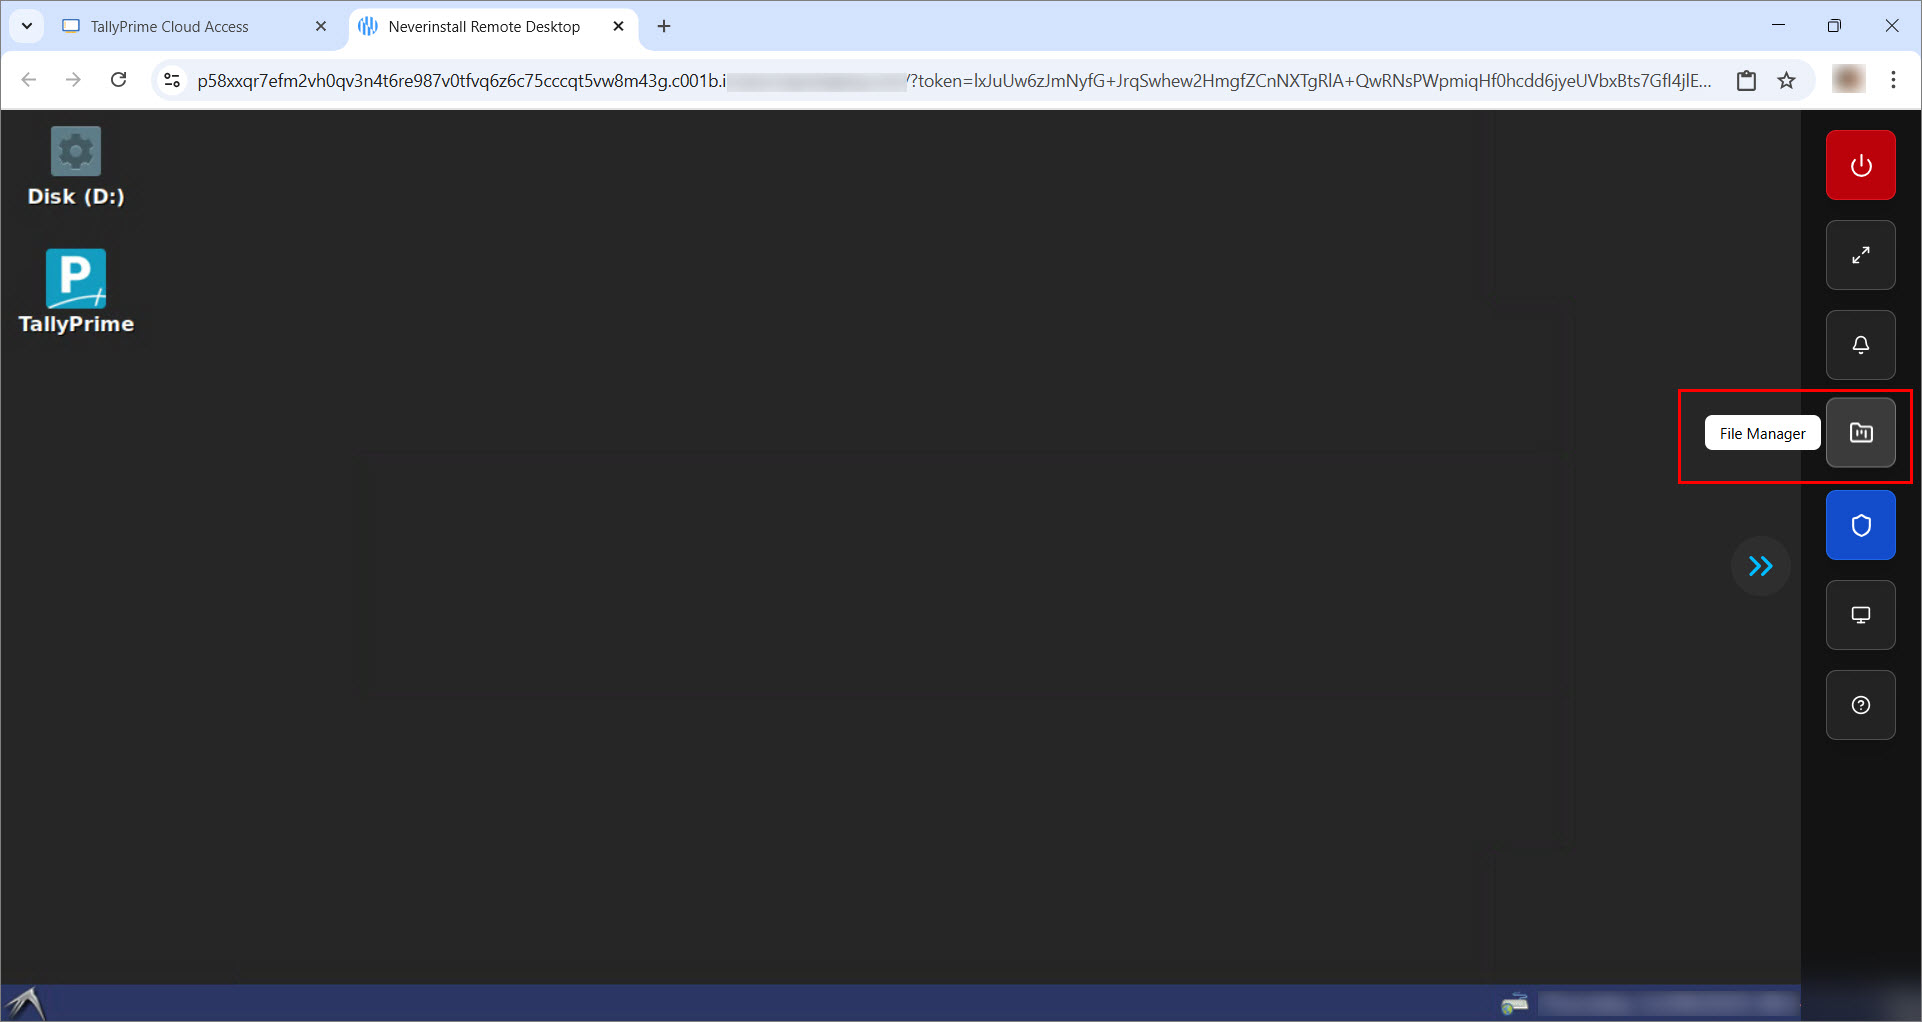
From here, you can upload files by simply using copy-paste, dragging and dropping them, or by browsing and selecting the files from your computer.

- Click Browse Files.
- Select the file that you want to upload and click Upload File.
- If you need to bring a file back to your local computer, select the file and click Download Selected.
- Open the Control Panel and select File Manager.
- Upload via TPCA Client
If you are connected using the TPCA Client, you can directly copy and paste your files into the Virtual Computer, just like you would on a local desktop.
In both cases, make sure to place your Tally data in the Shared_Data folder.
This is important because only files kept here will be accessible to all authorised users working in your Virtual Office.
Once you have configured your license and uploaded your company data, you can start working on TallyPrime in your Virtual Office — anytime, anywhere.
Still Using TallyPrime on AWS?
If you are still on TallyPrime on AWS, you can continue to:
-
Access Your Virtual Office
You can access your cloud environment in two ways:-
-
Open the Self-Service Portal.
-
Log in with your credentials.
-
Start working on TallyPrime in your browser.
-
-
-
Log in with your credentials for a desktop-like experience.
-
-
-
Back Up and Restore Data
The system automatically takes a backup of your virtual machine every time it starts or restarts, ensuring your data stays secure and up to date. In addition, Admins and Owners can take manual backups anytime and download them for local use. -
Schedule Automatic Shutdown for Your Virtual Office
Easily manage your Virtual Office timings by scheduling an automatic shutdown. This ensures your machine is securely turned off when not in use—set it once and forget it. -
Sync TallyPrime with Local Applications
Connect third-party local applications seamlessly with TallyPrime on AWS. Simply enable Synchronisation from the Self Service Portal and install VCC Client v1.2 (or later) to start smooth data exchange. -
Manage User Access and Account Settings
Control access to your Virtual Computers by adding, removing, or toggling users as active or inactive. Even if your plan supports four users at a time, you can add more users and decide who stays active as per your business needs. -
Troubleshoot Issues
Handle common issues such as corrupted data, application crashes, or basic system tweaks with the built-in troubleshooting tools available in Virtual Computer. Quick fixes and adjustments are always within reach.


