Some of the commonly asked questions about data migration and data corruption are answered here.
To migrate the data from Tally 5.4/6.3/7.2 to Tally.ERP 9 follow the steps shown below:
1. As a precaution it is suggested to take a backup of the Tally 5.4/6.3/7.2 data by following the required backup process.
2. Copy the required company folder of 5.4 or 6.3 or 7.2 to Tally.ERP9 data folder,
3. Start the Tally.ERP 9 migration tool (tally72migration.exe) available in the Tally.ERP9 folder
4. In the Tally.ERP 9 Data Migration Tool screen, click Migrate Data
5. Specify the required path in Select Company for Migration
6. Press Y to rewrite the version
7. On successfully rewriting the data to Tally 7.2 format, the migration tool prompts to migrate the data from Tally 7.2 to Tally.ERP 9. Select Yes.
The migration screen appears displaying the number of masters and vouchers that will be migrated to Tally.ERP 9. On successfully completing the migration a message Migration Completed, Check Statistics appears. Compare the statistics and ensure that the data migration is complete. The migrated company number is prefixed with an additional 0 and appears in five digits.
A group company created in Tally 7.2 cannot be migrated to Tally.ERP 9. It is suggested to migrate the individual companies to Tally.ERP 9 and then group them once again in Tally.ERP 9 to create a group company. However it is advised to take a backup of the data before migrating.
Customisation done in Tally 7.2 will not work in Tally.ERP 9. You need to migrate the customized programs to a format that is compatible with Tally.ERP 9. To migrate the program files (.tcp files) follow the steps shown below:
1. On installing Tally.ERP 9 in the existing folder the .tcp will automatically get converted to a format compatible with Tally.ERP 9.
Or
1. Start TallyAdmin tool
2. Click File Format Conversion
3. Select TCP (Tally Compliant Format )
4. In the Source File(s) specify the path and filenames
5. Click Convert
The specified file is converted to new format compatible with Tally.ERP 9 and the original file is retained as backup with .bak extension.
Or
● In case the customized program have an extension .txt, it is suggested to mention the correct path in List of TDLs to preload on Tally start up in TDL Configuration screen.
Do the following before commencing data migration:
1. Ensure that tally9.exe and tally72migration.exe are available in the same folder.
2. Close all other applications that are open before commencing migration.
3. Go to File menu in Internet Explorer and uncheck the option Work offline.
4. Scan for Virus on the system.
5. In case the data size is too large it is advisable to use a system with higher configurations.
6. Disable real time protection on your anti-virus software.
To resolve the above problem, in stock item alteration, select the costing method as FIFO Perpetual, also match the Unit of measure and Godown.
This error occurs when the Unit Symbol is altered to numeric/alphanumeric. For example , Nos to Nos1 or Kgs to KgsA ( Inventory Info. > Unit of Measure > Alter ).
Follow the steps given below to resolve this issue.
1. Create a new company in Tally 5.4/6.3/7.2 (for the same financial year and with features similar to that of the migrating company).
2. Export the Masters and Vouchers, and import them to the newly created company.
3. Migrate the newly created company data to Tally.ERP 9.
This error might occur during data migration
Increase the screen resolution by following the steps given below:
1. Right click the desktop.
2. Select Properties .
3. In the Display Properties window, click Settings tab.
4. Increase the Screen resolution to 1024 x 768 pixels.
Data path in client system can be changed when data path in server system is changed.
While loading Tally in client system, if no companies are available on disk:
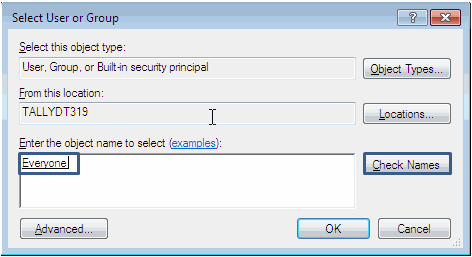
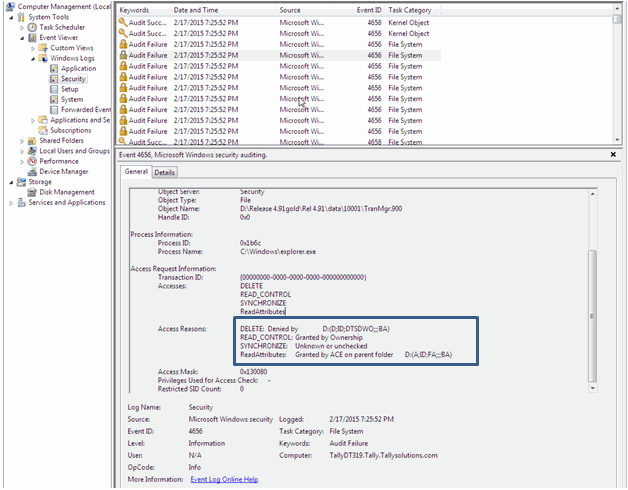
● Check if data is shared from the server machine.
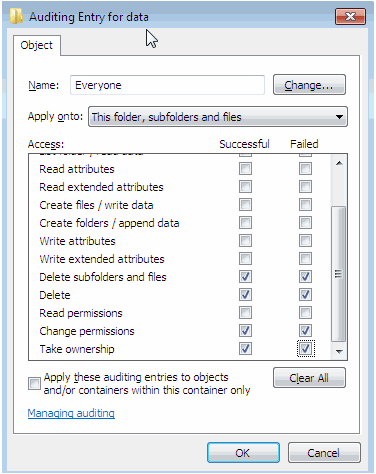
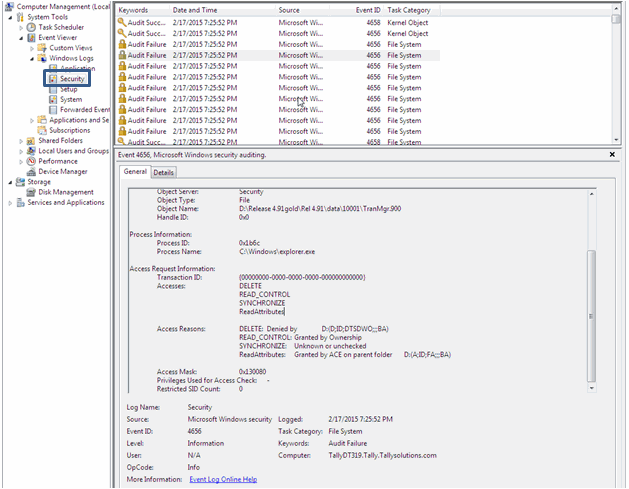
● Check whether User in Client system has rights to access the data folder.
● Check the data path configured in client system.
To configure the data path
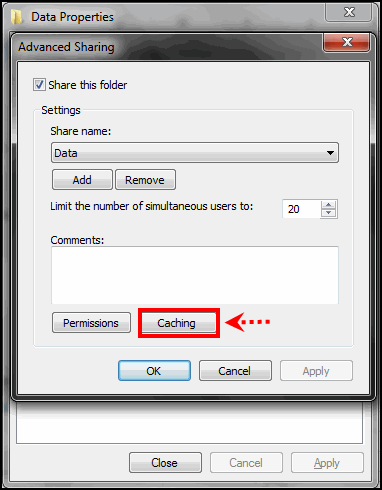
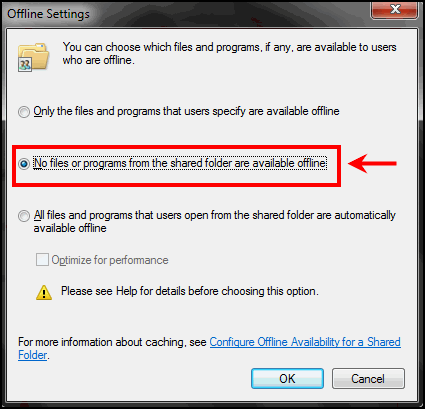
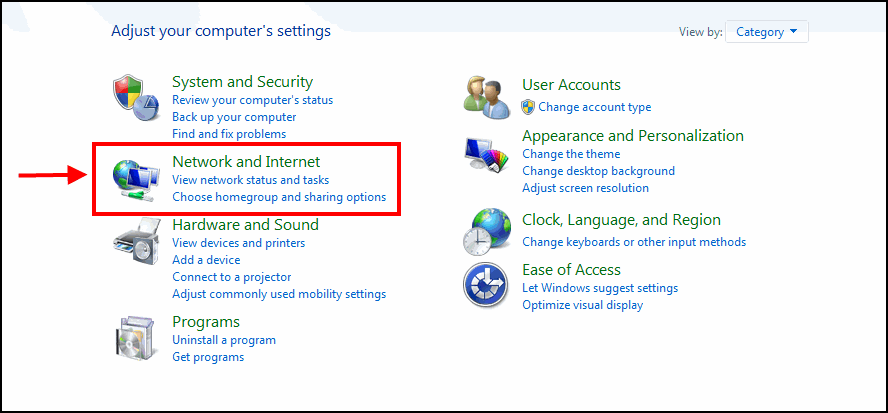
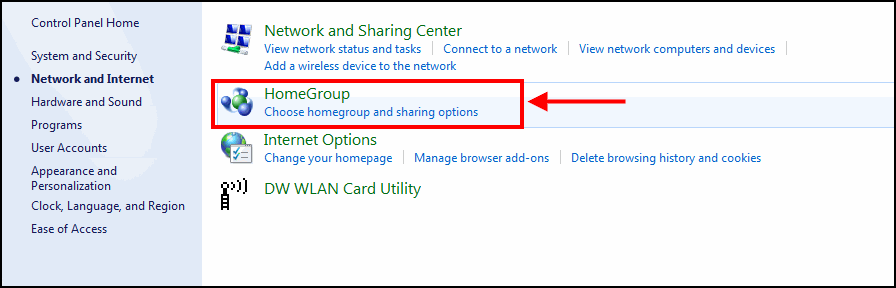
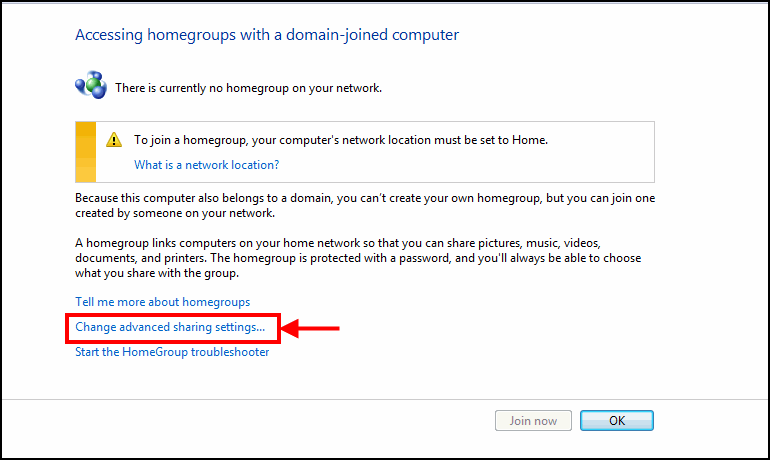
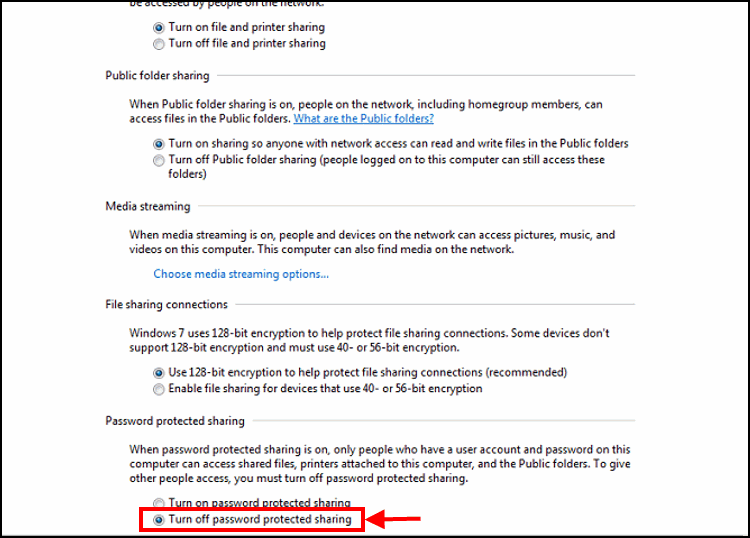
1. Share the data folder from the Server system. Provide full permission to access the data folder. Click here to view Data sharing process.
2. Go to Start > Run > Type Server system name/ip followed by \ (i.e back slash) and press Enter .
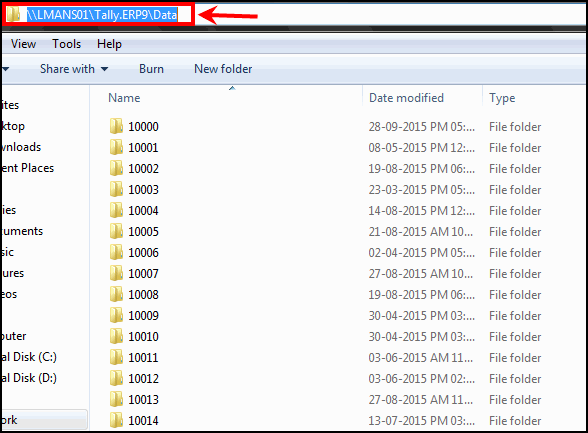
The folders which are shared from Server machine appear as shown below:
2. Open respective Tally data folder and copy the address path.
3. Load Tally.ERP 9 in client machine and Press F12 > Data Configuration > under location of Data files, remove old data path and mention the new data path.
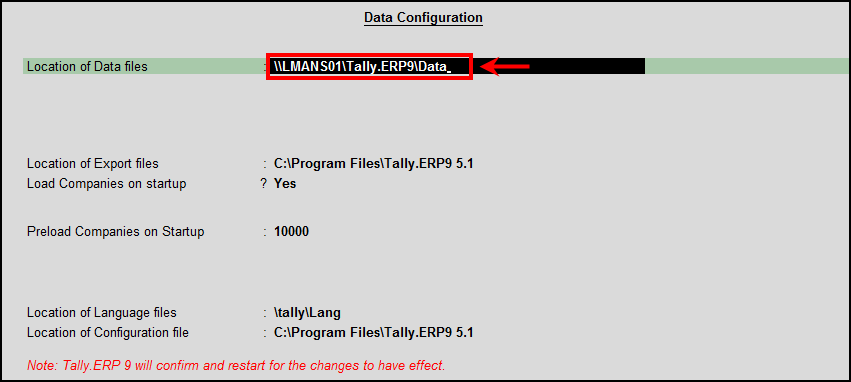
4. Press Enter to save and check.
Data migrated to a later version of Tally.ERP 9 is not reverse compatible. This means that if you have migrated your data to the latest release, you cannot open the same data using an earlier release of Tally.ERP 9. Therefore, it is recommended that before migrating your data, take a backup or copy of your data and open the backed up data in the earlier release, if needed.
This error occurs when data from a higher release of Tally.ERP 9 is loaded in a lower release.
● Load the data in the same release of Tally.ERP 9 that was used earlier. We recommend that you download the latest release of Tally.ERP 9, install it in a new folder, reactivate, and restore the data backup.
● If you want to continue in the lower release, you have to rewrite your data .
Refer the topic - TSF Errors for more details.
Refer the topic - Error - Data files damaged. Need to Rewrite for more details.
Data from Tally 4.5 has to be converted to Tally 7.2 format before migrating to Tally.ERP 9. The tools required to convert data from 4.5 to 7.2 are available in tally website. The tool for migrating data from 7.2 to Tally.ERP 9 can be found in tally application folder.
Procedure for converting data from Tally 4.5 to Tally.ERP9 involves the following steps:
1. Converting the data of Tally 4.5 to Tally 7.2 compatible data using Tally 4.5 to Tally 7.2 data conversion utility.
2. Migrating the Tally 7.2 compatible data to Tally.ERP 9 using Tally 7.2 to Tally 9 data migration utility.
1. Download Tally 4.5 data converter utility.
2. Run the Convert45to72.exe and extract the files (WCVTALLY.EXE, TW45250.DLL, and CNVTALLY.DAT ) to Tally 4.5 application folder.
3. Double-click the file WCVTALLLY.EXE (the icon will be identical to Tally Icon). The Company Info screen appears. (You can also execute this file from the command prompt Click Start > Run > Type C:<Tally 4.5 directory name>WCVTally.EXE C:<Data path>)
4. Select the company to be migrated.
5. Click Yes in conversion confirmation message.
Note: The Conversion utility will run in black & white only (even if you have a color monitor).
1. Install Tally.ERP 9
2. Double-click tally72migrate.exe file located in Tally.ERP 9 application folder. The utility will launch the Tally Data Migration Tool and Tally.ERP9
3. Select Migrate Data in the Migration Company screen.
4. Specify the directory where Tally 7.2 compatible data (Tally 4.5 converted data) is located in the field Directory .
5. Select the company to be migrated from the List of Companies .
6. Click Yes in the message displayed to start migration. The status of migration from Tally 7.2 to Tally.ERP 9 is shown in the Migration Messages pane.
7. Press any key in the Migration Completed Check Statistics message. A Congratulation message appears confirming completion of data migration.
Note: If any error occurs during migration, it gets logged into migration.err file, which is automatically generated in Tally.ERP 9 application folder.
The migrated company is by default saved in the directory which was specified in the directory field (refer point 3 above). The migrated data folder is prefixed with a 0 and appears as a 5 digit number. For example, if the company folder number, before migration was 0099, after migration it would be 00099.
Now your migrated data is ready for use in Tally.ERP9
Note: If customer wants to migrate Tally 4.5 data to Tally 9, the process is same. Instead of installing Tally.ERP, install Tally 9 and follow above process.
While migrating data from 6.3 or earlier releases, this error may occur when you enter strings other than numerals in the Value Basis field under Additional Accounting Entries in the Voucher Type Class screen.
Open the company where this error occurs, and correct the data entered in the Value Basis field in the Voucher Type Class screen.
This will fix all XML import errors that occur while importing, migrating, or synchronizing data to release 6.3 and above.
Refer the topic - TSF Errors for more details.
When the From e-mail id mentioned is wrong.
Verify the email id entered in From e-mail id field, ensure it is correct and then proceed with emailing.
The table below shows the list of files which are part of the database structure used in Tally.ERP 9 along with a brief description or function of the respective data file.
Data Files for |
File Contents/Function |
|
Tally 5.4/6.3/7.2 |
Tally 9/ Tally.ERP 9 Series A |
|
Company.500 |
Company.900 |
Contains Company Profile along with Statutory Information related to the respective company |
CmpSave.500 |
CmpSave.900 |
Is the Backup copy of Company.900 |
Manager.500 |
Manager.900 |
Consists of master level information such as Groups, Ledgers, Item Masters, etc. |
Tr01263.500 |
TranMgr.900 |
Stores the transactions entered. In earlier versions of Tally, there was a transaction file created for every month. Due to data structural changes made in Tally.ERP 9 only one file is created which is available across financial years. |
Tr01264.500 |
||
Tr01265.500 |
||
Tr01266.500 |
||
TrnLots.500 |
LinkMgr.900 |
Contains the detailed information on bill references, order numbers, batch numbers and tracking numbers. In earlier versions of Tally individual files were created for bill references, order numbers, batch numbers and tracking numbers. |
TrnOrds.500 |
||
TrnRefs.500 |
||
TrnTNos.500 |
||
MsgRead.TSM |
TACCESS.TSF |
Used for controlling access to the database. |
Exclusv.TSM |
TEXCL.TSF |
Used when database is accessed for administrative functions. |
MsgKeep.TSM |
TSTATE.TSF |
Tracks the state of database and ensures that data is safely written to the respective files. |
|
TMESSAGE.TSF |
Used for two-stage writing ensuring consistency and persistence. |
Record Insertion Failure in database error occurred while loading a company / saving a voucher in Tally.ERP 9. How to avoid this in future?
On receiving this error it is suggested you follow the steps shown:
1. Take a data backup.
2. Go to Gateway of Tally > F12: Configuration > Data Configuration and set Load Companies on Startup to No
3. Perform a Simple rewrite by pressing Ctrl+Alt+R
4. In case the problem persist, it is suggested to perform a Zero command rewrite
5. Suggest upgrade to latest release
6. In case the problem persist contact Tally Support.
This message is displayed while rewriting the data.
While rewriting, check if there is sufficient space in the hard disk or any external drive where the data is located.
Note:
♦ The minimum free space required while rewriting should be double the size of the data. For example: If the data size is 4 MB, then the free space available should be at least 8 MB.
♦ It is recommended to rewrite company data stored in a local disk rather than the data stored in an external drive.
Accessing Tally.ERP 9 data from external drivers is very slow because there might be differences between the USB ports.
The USB ports USB 3.0 is 10 times (572 megabytes per second) the speed of USB 2.0 (57 megabytes per second). However, in order to get better speed, plug your USB 3.0 device into a USB 3.0 port. If the port is 2.0, and the device 3.0, than the speed will go down from 572 MBps, to 57MBps (and vice versa). This means USB 2.0 and USB 3.0 are compatible with each other, but you will just get slower speed when you are using a combination of them, and not just 3.0.
The speed of USB 3.0 also provides more power to devices that require higher amount of power to operate. It can provide 50% more power than USB 2.0 does through the cable itself. USB 3.0 reduces the time required for data transmission. Hence the data processing becomes faster compared to the USB 2.0 may differ from one to another i.e. USB 2.0 and 3.0, in terms of power and speed.
For more information on USB 3.0 visit http://www.usb3.com/
How to handle the error - Data path specified for more than one Tally.ini, displayed on clicking migration tool, tally72migration?
The error may be due to multiple data paths in the file, Tally.ini. Steps to remove additional data paths:
1. Go to Tally application folder.
2. Open the file, Tally.ini (file Type is Configuration settings)
3. Delete the second data path/ location of data files, if any (not the primary data path)
4. Save the Tally.ini file.
Change the settings for Default Companies in the file, Tally.ini. Steps to change the settings:
1. Go to Tally application folder.
2. Open the file, Tally.ini
3. Set Default Companies to No .
4. Save the Tally.ini file.
5. Load the migration tool again
● A system process is deleting data files
● Virus
● Manual deletion by a user
The solution for this issue is to enable system audit, which will help the system admin to identify the reason for deletion.
1. Open Control Panel in the system and select Administrative Tools.
2. Open Local Security Policy which appears as shown below-
3. Expand Local Policies appearing on the left side as shown below and click on Audit policy
4. Double click on Audit Object Access which appears on the right side.
5. Enable Success and Failure as shown below and click OK to save the changes.
6. Enable audit for the data folder. For this, right click on your Tally.ERP 9 data folder. Select Properties. Go to Security tab and click on Advanced as shown below:
7. Go to Auditing tab and click on Edit option as shown below:
8. Click Add. In the box that opens, mention Everyone and click on Check names. You will see that Everyone will get underlined. Next, click on OK.
9. Auditing entry for data screen opens. Enable the options shown below and click on OK.
With this configuration, all users will be disallowed from deleting the data files.
Further, to find out the reason of deletion of any data file, right click on My computer. Click on Manage. Expand Event Viewer appearing on the left side. Select Windows logs and under Windows logs, select Security as shown below:
You can keep the cursor on bottom part of the screen and press Ctrl+F. In the Find window that opens, paste the data path for which you have enabled audit and click on Find Next as shown below:
The details of deletion will appear as shown in the below screen:
To ensure data is not shared with client systems in offline mode, you can disable caching of shared folders.
1. Right click the data folder and select Properties .
2. Navigate to the Sharing tab and click Advanced Sharing in the Data Properties window as shown below:
3. Click Caching in the Advance Sharing window as shown below:
4. Select the option No files or programs from the shared folder are available offline in the Offline Settings window as shown below:
5. Click OK to accept the settings.
This message appears if you try to split the company data when Tally.ERP 9 is in Educational Mode.
Configure your existing license or reactivate your license.
This error might be displayed even after configuring port number for ODBC in F12: Advanced Configuration .
The port number specified may already be in use.
1. Go to Gateway of Tally > F12: Configure > Advanced Configuration .
2. Enter a different port number in the field Port .
3. Press Ctrl + A to accept.
This error occurs when the backup process is not completed properly, leading to a partial or incomplete backup file, or when the disk (external drive) containing the backup file is corrupted. Further, due to limited space on the external drive, only a part of the backup may be saved on the file.
Click Yes in the error message to recover data. In case the recovery process is not successful,
● Restore an earlier backup file and re-enter any missing data.
● Contact Tally Solutions with the data. In case the data is recoverable, the recovered data will be sent to you.
For computer with Windows XP and above operating system installed
1. Right click on Tally.ERP 9 icon and select Run as administrator
Or
1. Login as user with administrative rights as shown below:
The Company Info menu appears:
2. Select the required company from which you want to extract the data. The Configuration block of the Info Panel displays Running as Client or Server or Client/Server with ODBC. In case the above message does not appear it indicates that the port number is not configured, as shown below:
To configure the Port
1. Go to Gateway of Tally or Company Info. menu > F12: Configure > Advanced Configuration . The Client/Server Configuration screen appears.
o Set Enable ODBC? to Yes .
o Enter the required port number in Port field, by default the port is set to 9000, as shown below:
Note : In case the port number mentioned is occupied by another application, Running as Client or Server or Client/Server with ODBC will not appear in the Configuration block of the Info. panel. In such a case the user needs to provide another port number by following the steps shown above.
Malware slows down your computer and corrupts the data. Such data cannot be recovered. If you have the system backup, you can restore it, and check if it can be used.
In one particular system data is not getting shared/displayed. The system could be a Laptop which would have not configured to the same domain. If there is mismatch between domain then data won’t get shared. To resolve this:
1. From desktop, click on Start > Control panel > Network and Internet .
2. Click on Home Group .
3. Click on Change advanced sharing settings .
4. Under Domain , select Turn off the password protected sharing .
5. Click on Save Changes and Re-login to system. Now you will be able to share/ display the data.
This particular error may occur, if you do not not have full access to the Tally Data folder or the device is write protected.
Ensure that the Data folder is shared for full access or the device on which you wish to create the Company is NOT "write protected".
Incase the error persists, send an email to support@tallysolutions.com.
It is suggested to restore the earlier backup data and continue working. In case the backup restored is up to an older date, the data until the current date needs to be updated manually. In case you do not have a backup, we recommend that you start taking a backup on a daily basis.
Checking for bad sectors in hard disk helps you identify sections of hard disk that are not being utilised for storing data but is wasted. Proper data on hard disk space usage will help you manage your data better and system to perform read write functions effectively.
1. Open command prompt.
2. Enter chkdsk on the command prompt screen.
3. Check the amount of space (KB) in bad sectors.
4. De-fragment the hard disk based on the results in the report, if required.
Note: Ensure system backup is created before performing de-fragmentation.
We are working towards providing a log file, the details will be updated shortly.
This message is related to the medium on which the backup is taken. The prompt is Tally’s unique way of ensuring that the user has already checked and wants the Tally backup to overwrite all the information available on the medium (such as floppy, zip diskette, and so on).
Select Yes if you wish to overwrite the available information.
This error appears during data backup process if the destination hard disk or drive is affected with virus.
Scan the hard disk or drive and check.