The Cheque Printing option in the Banking menu enables you to print the pending, already printed or the required cheques continuously from a single screen. You can also update the cheque details and have track of cheques to be printed, of a selected or all banks.
Note: The bank ledger needs to be enabled for cheque printing from ledger creation or alteration mode.
Printing Cheques / Cheque Printing Reports
To access Cheque Printing screen
1. Go to Gateway of Tally > Banking > Cheque Printing .
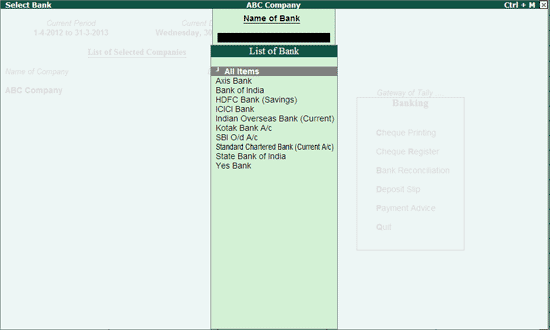
The Select Bank screen displaying the List of Bank appears as shown:
2. Select All or the required Bank account from the List of Bank .
3. Press Enter .
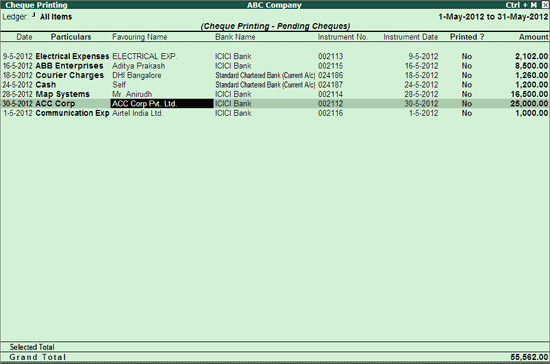
The Cheque Printing screen of the selected Bank is displayed as shown:
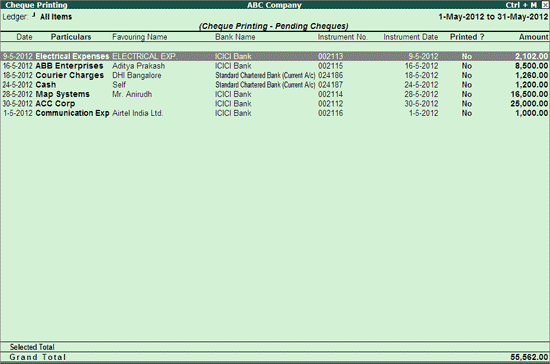
4. By default, this screen displays list of pending cheques of the current date’s month.
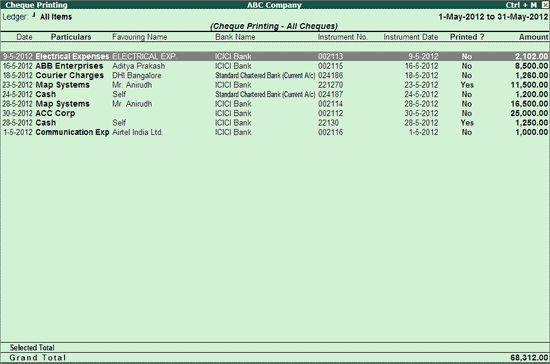
5. Click F6: Show All to display all the cheques.
Note: On clicking F6: Show All , you can toggle to F6: Hide Printed .
The cheque printing screen will prompt with a message Bank not configured for Cheque Printing when the bank ledger not configured for cheque printing is selected, as shown:
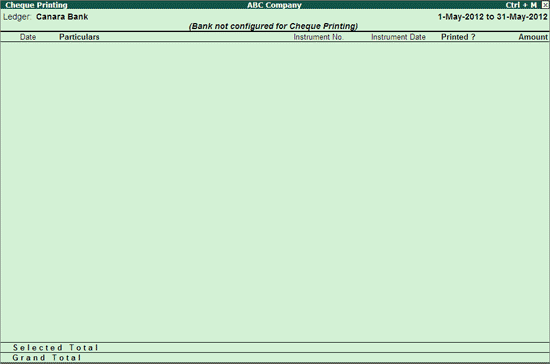
The bank needs to be enabled for cheque printing from ledger alteration screen.
In the Cheque Printing screen of the ledgers configured for it,
● Select the required row from the Cheque Printing list to open the voucher in alteration mode.
● F2: Period : Allows to change the period.
● F4: Bank : Allows to select All / Other required Bank from the list.
● F7: Edit Ch Details : Allows to edit/update the Favouring Name , Instrument No and Instrument Date columns, as shown:
● Accept the screen to save the settings.
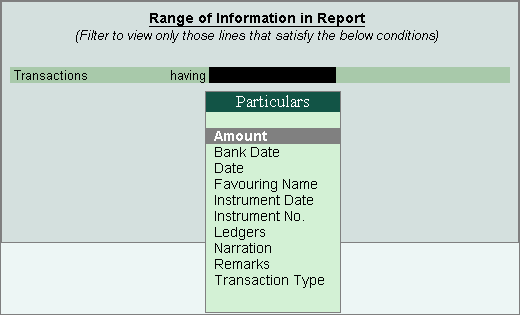
● F12 : Range : Allows to filter the Cheque printing screen. The user can filter the transactions based on the Amount , Bank Date , Date , Favouring Name , Instrument Date , Instrument No. , Ledgers , Narration , Remarks and Transaction Type as shown:
To select the printer
1. Click S : Select Printer.
2. Select the Printer from the List of Printers .
To change the orientation
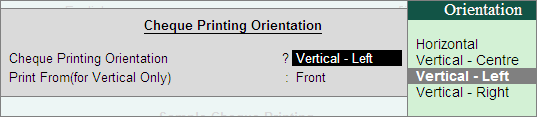
1. Click N : Orientation to view the Cheque Printing Orientation screen.
2. Select the Cheque Printing Orientation , as required.
3. If the orientation selected is Vertical , then select Front/ Rear in the field Print From (for Vertical Only) .
The Cheque Printing Orientation screen appears as shown below:
To modify the pre-configured cheque dimensions
1. Click F12: Configure .
2. Enter the dimensions as required.
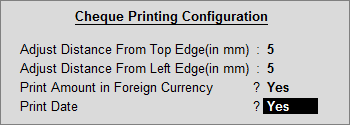
o Adjust Distance From Top Edge (in mm) : To adjust the distance from top edge such that the overall measurements defined in Cheque Dimensions screen get shifted as per the 'mm' entered here.
o Adjust Distance From Left Edge (in mm) : To adjust the distance from left edge such that the overall measurements defined in Cheque Dimensions screen get shifted as per the 'mm' entered here.
o Print Amount in Foreign Currency : Set this option to Yes , to print cheques for foreign currency transactions in the respective currency.
o Print Date : By default the date gets printed on the cheque. If the date is not to be printed on the cheque set this field to No .
3. Enable the option Print Amount in Foreign currency , if required.
4. Set the option Print Date to No , if the date is not to be printed in the cheque.
The Cheque Printing Configuration screen appears as shown below:
5. Press Enter to save.
The adjustments done for overall adjustment using F12: Configuration of cheque printing screen does not affect the settings of c heque dimensions pre-configured for the selected cheque format. The printed cheque appears as shown below:
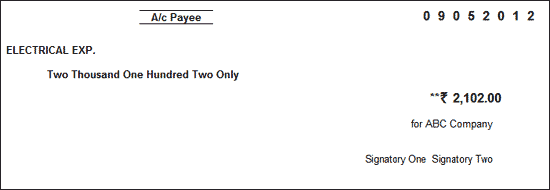
To print selected cheques from the list
1. Go to Gateway of Tally > Banking > Cheque Printing .
2. Select All or required Bank account from List of Bank to view the Cheque Printing screen.
3. Press spacebar to select the required row(s).
4. Click P : Print to view the Cheque Printing screen.
5. Press Enter to print.
Only the selected cheques will be printed.