Related topics |
Time to file GSTR-1? With Tally.ERP 9, file your GSTR-1 in four simple steps. Also, watch our video on this page to learn more.
Steps for filing GSTR-1
● Download and install the GST Offline Tool
● Export GSTR-1 data from Tally.ERP 9
● File returns on the GST portal
Prerequisites for filing GSTR-1
● Internet connectivity: This is required for downloading the offline tool and filing returns.
● Microsoft Office: For exporting data to MS Excel, GSTN recommends MS Excel 2007 or later.
Note: You can use the GST Offline Tool either on the same computer where Tally.ERP 9 runs, or on a different computer.
To download and install the GST Offline Tool
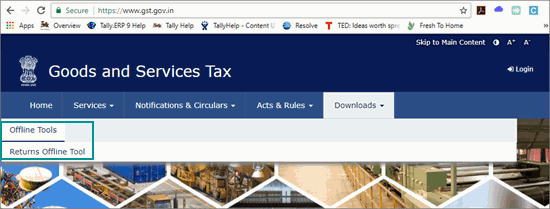
1. Go to the GST portal > Downloads.
2. Click Returns Offline Tool. A .zip file containing the GST Offline Tool will be downloaded. This zip file also contains a detailed document on using the offline tool. Some important information about the tool, and the system requirements for using the tool are also available on the download page.

3. Extract the offline tool from the .zip file and install it.
If you are using an older version of the GST Offline Tool, you have to uninstall it and install the latest version.
To uninstall:
♦ On your computer, go to Control Panel > Programs and Features.
♦ Right click GST Offline Tool, and click Uninstall and proceed.
♦ Similarly, uninstall the Node.js application.
♦ Delete the installation folder of the older version.
♦ Restart your computer. Now you can download and install the latest version of the GST Offline Tool.
You can export your GSTR-1 data either in MS Excel or CSV format. Before exporting GSTR-1, resolve the exceptions in your transactions by going to the Summary of Exceptions (GSTR-1).
Note: The requirement to pay tax on advance receipts from customers has been withdrawn for businesses with annual aggregate turnover up to Rs. 1.5 crores. To support this, calculation of tax liability on advance receipts from customer has been disabled by default in Release 6.1.1.
The value from transactions recorded for tax liability on advance receipt from customers will not be included in the GSTR-1 returns by default. Such transactions will be under Not relevant for returns in the GSTR-1 report. The businesses with turnover above Rs. 1.5 crores can enable the same by setting the option Enable tax liability on advance receipts to Yes in the Company GST Details screen.
To export GSTR-1
1. Go to Gateway of Tally > Display > Statutory Reports > GST > GSTR-1.
2. Select the period for which returns need to be filed.
3. Press Ctrl+E.
Note: The Format is set to Excel (Spreadsheet) by default. To change the format, select CSV (Comma delimited) on the Export Report screen.
4. Specify the Export Location and Output File Name.
5. Set Export HSN/SAC details even if UQC is not available? to Yes to export the transactions having stock items not mapped to UQC. Do the required conversion in the MS Excel before importing the file into the offline tool or directly enter it on the portal.
6. Set Export HSN/SAC details not included for other reasons? to Yes to export the transactions which are not included in HSN/SAC Summary for other reasons. Enter this data on the portal.
7. Set Export document summary? to Yes to generate the worksheet with relevant information of document summary.
8. In Allow Export of select All Vouchers to generate the MS Excel file with all the transactions. If you have already filed data for a few days in the period, on GSTN portal, select Only New Vouchers to export the transactions that are not filed on GSTN portal. Ensure that you use a different MS Excel file name, to avoid overwriting the existing files with the new transactions.
9. Press Enter to export.
If you have selected the CSV format, Tally.ERP 9 will create separate CSV files for each table in GSTR-1. These files need to be imported into the offline tool.
Note: If the data exported to MS Excel has $ symbol in place of transaction details, or if the values are not appearing, generate CSV file and import it into the offline tool. If you wish to continue with MS Excel, you have to modify the Trust Center Settings in MS Excel, and add the location where Tally.ERP 9 is installed on your computer. Click here for more information.
For more details on the information captured in each column of the e-return template, click here.
● The GST department has not issued GSTIN/UIN for e-commerce operators. Currently, when data is exported from Tally.ERP 9 to MS Excel or CSV files, the GSTIN/UIN entered in the e-commerce party ledger is captured as E-Commerce GSTIN in b2b, b2cl, and b2cs worksheets. After exporting data to MS Excel or CSV files:
1. Delete the GSTIN/UIN captured in the column E-Commerce GSTIN.
2. Set the Type as OE in b2cs worksheet.
3. Generate the JSON file.
● The list of Unit Quantity Code provided by the department does not have the representative code for brass, carats, litres, running foot, and so on. To handle this situation:
1. Based on your business requirement, map the unit to the related UQC and export it to MS Excel or CSV files. For example, you can map litres to KLR-KILOLITRE.
2. In the hsn worksheet of the template or CSV file, convert the quantity as per the mapped UQC. For example, if litre is mapped to KLR-KILOLITRE, multiply the quantity by 0.001 in the hsn worksheet of the template or CSV file to convert litre to kilolitre.
3. Upload the modified MS Excel template or CSV file to the GST Offline tool.
4. Generate the JSON file.
Examples of mapping units to the related UQCs with the conversion factors are given below:
Unit of Measure |
Nearest UQC |
Conversion of Quantity in Template |
Litres |
KLR-KILOLITRE |
Multiply by 0.001 |
MLT-MILILITRE |
Multiply by 1000 |
|
Carat |
KGS-KILOGRAMS |
Multiply by 0.0002 |
GMS-GRAMMES |
Multiply by 0.2 |
|
Brass |
SQF-SQUARE FEET |
Multiply by 100 |
CBM-CUBIC METERS |
Multiply by 2.835 |
|
Running foot |
MTR-METERS |
Multiply by 0.3048 |
Cubic inches |
MLT-MILILITRE |
Multiply by 16.3871 |
Hanks |
YDS-YARDS |
For cotton, multiply by 840 |
For woolen, multiply by 560 |
||
Inches |
MTR-METERS |
Multiply by 0.0254 |
CMS-CENTIMETERS |
Multiply by 2.54 |
|
Pounds |
TON-TONNES |
Multiply by 0.000453592 |
KGS-KILOGRAMS |
Multiply by 0.453592 |
|
GMS-GRAMMES |
Multiply by 453.592 |
|
Lots |
TON-TONNES |
Multiply by 0.0000128 |
KGS-KILOGRAMS |
Multiply by 0.0128 |
|
GMS-GRAMMES |
Multiply by 12.8 |
|
Milligrams |
GMS-GRAMMES |
Multiply by 0.001 |
Decameter square |
SQY-SQUARE YARDS |
Multiply by 119.599 |
SQF-SQUARE FEET |
Multiply by 1076.39 |
|
Square inches |
SQM-SQUARE METERS |
Multiply by 0.00064516 |
SQY-SQUARE YARDS |
Multiply by 0.000771605 |
|
SQF-SQUARE FEET |
Multiply by 0.00694444 |
|
Tola |
GMS-GRAMMES |
Multiply by 11.6638125 |
Note: The e-Return file has provision to capture the taxable value and tax rate but not the tax amount. Hence, the tax amount is not exported to the e-Return file. Tax value is automatically calculated after upload to the portal based on rate, taxable value and place of supply.
Now you need to import your data (either in MS Excel or CSV format) to the GST Offline Tool, and generate the JSON file.
To import data and generate the JSON file
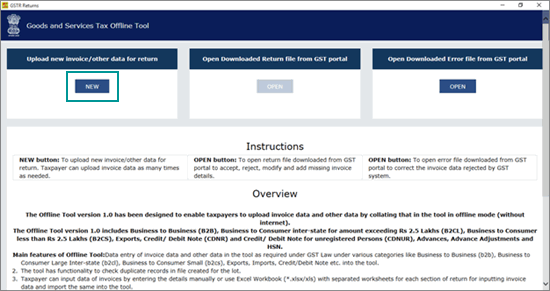
1. Open the GST Offline Tool.
2. Click NEW.
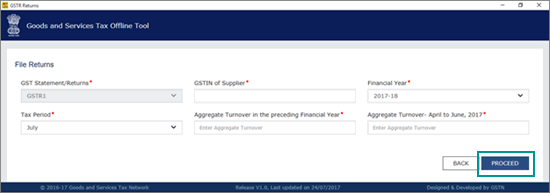
3. Provide the required details, and click PROCEED.
4. Click IMPORT FILES.
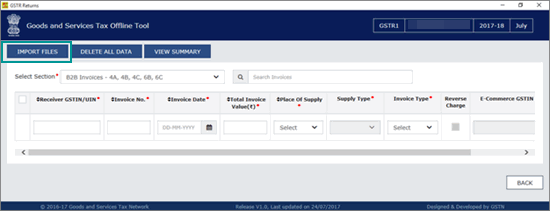
5. Click IMPORT EXCEL, and select your file.
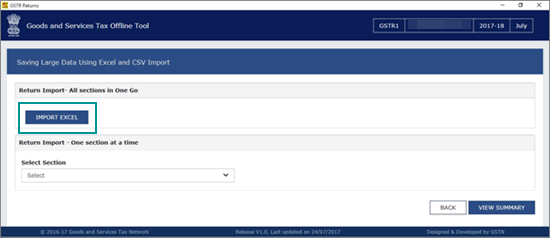
Note: If the tool shows a warning that some invoices contain invalid input, you can ignore it and proceed. This happens when you do not have transactions in the given sections.
To export the return details in the CSV format, select the name of the table in Select Section under Return Import – One section at a time, and click Import CSV. You have to individually import files for each section.
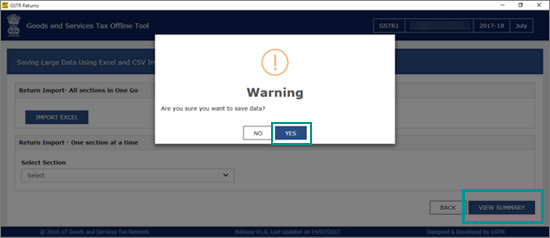
6. Click YES on the warning message, and click VIEW SUMMARY.
7. Click GENERATE FILE.
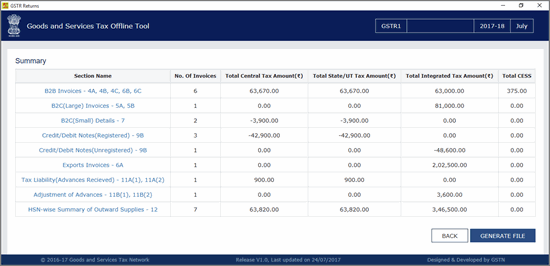
The offline tool generates a JSON file that has to be uploaded on the GST portal.
To file GSTR-1 returns
1. Log in to the GST portal.
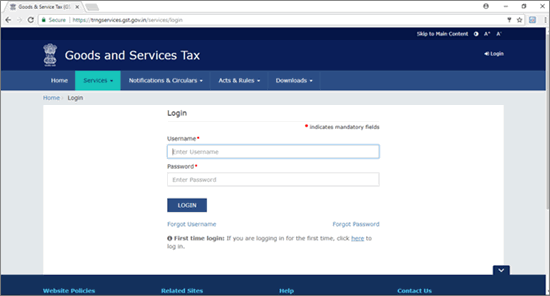
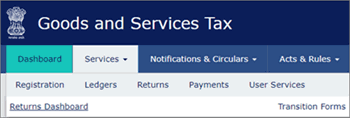
2. Click Services > Returns > Returns Dashboard.
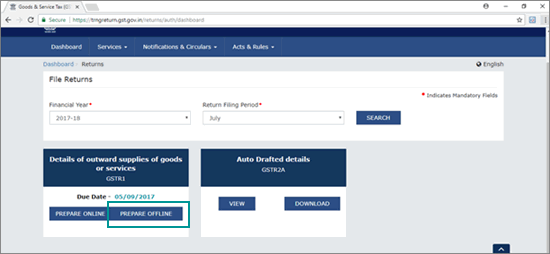
3. Select the Return Filing Period, and click Search.

4. Click PREPARE OFFLINE.
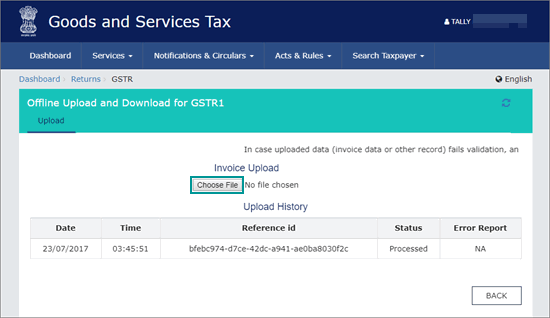
5. Click Choose File to import the JSON file.
Once your JSON file is uploaded successfully, you will be notified by a message.
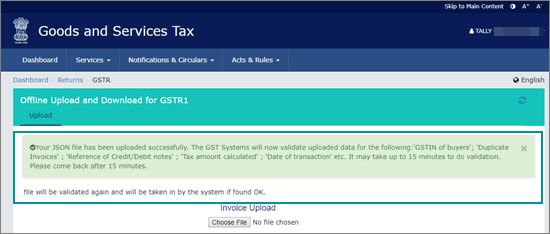
6. Verify the uploaded details after the time specified in the GSTR screen.
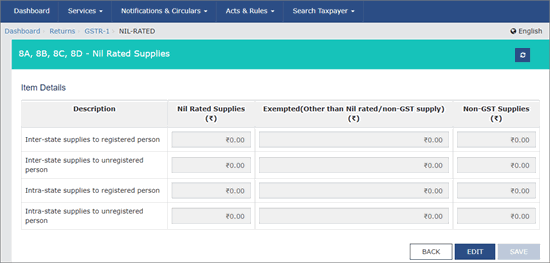
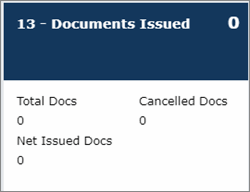
You have to manually enter the details for Nil Rated Supplies and Documents Issued by referring to the table-wise format of GSTR-1, because these details do not get directly uploaded to the portal.
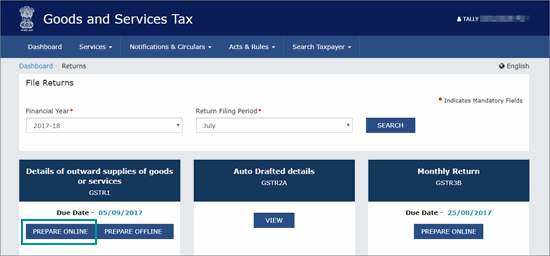
7. Go to Services > Returns > Returns Dashboard, and click Prepare Online.
8. Go to the 8A, 8B, 8C, 8D - Nil Rated Supplies page, and enter the details.
9. Go to the 13 - Documents Issued page, and enter the details.
10. Submit your returns and e-sign.