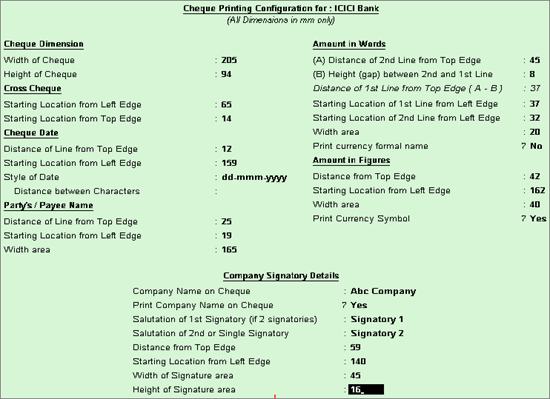
Cheque printing dimensions from the sample formats can be used or bank specific templates can be used. However, the flexibility to define dimensions as per your requirement is available.
To define the cheque format manually
1. Go to Gateway of Tally > Accounts Info. > Ledgers > Create. The Ledger Creation screen appears.
2. Enable the option Set/Alter Bank Details?. The Bank Details screen appears.
o Enable the option Set Cheque Printing Configuration?. The Cheque Format Selection screen appears.
o Select User defined from the List of Cheque Formats or click U: User defined as shown below:

o Define values in the Cheque Dimensions screen, as required.
Note:
♦ All the dimensions are filled in millimeters.
♦ If the Style of Date selected is dd-mm-yyyy, the cursor skips the field Separator used in date.
♦ If Style of Date used is other than dd-mm-yyyy, users can use '-' or '/' as a separator. Press Alt+255 in the Separator used in date field to use space as separator.
♦ You can specify two signatories, for example, one could be Managing Director and the other could be Director, etc.
The completed Cheque Dimensions screen appears as shown below:

3. Press Alt+P to print or preview the settings.
4. Press Enter to save details.
Cheque Printing in Tally.ERP 9
Enabling Cheque Printing in Bank Ledger with TSS and internet