Create Party Ledgers for GST
You can create party ledgers for GST in TallyPrime for the parties with whom you purchase and sell goods and services, with the GST registration details.
You can create supplier Ledger, customer Ledger and enter the GSTIN/UIN based on the party type.
You can set GST rates in the ledger grouped under non-revenue accounts, for example, Current Assets and Current Liabilities. If you have created the party ledgers under groups other than Sundry debtors, Sundry creditors, Bank, Cash, and Branch/divisions:
Supplier Ledger
- Gateway of Tally > Create > type or select Ledger > and press Enter.
Alternatively, press Alt+G (Go To) > Create Master > Ledger > and press Enter. - Enter the Name of the supplier’s ledger.
- Select Sundry Creditors in the Under field.
- Set the option Maintain balances bill-by-bill to Yes.
If you do not see this option, press F12 (Configure) > set Maintain balances Bill-by-Bill to Yes. - Enter the Default credit period, if any.
- Select the party Registration type, and enter the GSTIN/UIN.
- Enable the option Set/Alter GST Details to open the GST Details screen.
- Accept the screen. As always, you can press Ctrl+A to save.
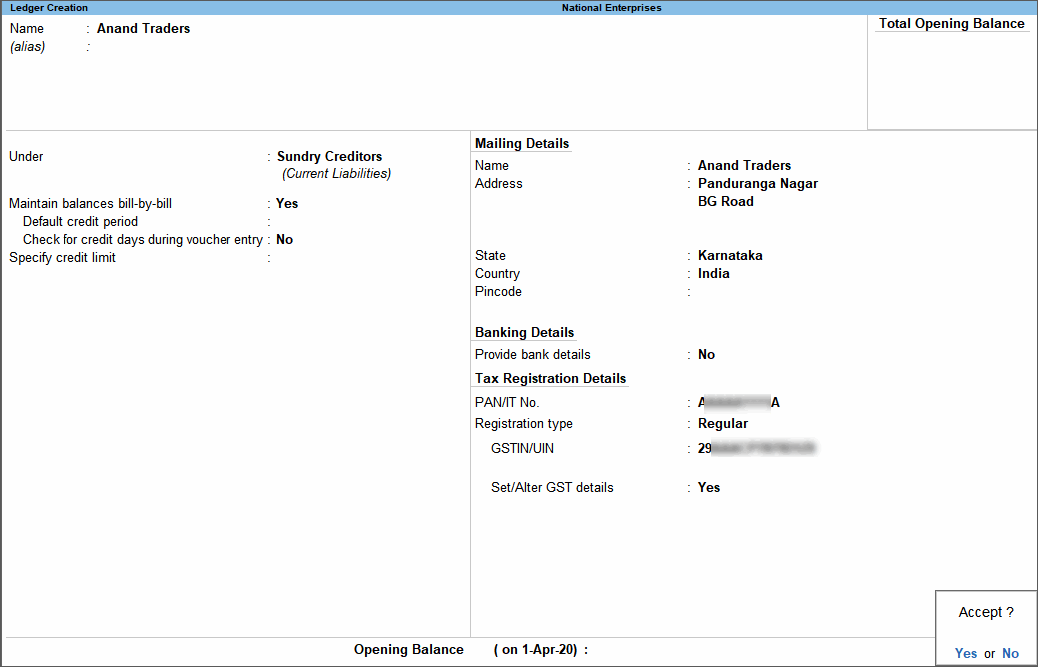
The Ledger Creation screen appears as shown below:

- Accept the screen. As always, you can press Ctrl+A to save.
Customer Ledger
- Gateway of Tally > Create > type or select Ledger > and press Enter.
Alternatively, press Alt+G (Go To) > Create Master > Ledger > and press Enter. - Enter the Name of the customer’s ledger.
- Select Sundry Debtors from the List of Groups in the Under field.
- Set the option Maintain balances bill-by-bill to Yes.
- Enter the Default credit period, if any.
- Select the party Registration type, and enter the GSTIN/UIN.
- Enable the option Set/Alter GST Details to open the GST Details screen.
- Set the option Assessee of Other Territory to Yes if the party is belongs to Exclusive Economic Zone (other territory).
- If the supplier is an e-commerce operator, then enable the option Is e-commerce operator.
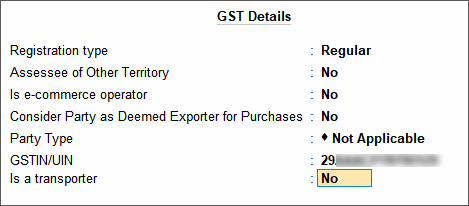
The GST Details screen appears as shown below:


- Accept the screen. As always, you can press Ctrl+A to save.
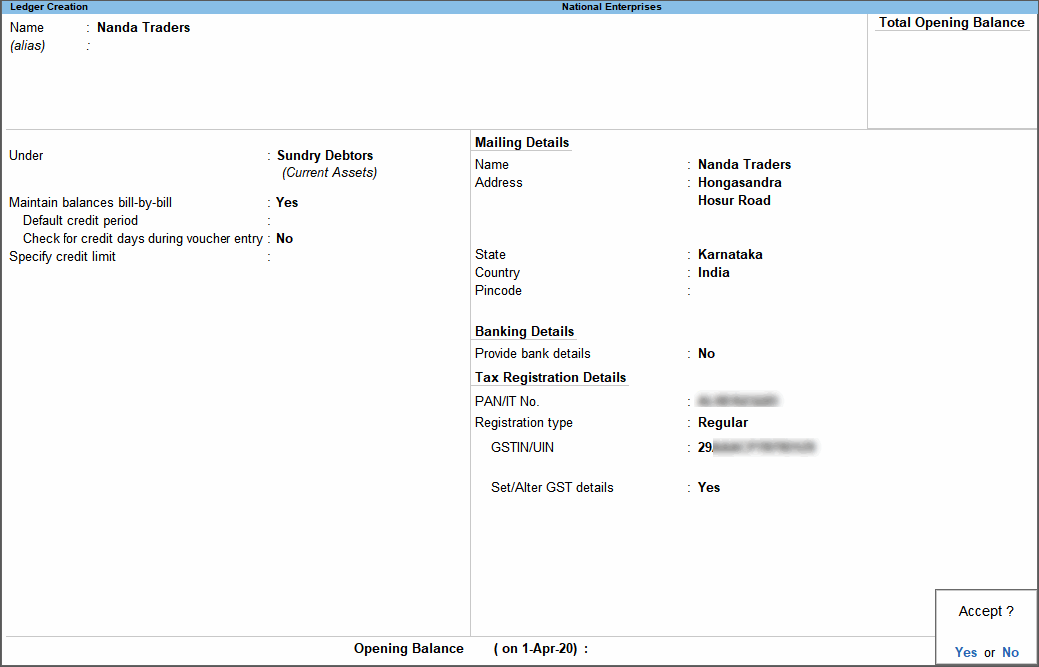
The Ledger Creation screen appears as shown below:


- Accept the screen. As always, you can press Ctrl+A to save.
GSTIN/UIN Format
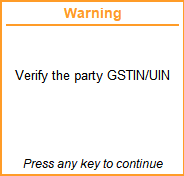
The GSTIN/UIN entered in party ledger gets validated by considering the formats prescribed for all the party types. If a GSTIN/UIN does not fall in the supported formats, a warning message appears as shown below:
If you have provided a valid GSTIN/UIN (the format that is newly introduced by the department), you can ignore this message and save the ledger. The transactions recorded using this ledger will appear as exceptions in the Information required for generating table-wise details not provided section of GSTR-1, GSTR-2, GST CMP-08.
You can do the following to include such transactions in the returns.
- Press Alt+V (Accept GSTIN/UIN)
- Press Enter to skip the GSTIN/UIN validation and accept the voucher.
To move the voucher back to exceptions, press Alt+V (Accept GSTIN/UIN) in the Vouchers Accepted without Party GSTIN/UIN Validation screen.


