Fixed Assets Analysis
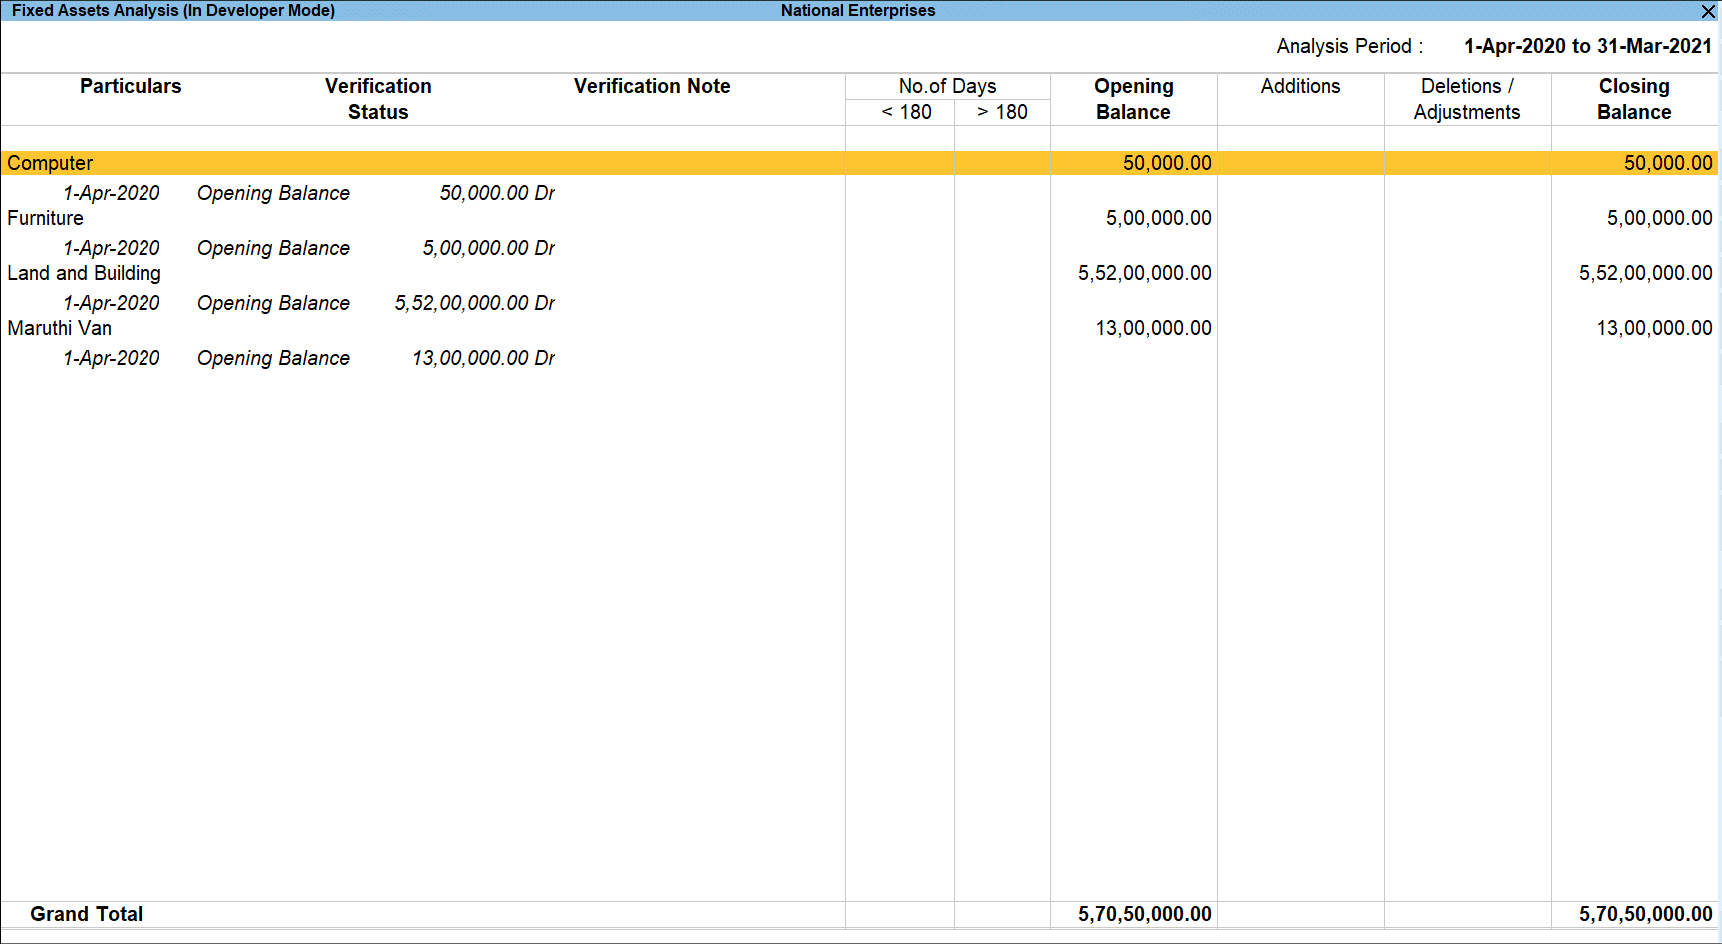
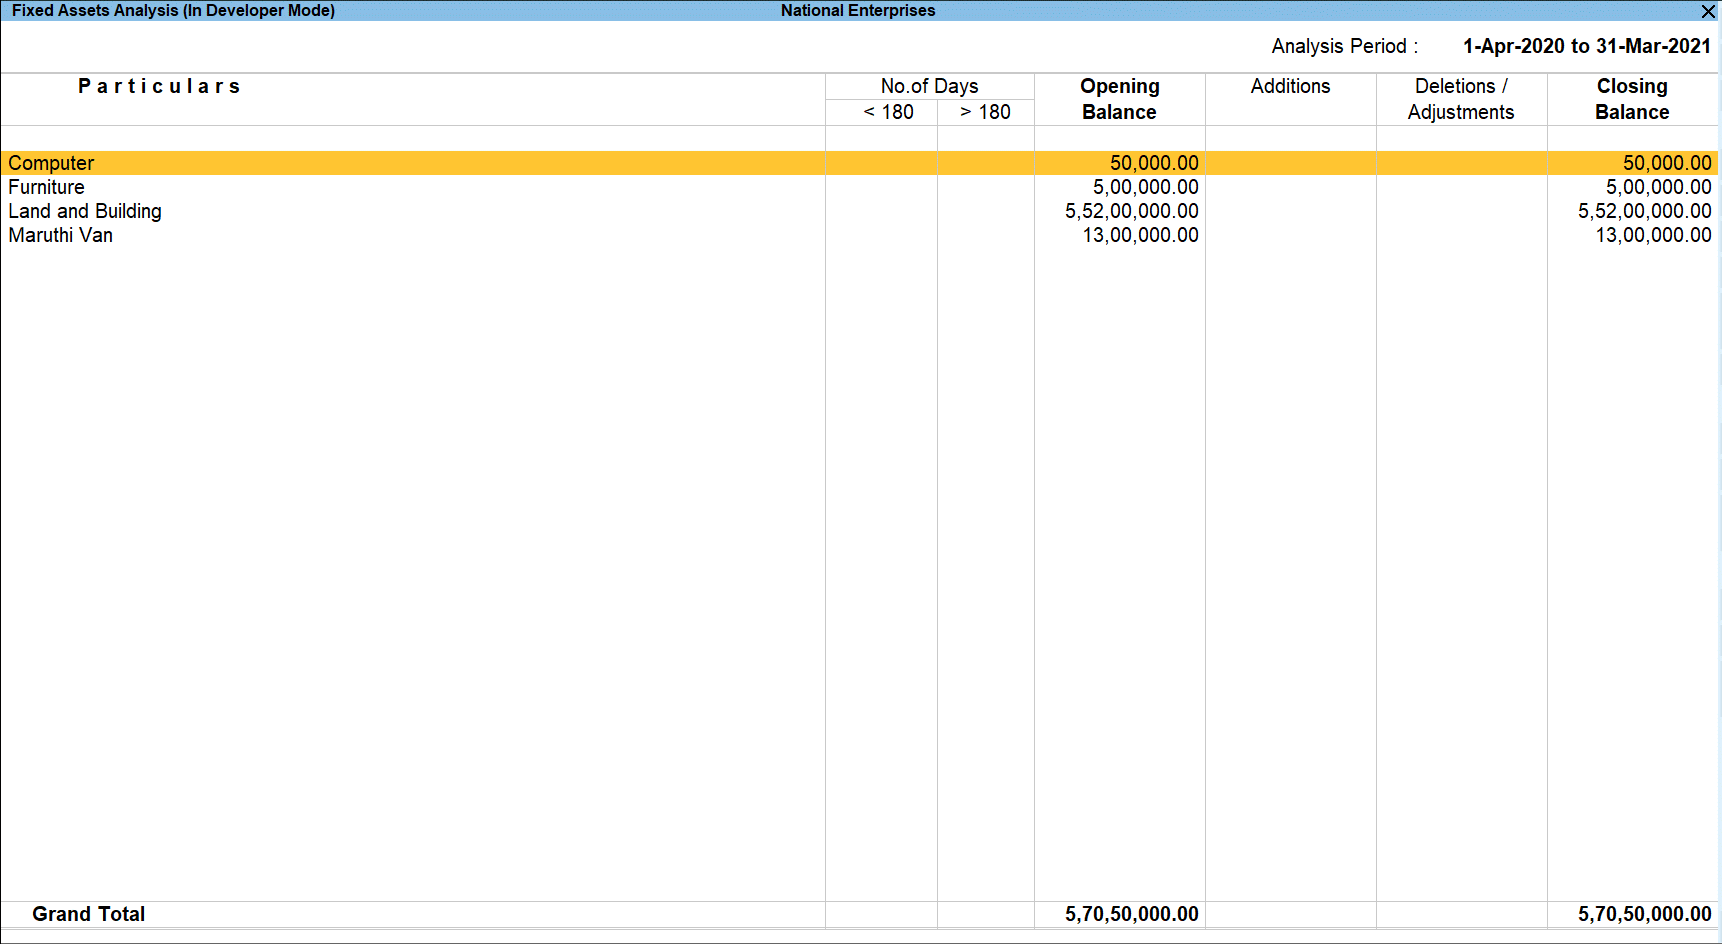
The Fixed Assets Analysis report in TallyPrime provides the details of all the Fixed Assets possessed by the selected Company at the end of the Analysis Year.
- Number of days for the Assets purchased/procured during the Analysis Year with the option to classify as less than 180 days and more than 180 days. The relevant Purchase entries are also available for scrutiny.
- Opening Balance of the Assets brought forward from the previous year.
- Additions of those assets which have been purchased during the analysis year.
- Deletions/Adjustments of those assets which have been sold during the analysis year.
- Closing Balance for each Fixed Assets at Group and Ledger level.
View the Fixed Assets Analysis Report
Gateway of Tally > Display More Reports > Analysis & Verification > Data Analysis > Fixed Assets Analysis.
Alternatively, press Alt+G (Go To) > type or select Fixed Assets Analysis > and press Enter.
The above report displays the details of the Fixed Assets, number of days for the Assets added during the Analysis Year, Opening Balance of the Assets carried forward from the previous year, details of Additions/deletions and the Closing Balance.
The No. of Days will be displayed only for the Fixed Assets procured/purchased during the year and will be visible only in the exploded mode.
Button options in the Fixed Assets Analysis Report
- Press F2 (Period)to change the selected period.
- Press Alt+F5 (Detailed) to viewed the detailed Fixed Assets Analysis report displaying the No. of Days for the additions during the Analysis year.

TallyPrime provides the flexibility of verifying the Vouchers from the Fixed Assets Analysis screen also. The Vouchers which are verified from the above report will be displayed with the Verification Status and Verification Note in the detailed mode. - Press F9 (Analysis & Ver Reports): type or select Movement Analysis > press Enter.
You can follow this step to open any of the Accounting, Inventory, and Verification reports from the list. - Press Alt+R (Verify) to verify the selected vouchers.
Note: The Verify button will be highlighted only when one or more vouchers are selected for verification using Spacebar. - Press Alt+S (Remove Verify) to change the Verify Status for the selected vouchers as not verified.
- Press Alt+V (Master Configuration) to identify Related Parties and apply Sampling Methods for analysis.
- Press F12 Configure to change the default view of the report:

- Show Verification Note: Set this option to Yes to view Vouchers along with their Verification Notes.


