
Synchronisation rule for the client company defines your data synchronisation preferences. The client rule sets options for synchronising all masters and transactions. You need to activate the sync rules to perform synchronisation.
To activate the rule on server
1. Go to Gateway of Tally > Import of Data > Synchronisation > Server Rules > Activate . The Select Item screen appears as shown below:

2. Select the rule from the List of Rules.
The Rule Type tells you if the rule you are selecting is a masters or transactions rule.
The Server Rule Alteration screen appears as shown below:
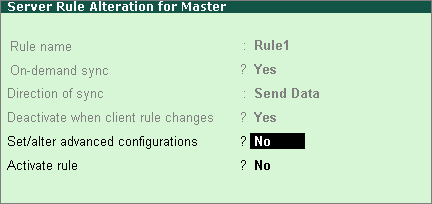
Set Set/alter advanced configurations? to Yes to change the advanced configuration. You can specify advanced configurations for send masters or receive masters.
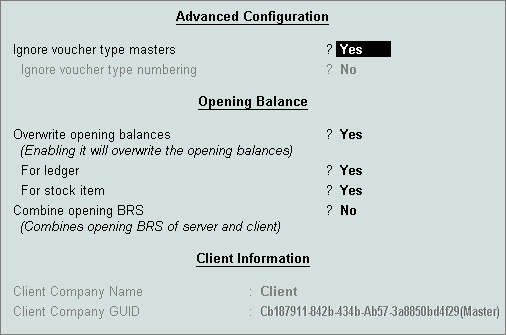
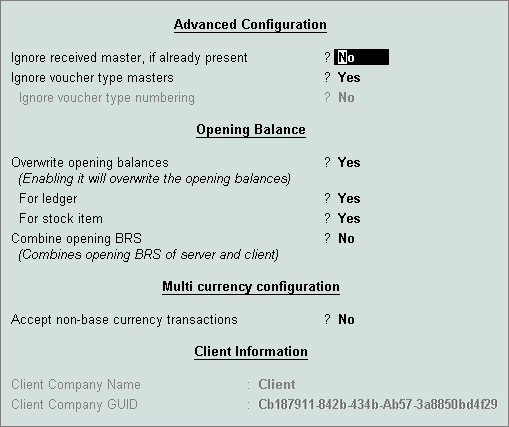
The Advanced Configuration screen appears as shown below:
To define advanced configuration
1. Set Ignore voucher type masters? to Yes to ignore changes in voucher types made at the server company.
2. Set Ignore voucher type numbering? to Yes to ignore voucher numbering and related configurations. Set this option to No to overwrite voucher numbering configuration.
3. Set Overwrite opening balances? to Yes to overwrite opening balance for ledgers and/or stock item.
4. Select Combine opening BRS? to Yes to combine the opening BRS of server and client company.
The Client Information section displays details of the client rule set.
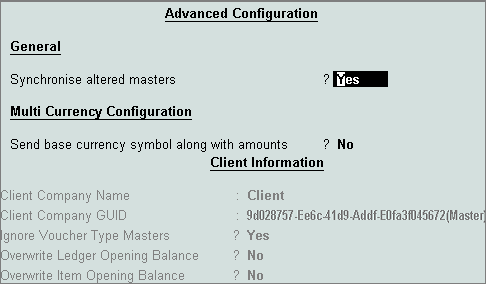
The Advanced Configuration screen appears as shown below:
To define the advanced configuration
1. Set Synchronise altered masters? to Yes to synchronise changes on masters altered since the last synchronisation.
2. Set Send base currency symbol along with amounts? to Yes to send the base currency symbol of the company to the server.
Client Information contains details of the client rule set.
The Server Rule Alteration screen appears as shown below:
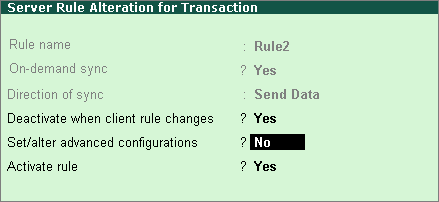
Set Set/alter advanced configurations? to Yes to change the advanced configuration. You can specify advanced configurations for receive data, send data or both.
The Advanced Configuration screen appears as shown below:
See Advanced Configuration for Receive Data for information on configuration options.
The Advanced Configuration screen appears as shown below:
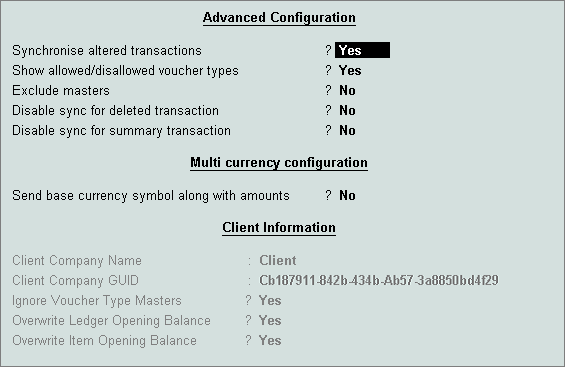
To define the advanced configuration
1. Set Synchronise altered transactions? to Yes to synchronise changes to transactions made post synchronisation.
2. Set Show allowed/disallowed voucher types? as Yes to display the allowed/disallowed voucher types.
3. Set Exclude masters? while sending to Yes to leave out dependant masters along with transactions.
4. Set Disable sync for deleted transaction? to Yes to leave out deleted vouchers for synchronisation.
5. Set Send base currency symbol along with amounts? to Yes to send the base currency symbol to server company.
Client Information displays details of the client rule set.
The options for sending and receiving data are explained in Advanced Configuration for Send Data and Advanced Configuration for Receive Data .