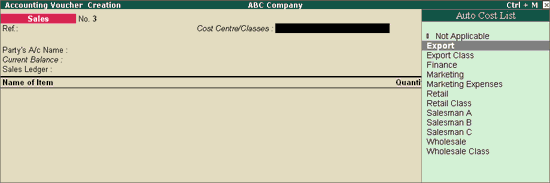
Each voucher now contains the Cost Centre/Classes option at its head. Select Not Applicable in case you want to allocate manually. Select a cost centre class to auto-allocate according to the predefined percentages set in that class.
Let us examine this with two examples, a sales entry and a payment entry.
In sales, let us select Export as the Cost Centre Class .
● Go to the Voucher Entry Screen.
● Select F8: Sales.
You have the following options:
● Select one of the classes created earlier, in this case Export.
● Now enter the sales invoice . The cost centre allocation sub-screen will not be displayed but the allocation will be done automatically.
● After accepting the entry, check the cost centre displays to verify whether the allocation was done correctly.
● Similarly, when you press F5: Payment , similar options are displayed. Select Marketing Expenses in that case. The cost centre allocation sub-screen will not be displayed but the allocation will be done automatically.
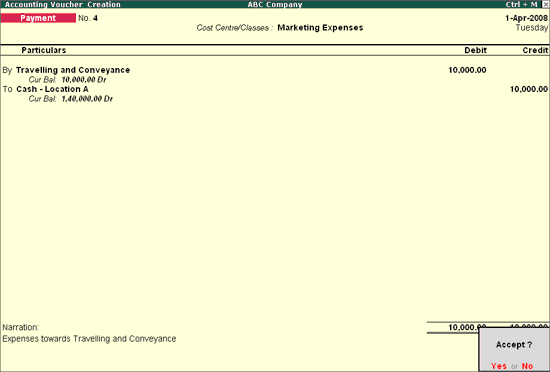
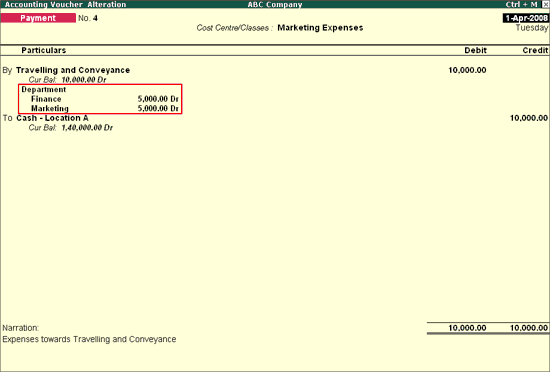
● Use PgUp to check the entry in alteration mode. It will display the allocation in the voucher.
● Check the cost centre reports for allocation.
Note: You can combine Voucher Class and Cost centre class to maximize automation.