If multiple stock items have to be modified to change the configuration from calculation of VAT on MRP to just printing MRP in invoice, the changes have to be made in the XML file.
To make the required changes in XML,
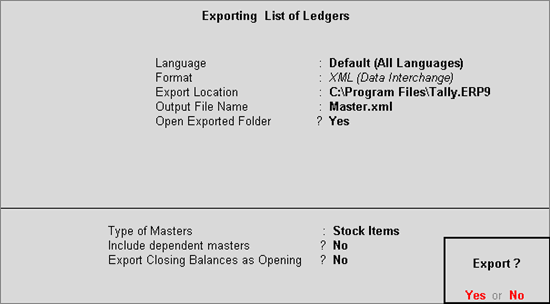
1. Go to Gateway of Tally > Display > List of Accounts > Export .
2. Do not change the Export Location .
3. Select the Type of Master as Stock Items as shown below:
4. Press Enter to export. The folder in which the XML file is generated appears.
5. Right click the Master.xml file and select Open with > Notepad .
6. Press Ctrl+H in notepad and enter the text.
o <CALCONMRP>Yes</CALCONMRP> in the field Find what .
o <CALCONMRP>No</CALCONMRP> in the field Replace with .
7. Click Replace All .
8. Press Ctrl+A to accept the notepad.
To import the XML,
1. Go to Gateway of Tally > Import Data > Masters .
2. Type the Import File Name (XML) as Master.xml .
3. Set the option Treatment of entries already existing to Modify with New Data .
4. Press Enter to import.
On importing data, the MRP configuration changes to display of MRP for print.