A Multi-site account is a type of account under which multiple Tally.ERP 9, Tally.Developer 9, or Tally.Server 9 licenses activated on different locations, can be added. Each site is given a unique identification by the user, which is termed as Site ID. The multi-site account is identified using a unique Account ID.
For example, a company with branch offices in multiple locations, where single and multi-user licenses are activated, can create a multi-site account and the administrator can centrally manage all the branch office licenses.
To activate a multi-site account
1. Start Tally.ERP 9.
2. Click A: Activate Your License in the Startup screen, as shown below:

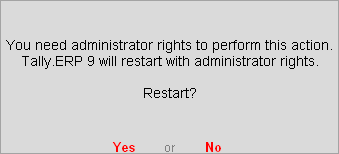
o If you are a Microsoft Windows standard user, and do not have the required rights, a message appears as shown below:

Click Yes, and enter your computer administrator username and password to restart Tally.ERP 9 with administrator rights.
o If you have Microsoft Windows administrator rights, a message appears as shown below:

o Click Yes, for Tally.ERP 9 to restart with administrator rights.
3. Click F2: Multi-Site to view the Site License Activation screen.
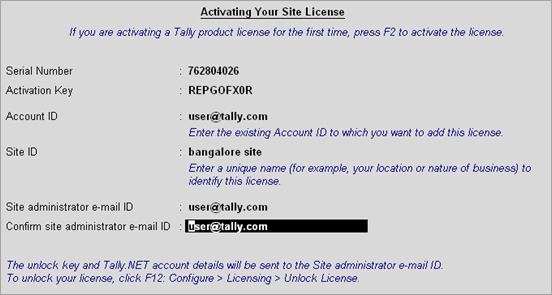
4. Enter the Serial Number and Activation Key.
5. Enter the Account ID to which you want to add this license. Contact your administrator for this information.
6. Enter the Site ID. The Site ID should be a unique name to help you to identify this license.
7. Enter the Site administrator e-mail ID. The Site administrator is authorised to perform all licensing operations for this Site. The Site License Activation screen appears as shown below:

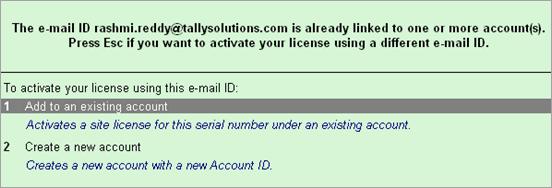
8. Press Enter to save. The Manage Account screen appears as shown below:

9. Click Create a new Site to activate this site license. A confirmation message appears on successful activation.
Note: Click Reactivate an existing Site to reactivate an existing site license.
10. Press Enter to view the Unlock License screen.
11. Enter the Unlock Key sent to your e-mail ID in the Unlock License screen, as shown below:

12. Press Enter to unlock your license. A confirmation message appears after you unlock your license.
On activation, the license details are displayed in the Information Panel.