Purchase Voucher Classes are templates where you can restrict accounts to be used in entries as well as automate accounting entries for items and expenses.
You can either alter the existing Purchase Voucher Type or create a new voucher type based on the requirements.
To Configure Purchase Voucher Class
● Go to Gateway of Tally > Accounts Info. > Voucher Type > Alter > Purchase.
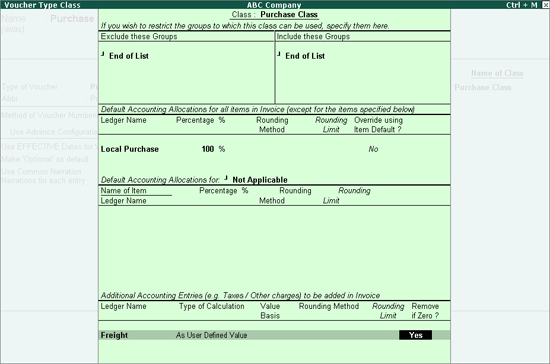
● Give a name to the class under Name of Class, for example, Purchase Class. You can create more than one class. (Make sure that Enter Purchases in Invoice Format in F11: Features is enabled to create class). Create the Class as shown below:

In Default Accounting Allocations for each Item in Invoice (except for the items specified below) section
o Select the Purchase Ledger – Local Purchases. All the stock items that will be entered in the voucher using this class, except for those specified in the Default Accounting Allocations for section, will be automatically allocated to Local Purchases. Of course, the stock item record remains as it is and can be viewed separately.
o Specify 100% in Percentage field.
o Set Override using Item Defaults? to No.
o Default Accounting Allocations: Set Default Accounting Allocations to Not Applicable (Refer to Voucher Class - Allocation of Stock Item for the usages of this option).
● Record Purchase by passing a Purchase entry using the created Purchase Class:
o Go to Gateway of Tally > Accounting Vouchers > F9: Purchase.
o Select the Class.

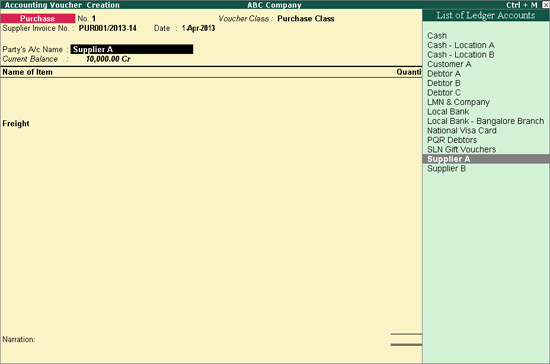
o Select the Supplier Account.

You will observe that the Ledger Accounts grouped under Sundry Debtors are also listed as you have not specified any condition to exclude Sundry Debtors Group. If you have specified Sundry Debtors under Exclude option, then Tally would have displayed the Ledgers excluding those Ledgers grouped under Sundry Debtors.
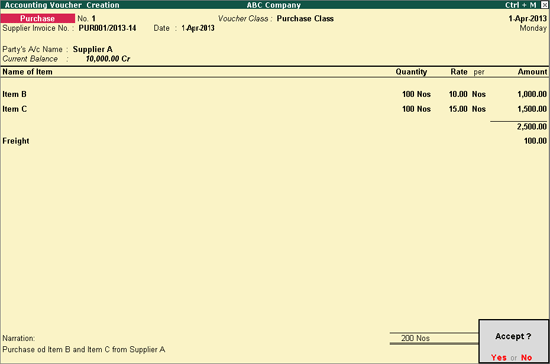
Please note that the Freight Ledger is automatically displayed and the user has to only specify the value.

Once you select Item B, specify the Quantity and Rate, the value will be automatically calculated and the cursor will directly move to the Name of Item field instead of popping up the Accounting Allocations for screen.