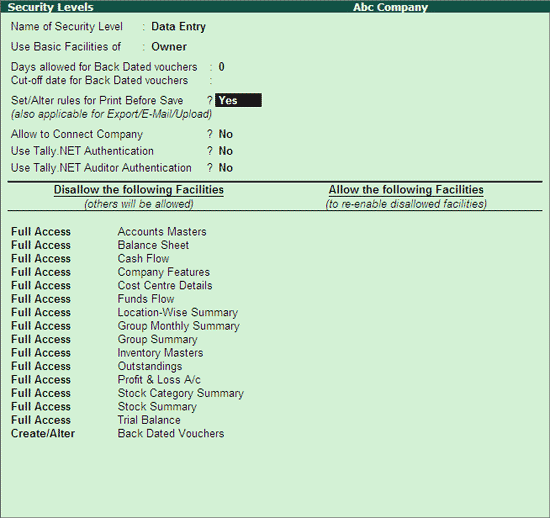
The Name of the Security Level is the one you have entered in the previous screen
Use Basic Facilities of – the administrator can select the required facility from the Security List. In case there already exists user defined security levels, they will be displayed in the Security List. The new level created will be displayed when the user creates another security level
Days Allowed for Back Dated Vouchers – By default this field is set to 0, enter the required number of days. Alteration or Insertion of backdated vouchers can be done within the number of days mentioned from the Date of Last Entry of vouchers
Cut-off date for Backdated vouchers – the user can specify the required date. Tally.ERP 9 does not allow you to record a transaction prior to the date mentioned. This can be used in addition to Days Allowed for Backdated Voucher. This input will be useful in situations where you have completed the audit and do not require any changes in the data
Set Rules for Print Before Save - set this option to Yes in order to restrict a security level from printing the required voucher type before saving the voucher or restrict a security level from printing all the available voucher types before saving the vouchers

By default Set Rules for Print Before Save is set to No which allows the user to print all the available voucher types.
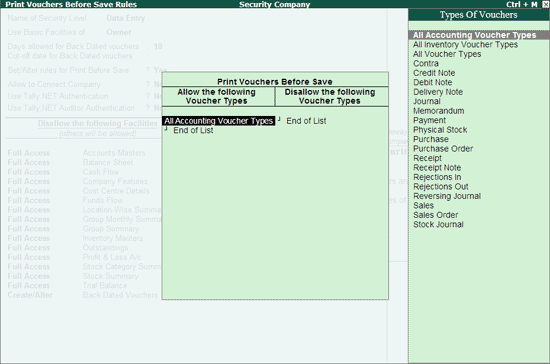
The Print Vouchers Before Save Rules screen appears
In Allow the following Voucher Types
From the Types of Vouchers displayed select the required voucher type that is allowed for printing before save

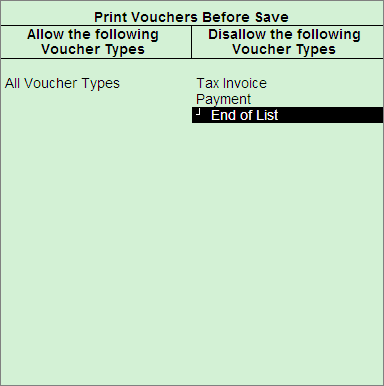
In Disallow the following Voucher Types
From the Types of Vouchers displayed select the required voucher type that need to be disallowed for printing before save

Allow to Connect Company – by default it is set to No. Set this to Yes if you need to connect the respective company to the Tally.NET Server
Use Tally.NET Authentication – by default it is set to No. Set this to Yes if you need to work from a remote location
User Tally.NET Auditor Authentication – by default this option is set to No. Set it to Yes if you want to scrutinise the data of the client from a remote location
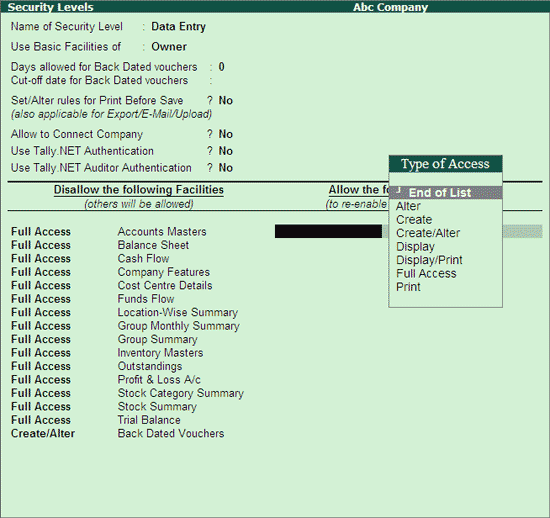
Permissions for Security Levels – The columns Disallow the following Facilities or Allow the following Facilities are further divided into two columns each
Disallow the Following Facilities - To disallow access to different options, select the required type of access from the Type of Access and then select the report for which the access rights are restricted from the List of Reports. You can set the access rights for different options. E.g., Select Full Access for the Balance Sheet, you will not have access to the Balance Sheet for this Security Level
Allow the following Facilities – Conversely when you select Full Access to the Balance Sheet, there will be full access to the Balance Sheet for this security level

Press Enter to return to Security Levels for Company screen. You can create the next security level following similar steps or press Enter to save and return to Security Control Menu.