The Jobs & Recruitment function not just allows a user to recruit candidates for an employer/user, but it also allows to recruit candidates on behalf of the client. While the entire process of recruitment remains the same, the client needs to be created and has to be assigned to the respective Job Profile created.
Recruiting on behalf of the client involves three steps which are as shown below:
Enable Client
Create Client
Assign Client to a Job
To enable client option follow the steps shown:
In the Control Centre screen, select Jobs & Recruitment.
Select Job Management.
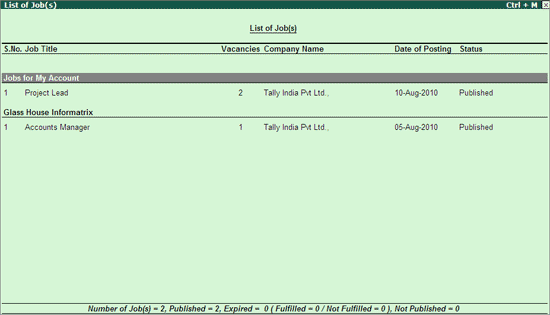
The List of Job(s) screen appears:
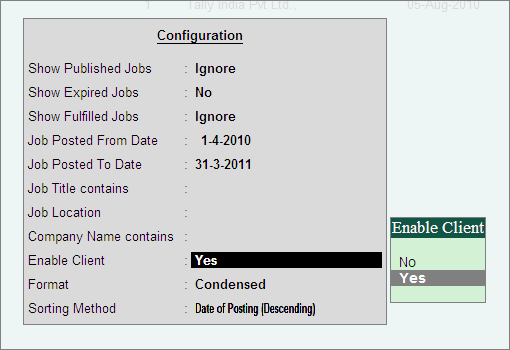
Click F12: Configure or press F12, the Configuration screen appears.
Set Yes to Enable Client as shown:

Save the settings
Once the Client is enabled, the buttons C: New Client and L: List of Client(s) appear in the vertical buttons bar.
To create a client follow the steps shown:
In the Control Centre > Jobs & Recruitment.
Select Job Management.
The List of Job(s) screen appears:
Click C: Create Client or press Alt + C
The Client Creation screen appears as shown:
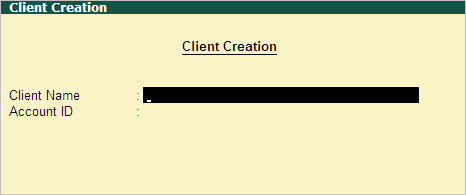
Enter the client’s name in Client Name field.
Enter the client’s Account Administrators E-Mail ID in Account ID field.
The completed Client Creation screen appears as shown:
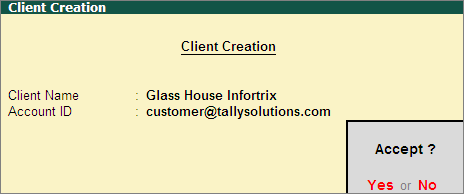
Press Enter to accept the client creation
Similarly, create other required client by follow the steps mentioned above.
To view the client list:
From the List of Job(s) screen
Click L: List of Client(s) or press Alt + L
The List of Client(s) screen appears along with the status as shown:
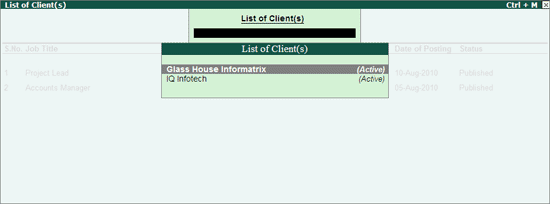
Note: The status of Client can be changed through Client Alteration mode.
To alter a client, select the required client from the List of Client(s) and press Enter.
The Client Alteration screen appears.
Alter the Client Name, Account ID or Status fields based on the requirement.
The completed Client Alteration screen appears as shown:
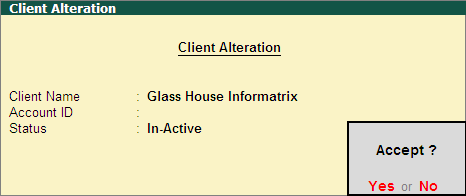
After enabling the feature to enable recruitment on behalf of the client and having created the client. You need to assign the client to a job and publish the job or assign the client to a published job.
To assign the client to a job follow the steps shown:
In the List of Job(s) screen
Click Ctrl+C: Create Job or press Ctrl+C
Or
Select the required job and press Enter
The Job Creation/Alteration screen appears as shown:
Enter the required details as shown in Create Job
Or
Tab down to the Client field.
Select the required client from the List of Clients.
The completed Job Creation/Alteration screen appears as shown:
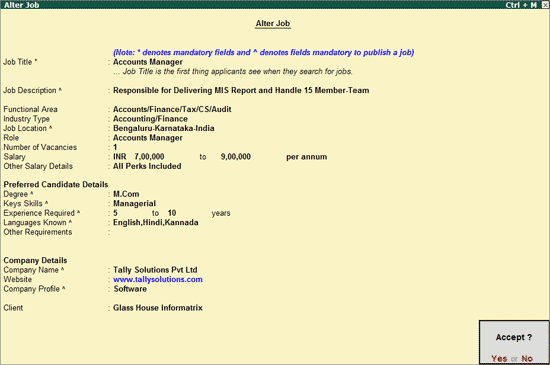
In the List of Job(s) screen press the following buttons to:
F3: Group by Client arranges the companies based on the client’s name.
To view the List of Job(s) grouped by client:
From the List of Job(s) screen:
Click F3:Group by Client or press F3
The List of Job(s) grouped by client appears as shown:
