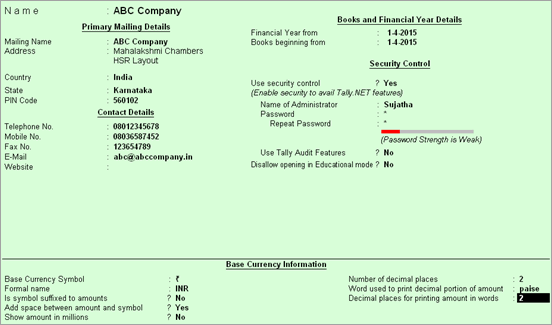
Creating a company in Tally.ERP9 is a one time activity. However, information about the company created is modifiable at any given point of time.
To create a company in Tally.ERP 9
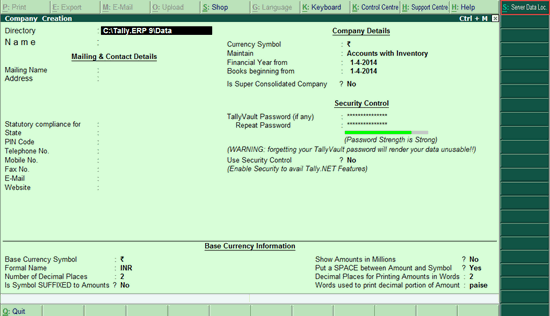
Go to Gateway of Tally > Create Company
Press Backspace to modify the data path in the Directory field, by default.
Enter details pertaining to your company.
The Company Creation screen appears as shown below:

The Company Creation screen consists of the following:
Primary Mailing and Contact Details
Books and Financial Year Details
Click S: Server Data Loc.

Note: If the administrator has enabled security access, users need to provide authorised Tally.NET credentials in order to access the server list.
Select the required location from the List of Tally.Server Data Locations.

Press Enter to continue with company creation.
Click here to know about connectivity and compatibility in Tally.Server 9 environment.
To alter details of an existing company
Go to Gateway of Tally.
Select ALT+F3: Cmp Info. from the right button bar.
Select Alter, and press Enter.
Select the company from the List of Companies.
Press Enter to view the Company Alteration screen.
Make necessary changes in the required fields.
Press Enter to save.
If security control is set to yes, then
Enter the name of the administrator.
Enter the new password.
Re-enter the password in the Repeat field, to confirm.
Enter the old password.
Press Enter to save.
To delete a company
Load the company to be deleted.
Go to Gateway of Tally > click F3: Cmp Info.
Select Alter, and press Enter.
Select the company to be deleted.
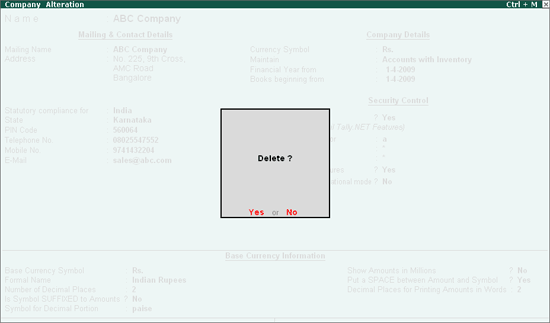
In the Company Alteration screen, Press Alt + D to delete.
A confirmation message appears as shown below:

Press Enter to delete the company.
Note: Deletion of a company is irreversible. The company is permanently deleted from the system.
Go to Gateway of Tally > click F1: Shut Company.
Select company from the List of Primary Companies.
Press Enter to shut the company.