Bank ledgers have to be created under the group Bank Accounts/Bank OCC Account/Bank OD Account. Configurations for cheque register, cheque printing, bank reconciliation have to be made in the ledger master.
To create a bank ledger
Go to Gateway of Tally > Accounts Info. > Ledgers > Create.
Enter the Name of the bank for the bank ledger.
In the field Under, select the bank account from the List of Groups displayed.
The Books Beginning date is pre-filled in Effective Date for Reconciliation field.
Enable the option Set/Alter Bank Details to Yes to change bank details.
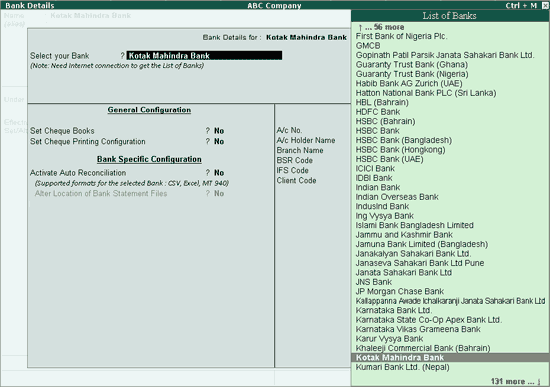
The Bank Details screen appears as shown below:

To change bank details
In the Select your Bank? field, choose Kotak Mahindra from the List of Banks displayed
Note: The List of Banks get displayed only when there is active Tally.NET subscription and internet connectivity.
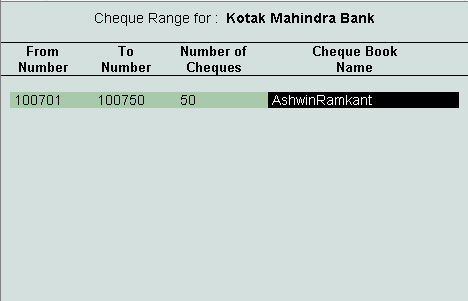
Set the option Set Cheque Books to Yes. The configure Cheque Book Management screen appears. Enter details of the Cheque Range as shown below:
Enable the option Set Cheque Printing Configuration? to configure Cheque Printing
Note: In case where the cheque printing feature is not enabled in F11: Accounting Features the error message - Enable Cheque Printing from F11 Accounting Features will be displayed while setting the option - Set/Alter Cheque Printing Configuration to Yes in the bank ledger master.
Activate Auto Reconciliation: Enable this option to reconcile the bank accounts by importing the bank statements.
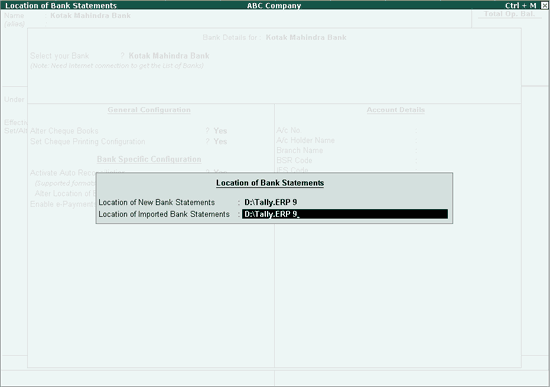
Alter Location of Bank Statement Files: Enabling this option, opens the Location of Bank Statements screen. Specify the path for New Bank Statements and Imported Bank Statements
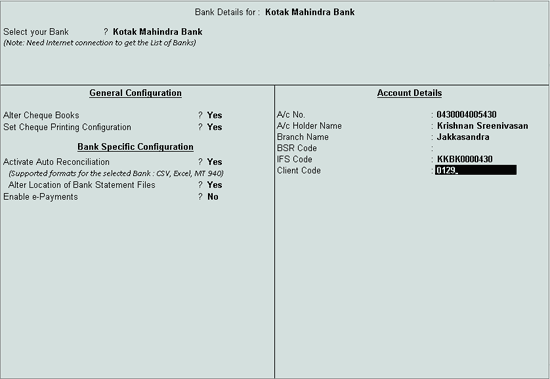
A/c No.: Enter Bank Account Number in this field
A/c Holder Name: Enter the name of the account holder in this field
Branch Name: Enter the bank branch name in this field
BSR Code: Enter BSR Code of the branch in this field. Basic Statistical Returns (BSR) code is a 7 digit number allotted by Reserve Bank of India (RBI) to a bank branch
IFS Code: Enter the IFSC code of the branch in this field. Indian Financial System Code (IFS Code), is a 11 character code assigned by the Reserve Bank of India (RBI) to a bank branch
Client Code: Enter the code assigned to you by the Bank.
The completed Bank Details screen is as shown below:
Press Enter to go to the Ledger Creation screen
Enter Name, Address, State and Pin Code in the Mailing Details section
Note: To display the Mailing details section in the Bank Ledger Creation screen, enable the option Use ADDRESSES for Ledger Accounts by pressing F12 key or by clicking the F12: Configure button.
The completed Bank Ledger Creation is displayed as shown below:
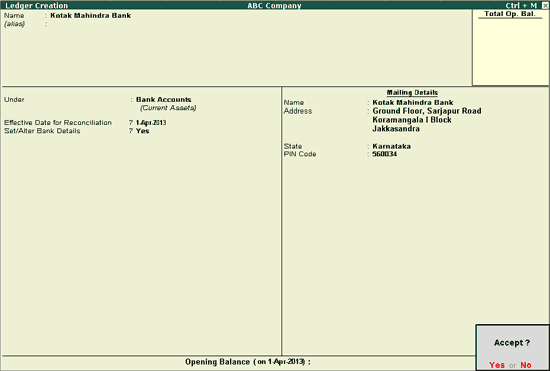
Press Enter or Y to accept
Note: The button B: Set Cheque Books in the Ledger Alteration screen can be clicked to open the Cheque Book Management screen
The button S: Set Cheque Printing in the Voucher Alteration screen can be clicked to open the Cheque Format Selection screen