When a manufacturer removes goods from the manufacturing unit to the buyer's warehouse for the purpose of exporting, the same can be recorded in Tally.ERP 9 using the Nature of Removal Exports.
In such cases, the exporter needs to apply for registration of the warehouse under Rule 9. The exporter has to submit ARE-3 for the removal, and the Central Excise Officer will issue Form CT-2 for removing the consignment.
Example: On 7-4-2013, ABC Company removed 500 nos. of Jute Bags to the warehouse of Karthik Exports. The same needs to be recorded in their books.
Go to Gateway of Tally > Accounting Vouchers > F8: Sales
In Voucher Type sub form select Excise – Sales as the voucher type
Ensure that the Sales Voucher is in Item Invoice Mode
Enter the Date as 7-4-2013
Enter reference number, if any, in the Ref field
The Excise Unit field will be pre-filled with the Excise Unit selected while creating the Excise Sales voucher
Excise Book Name field displays the name of the excise invoice book created for the Excise Unit
Serial No. field displays the Rule 11 invoice number
In Party A/c Name field select Karthik Exports from the List of Ledger Accounts
Enter the required details In Party Details sub-screen
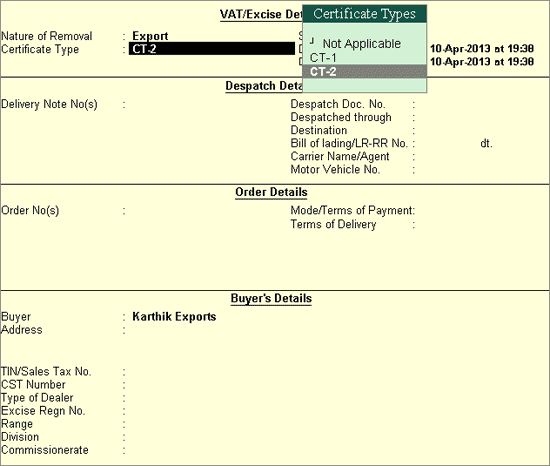
Set Nature of Removal to Export
Select Certificate Type as CT-2

Fill in other field under VAT/Excise Details as is necessary
Under Despatch Details, select the Tracking Number for the relevant Delivery Note, if any. Fill in other details as is necessary
Under Order Details, Select the relevant Order Number. The Certificate Number, if entered while raising the Sales Order, will be captured here. Fill the other details as required
Accept the screen
The option Nature of Removal in the Voucher Creation screen will be set to Export
In Notification Number field enter the notification under which the goods are exported. If the Notification number is specified while creating the party ledger application will capture the details from party ledger
In Sales Ledger field select the sales ledger Sales - Export from the List of Ledger Accounts
In Name of Item field select the Stock Item i.e. Jute Bags
In the Quantity field enter the number of units being exported. That is, 500 nos.
In Rate field enter the rate as Rs. 16. Amount will be calculated automatically
Enable Set/Alter ARE Details. Enter the details as required in the Form ARE Details sub-screen:
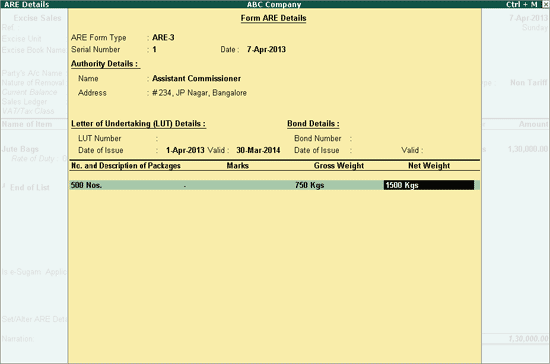
Enable the option Show Statutory Details, if you want to view the duty details
Press Enter to accept the screen and return to Voucher Creation screen
The completed entry appears as shown:
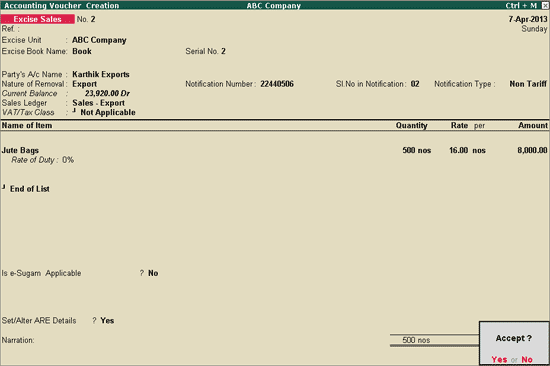
To print Rule 11 Invoice,
In the Voucher Printing screen, set Print ARE-3 to No.
The print preview will appear as shown:
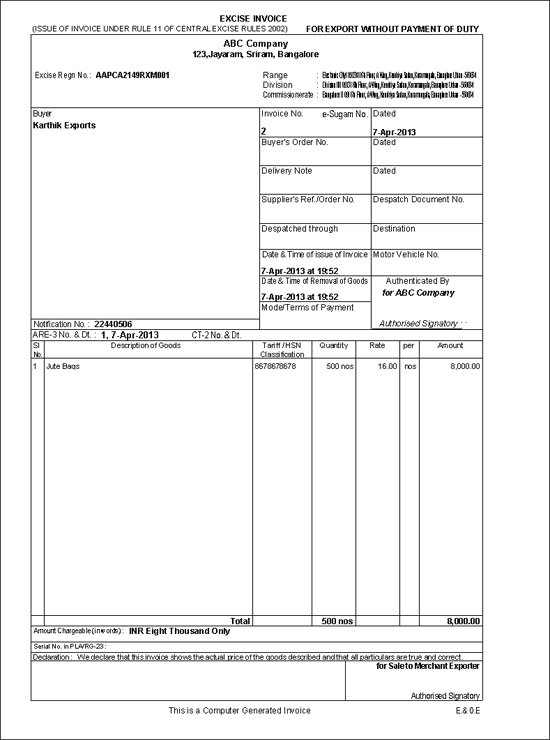
Note: The ARE-3 number and CT-2 number and date of issue of the CT-2 will be captured in Rule 11 invoice.
From the Voucher Alteration screen, press Alt+P
The Voucher Printing screen appears:
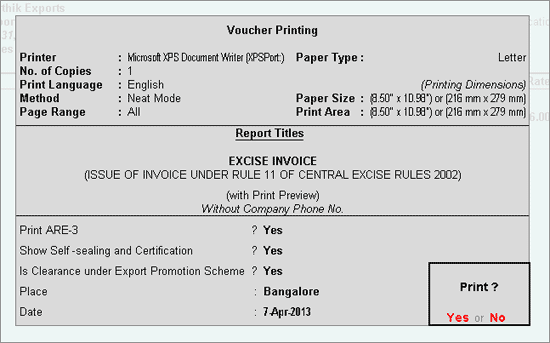
Set Print ARE-3 to Yes
Enable the other options if required
Fill in the place and date of generating ARE-3
Note: (i) If the goods are dispatched under ‘Self Sealing and Certification’, then the same needs to be certified accordingly. Hence the need to enable the option Show Self-sealing and Certification. Otherwise this option is set to No
(ii) Incase if the manufacturer would like to mark the ARE-1 with the details as ‘Export under EPCG / Advance License’ scheme then the option Is Clearance under Export Promotion Scheme has to be set to Yes
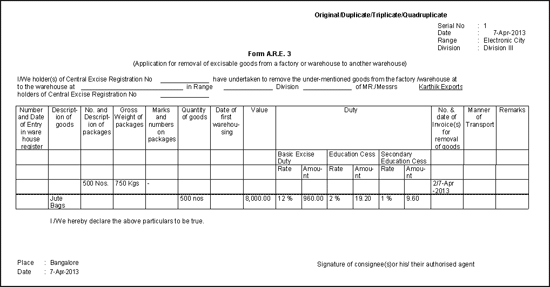
Form A.R.E. 3 will be printed as shown:
