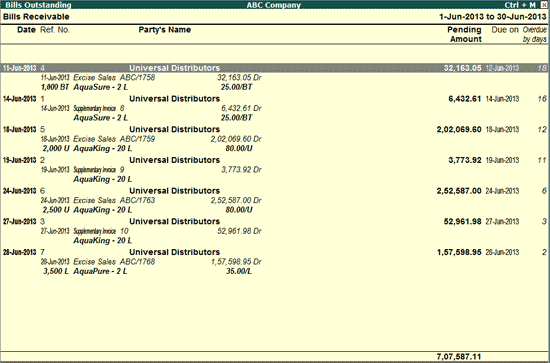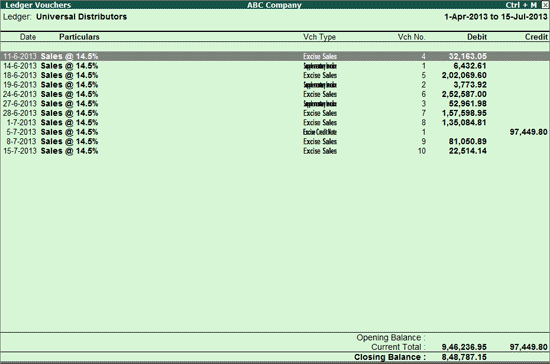
The facility to display and print excise book name and invoice number entered in the Excise Book Name and Serial No. fields of Excise Sales Invoice and Excise Debit Note is provided in the following reports:
Ledger Vouchers report generated for Excise Sales Invoice and Debit Note
Confirmation of Accounts
Columnar Register of Ledger Vouchers report generated for Excise Sales Invoice and Debit Note
CST Forms Receivable
CST Forms Issuable
Sales Register
Debit Note Register
Outstanding Statements
To print excise invoice number in Ledger Voucher report,
Go to Gateway of Tally > Display > Account Books > Ledger > select the required ledger.
The Ledger Vouchers report will be displayed.

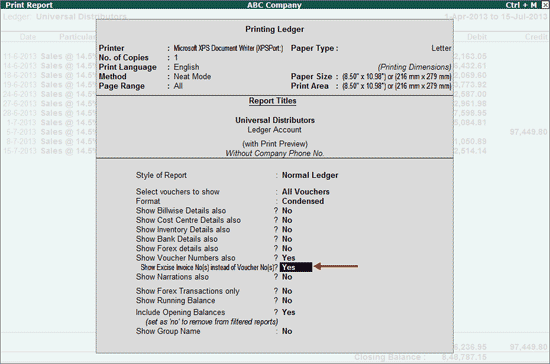
Click P: Print button. In the Print Report screen, set the Style of Report as Normal Ledger. The options Show Voucher Numbers also and Show Excise Invoice No(s) instead of Voucher No(s) will be set to Yes by default. Retain the settings of this option to print the excise invoice number in the printout.
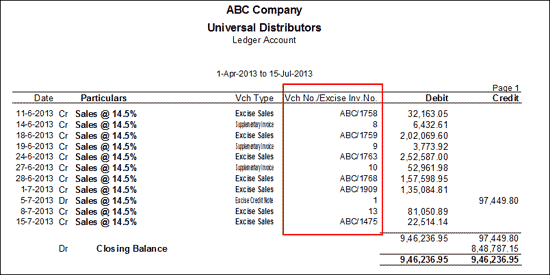
The printout of Ledger Vouchers report with Excise Invoice number appears as shown:
To print excise invoice number and book name in Confirmation Accounts,
Go to Gateway of Tally > Display > Account Books > Ledger > select the required ledger
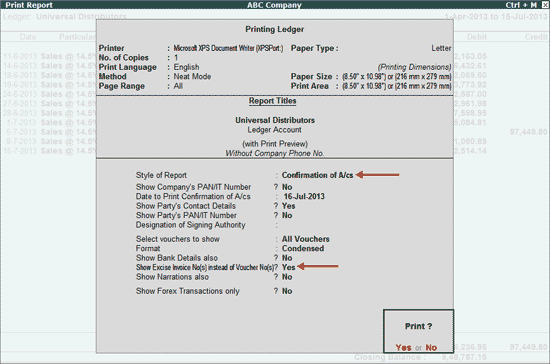
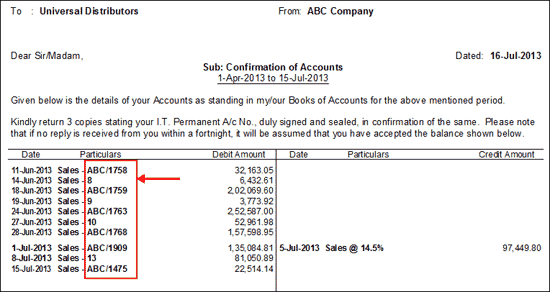
The Ledger Vouchers report will be displayed. Click P: Print button. In the Print Report screen, set the Style of Report as Confirmation of A/cs. The option Show Excise Invoice No(s) instead of Voucher No(s) will be displayed and set to Yes by default. Retain the settings of this option to print the excise invoice number in the report.
The printout of Confirmation of Accounts report with Excise Invoice number appears as shown:
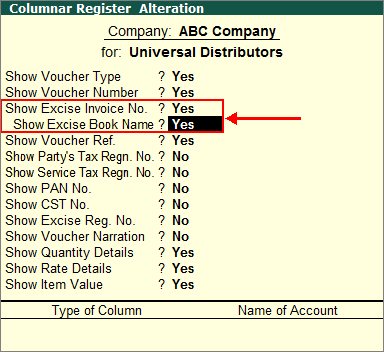
In the Ledger Vouchers report, click Alt+F8: Columnar button. In the Columnar Register Alteration screen, set the options - Show Excise Invoice No. and Show Excise Book Name to Yes.
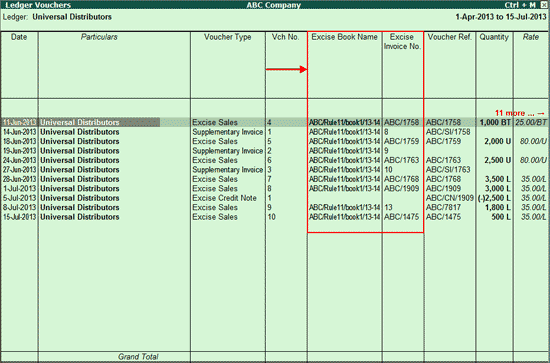
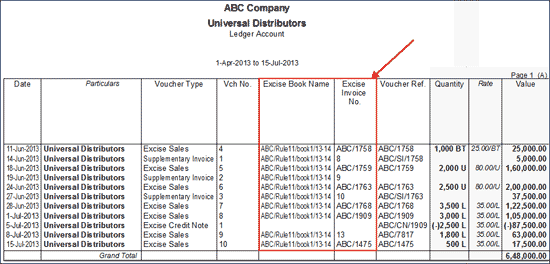
Accept the Columnar Register Alteration screen. The Ledger Vouchers report with Excise Book Name and Excise Invoice No. appears as shown:
Click Alt+P: Print button to print the report. In the Print Report screen, set the Style of Report to Normal Ledger and accept the settings. The printout appears as shown:
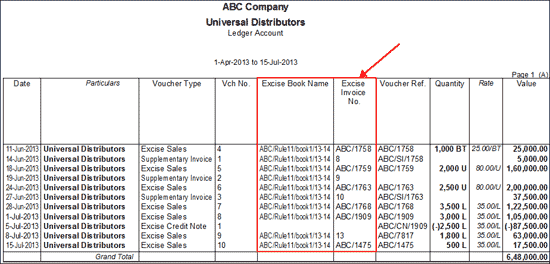
Click Alt+P: Print button to print the report. In the Print Report screen, set the Style of Report to Confirmation of A/cs and accept the settings. The printout appears as shown:
To generate the CST Forms Receivables report,
Go to Gateway of Tally > Display > Statutory Reports > CST > Forms Receivable > Ledger
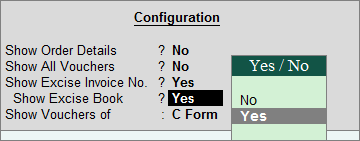
Click F12: Configure and set the options - Show Excise Invoice No. and Show Excise Book to Yes.
Note: On generating the Forms Receivables report for an account group by selecting Group in the Forms Receivable menu, the Excise Book Name and Excise Invoice numbers can be captured in the report by enabling the same options in F12: Configure as provided for Ledger-wise Forms Receivable report.
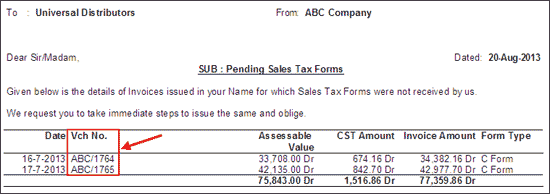
The Forms Receivable report with Excise Book Name and Excise Invoice No. appears as shown:

Click Alt+P: Print button. In the Print Report screen, set the options as shown:
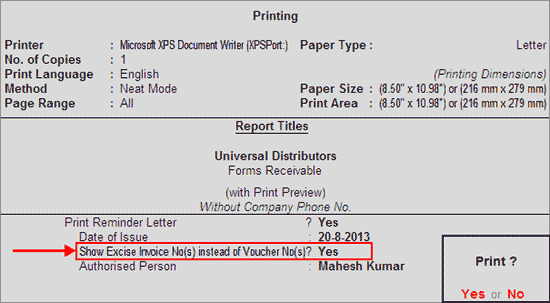
Accept the settings to print the report. The Forms Receivable report appears as shown:
To generate the CST Forms Issuable report,
Go to Gateway of Tally > Display > Statutory Reports > CST > Forms Issuable > Ledger
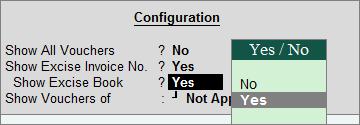
Click F12: Configure and set the options - Show Excise Invoice No. and Show Excise Book to Yes.
Note: On generating the Forms Issuable report for an account group by selecting Group in the Forms Receivable menu, the Excise Book Name and Excise Invoice numbers can be captured in the report by enabling the same options in F12: Configure as provided for Ledger-wise Forms Receivable report.
The Forms Issuable report with Excise Book Name and Excise Invoice No. appears as shown:

To generate the Sales Register,
Go to Gateway of Tally > Display > Account Books > Sales Register > Select the required month and press Enter
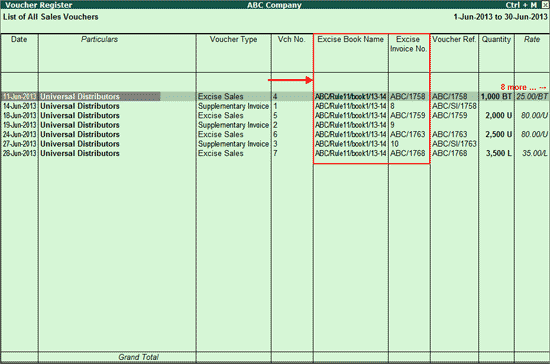
The Voucher Register for the selected month will be displayed. Click F5: Columnar button to view the Columnar Register Alteration screen. Set the options - Show Excise Invoice No. and Show Excise Book Name to Yes, and accept the Columnar Register Alteration screen. The Voucher Register displays as shown:
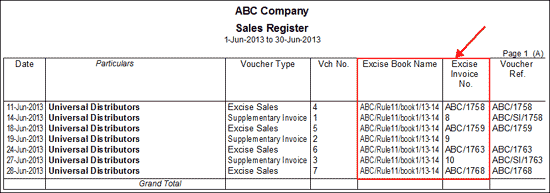
Click Alt+P: Print button and except the settings provided for printing. The Sales Register printout appears as shown:
To view the Debit Note Register,
Go to Gateway of Tally > Display > Account Books > Journal Register > Debit Note Register
Move the cursor to the relevant month and press Enter to view the list of transactions. Click Alt+P: Print button and set the option Show Excise Invoice No(s) instead of Voucher Nos(s) to Yes in the Print Report screen.
The printed Debit Note Register appears as shown:

Note: Similar to Sales Columnar Register report, the Excise Invoice number and book number can be displayed in the Debit Note Columnar report.
To view the outstanding statement of a ledger,
Go to Gateway of Tally > Display > Statement of Accounts > Outstandings > Ledger
Select the required ledger. Click F12: Configure and set the option - Show Excise Invoice No(s) instead of Voucher No(s) to Yes.
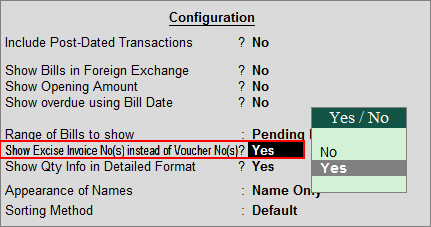
The Ledger Outstandings report with excise invoice numbers appears as shown:
