In Tally.ERP 9, you can export and import the entire data to a newly created company. You have to export the masters first and then the transactions. Ensure that F11: Features of the exporting and the importing company are the same.
Note: The price lists of the old company mentioned in F11 and F2 features can be imported and exported in a similar manner to the new company.
On this page
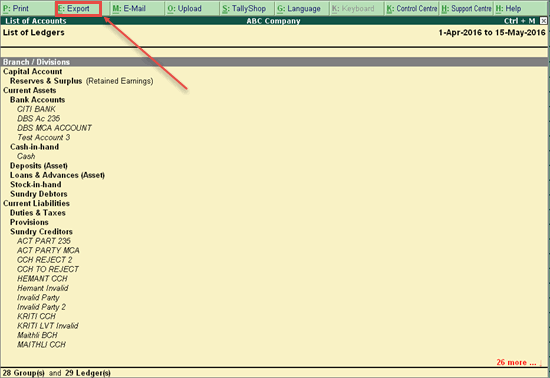
1. Go to Gateway of Tally > Display > List of Accounts .

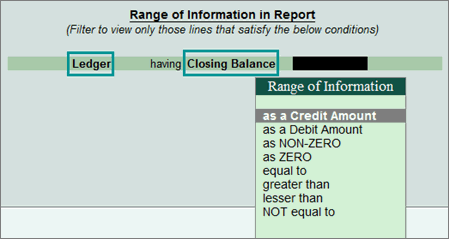
2. Click F12 : Range to select the masters you want to export. Skip this step if you want to export all the masters.
3. Click E : Export in the List of Accounts screen.
4. Select Language as Default (All Languages) from the list displayed.
5. Select Format as XML (Data Interchange) .
6. By default the Export Location is set to C:Tally.ERP9 or provide an export location of your choice.
7. By default the Output Filename is set to Master.XML or provide a filename of your choice.
8. Select All Masters in Type of Masters .
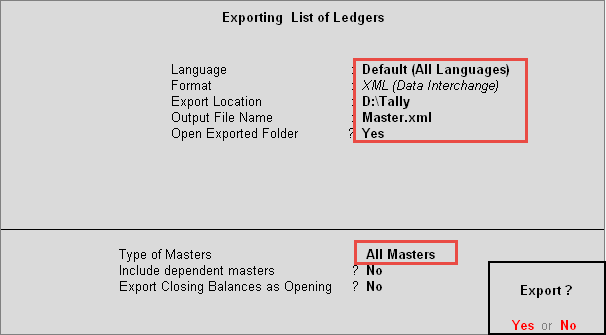
9. Press Enter .
1. Go to Gateway of Tally > Display > Day Book .
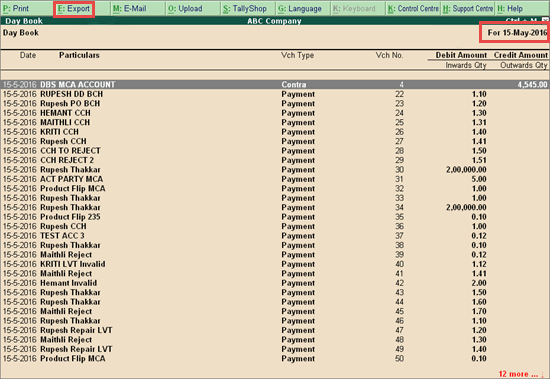
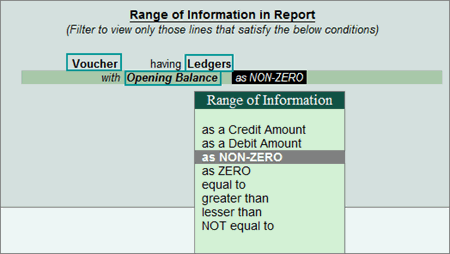
2. Click F12 : Range to select the transactions you want to export. Skip this step if you want to export all the transactions.
3. Click F2 : Period, specify the period, and then click E : Export .
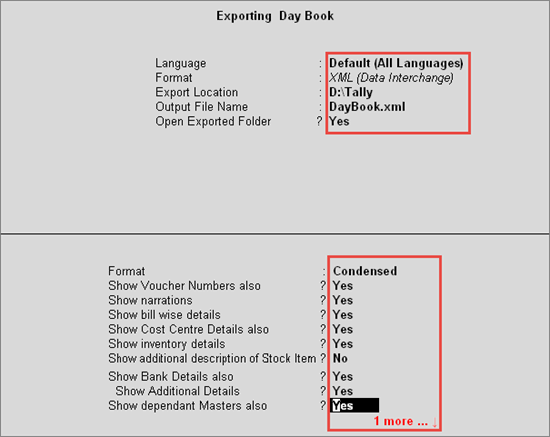
4. Select Language as Default (All Languages) from the list displayed.
5. Select Format as XML (Data Interchange) .
6. By default the Export Location is set to C:Tally.ERP9 or provide an export location of your choice.
7. By default the Output Filename is set to DayBook.XML or provide a filename of your choice.
8. Select the required Format (Condensed or Detailed).
9. Set Show Voucher Numbers to Yes to export voucher numbers.
10. Set Show Narrations also to Yes to export voucher narrations.
11. Set Show Billwise Details also to Yes to export bill wise details.
12. Set Show Cost Centre details also to Yes to export cost centres.
13. Set Show Inventory Details also to Yes to export inventory details.
14. Set Show Bank Details also, Show Dependent Masters and Show Forex Transactions to No .
15. Set Select vouchers to show to All Vouchers export all voucher types.
16. Press Enter , the exported data is stored in the specified path.
1. Select the required company.
2. Go to Gateway of Tally > Import Data > Masters .
3. In Import File Name enter the filename containing the exported masters.
4. In Treatment of Entries Already Existing , select Modify with new data from the list of behaviours displayed.
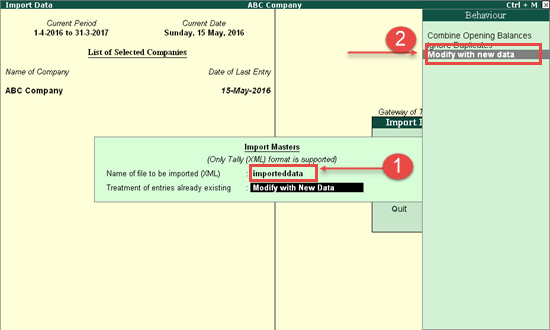
5. Press Enter to import the masters.
● Once the import process is complete, compare the statistics of both importing and exporting company.
o Go to Gateway of Tally > Display > Statement of Accounts > Statistics .
1. Select the required company.
2. Go to Gateway of Tally > Import Data > Vouchers .
3. In Import File Name enter the filename containing the exported vouchers.
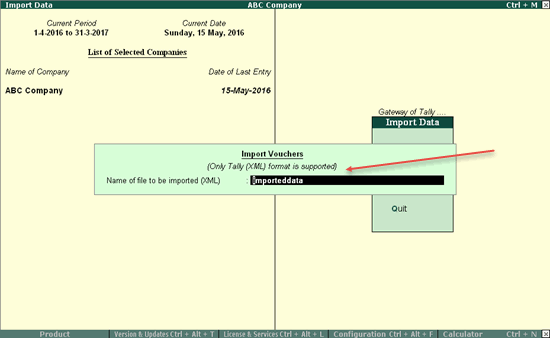
4. Press Enter to import the transactions.
● Once the import process is complete, compare the statistics of both importing and exporting company.
o Go to Gateway of Tally > Display > Statement of Accounts > Statistics .